PagerDuty Integration
Avantra’s integration with PagerDuty allows SAP monitoring alerts to create incidents in PagerDuty automatically. The integration reduces manual work, saving key technical staff time, ensuring a quicker response, and allowing PagerDuty to prioritize and manage the incident.
Avantra metrics sends an event to service in PagerDuty. Events from Avantra will trigger a new incident on the corresponding PagerDuty service or group as alerts into an existing incident. Once the metric has returned to its designated range, Avantra will send an instant event to the PagerDuty service to resolve the alert and associated incident on that service.
| PagerDuty integration requires an Admin base role for account authorization. If you do not have this role, please contact an Admin or Account Owner within your organization to configure the integration. |
Create PagerDuty Integration
Follow the steps below to integrate PagerDuty Events API with Avantra:
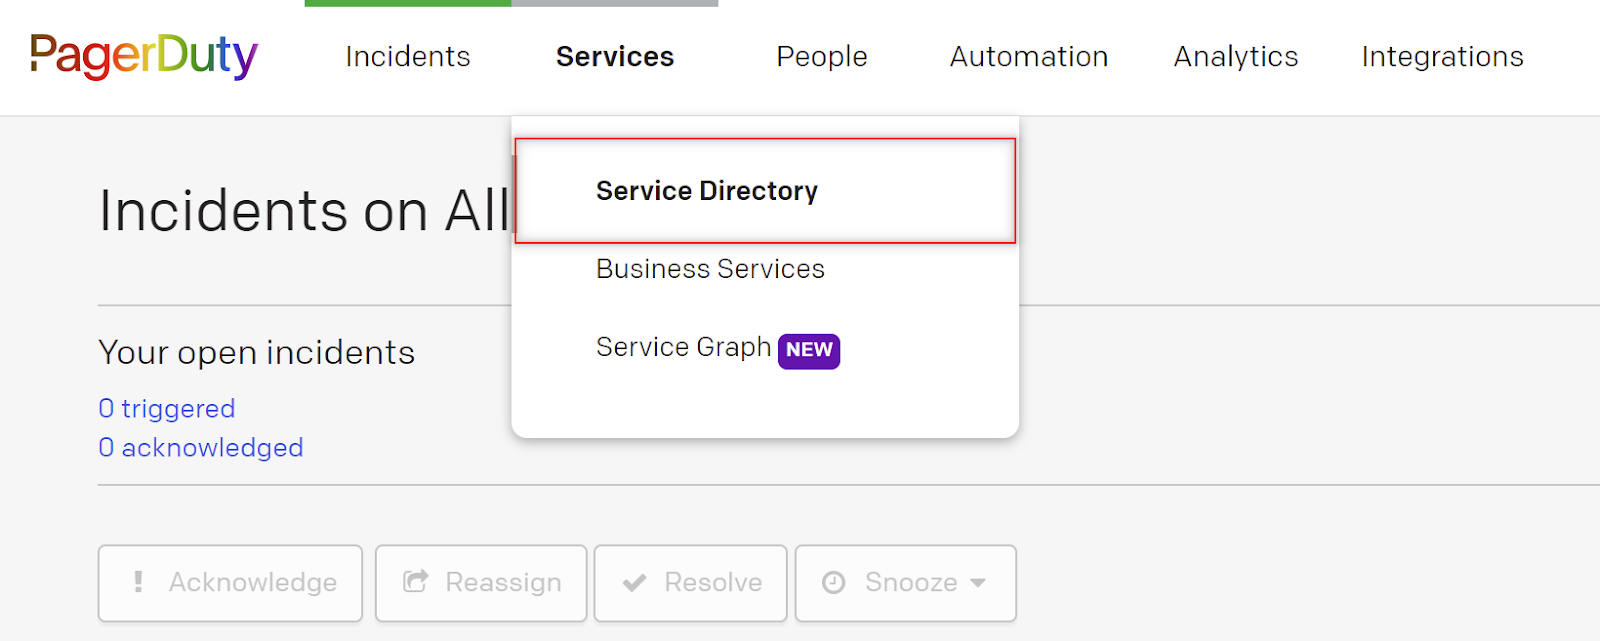
1 In your PagerDuty account, navigate to Services and select Service Directory (framed in red):
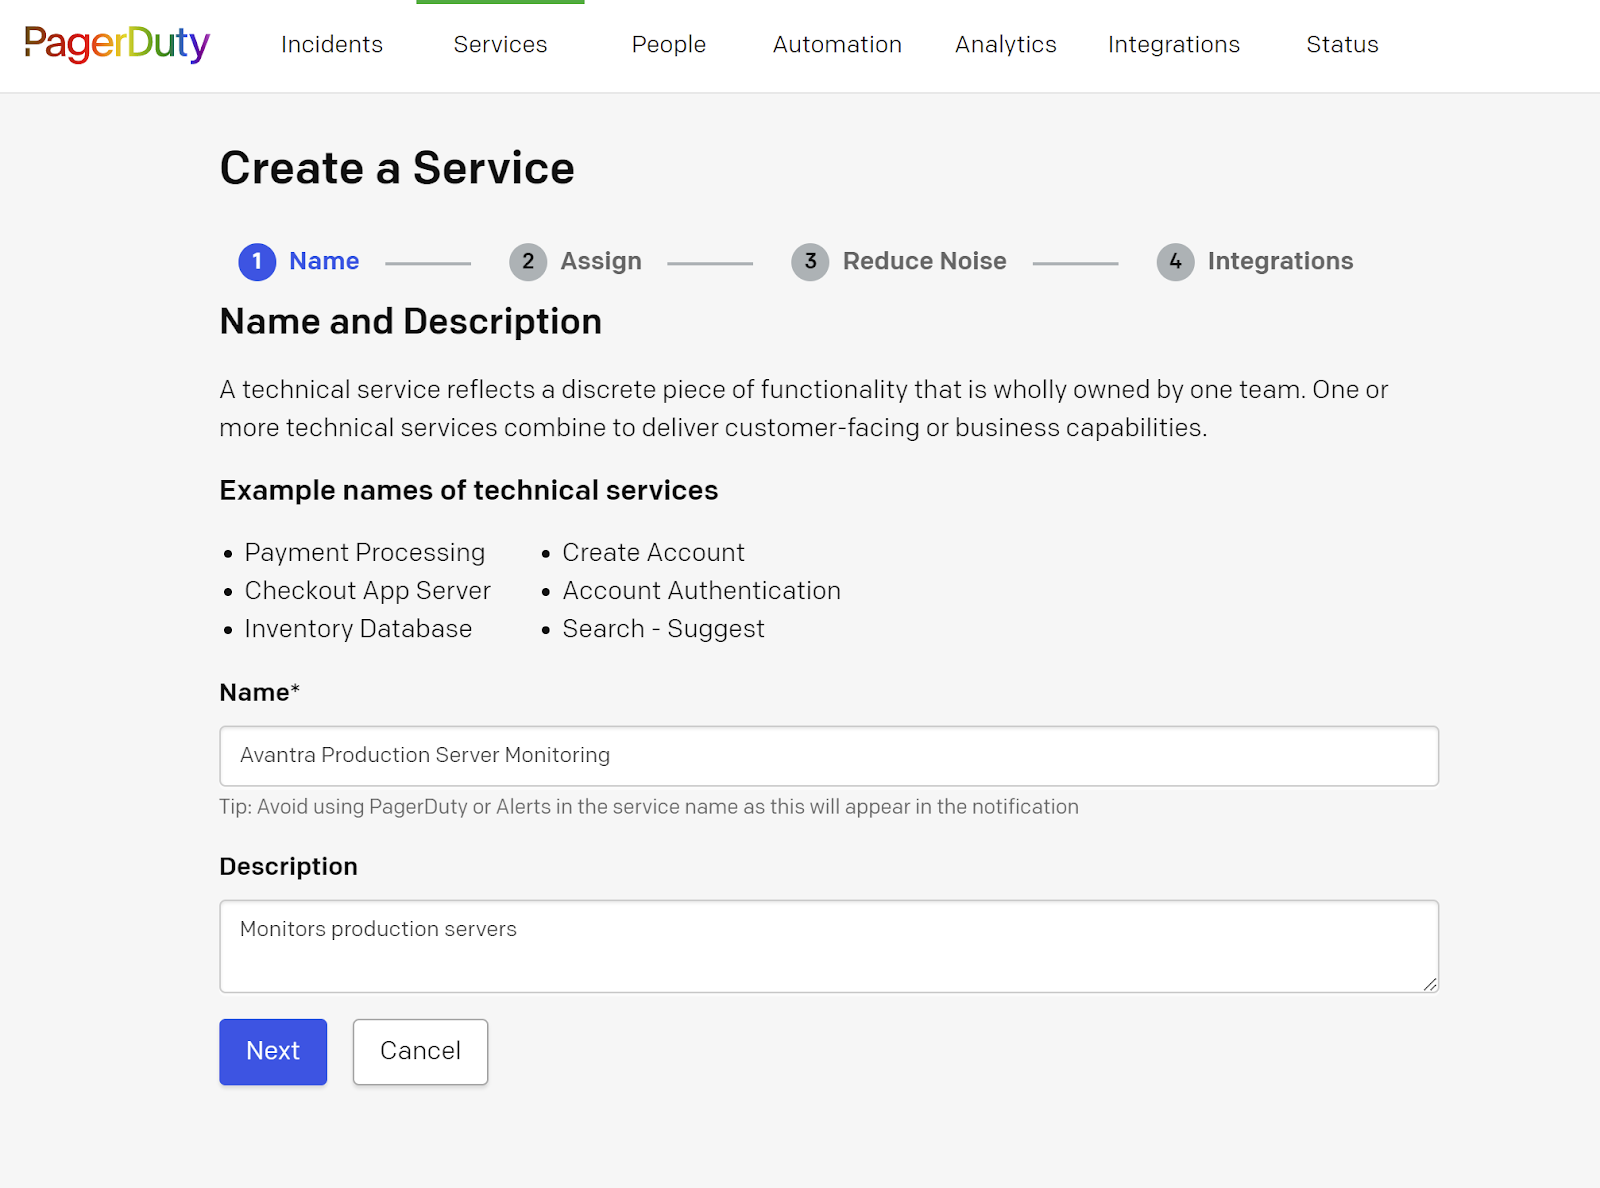
2 To add a new service, click the New Service button, enter the name and short description in General Settings, and click Next.
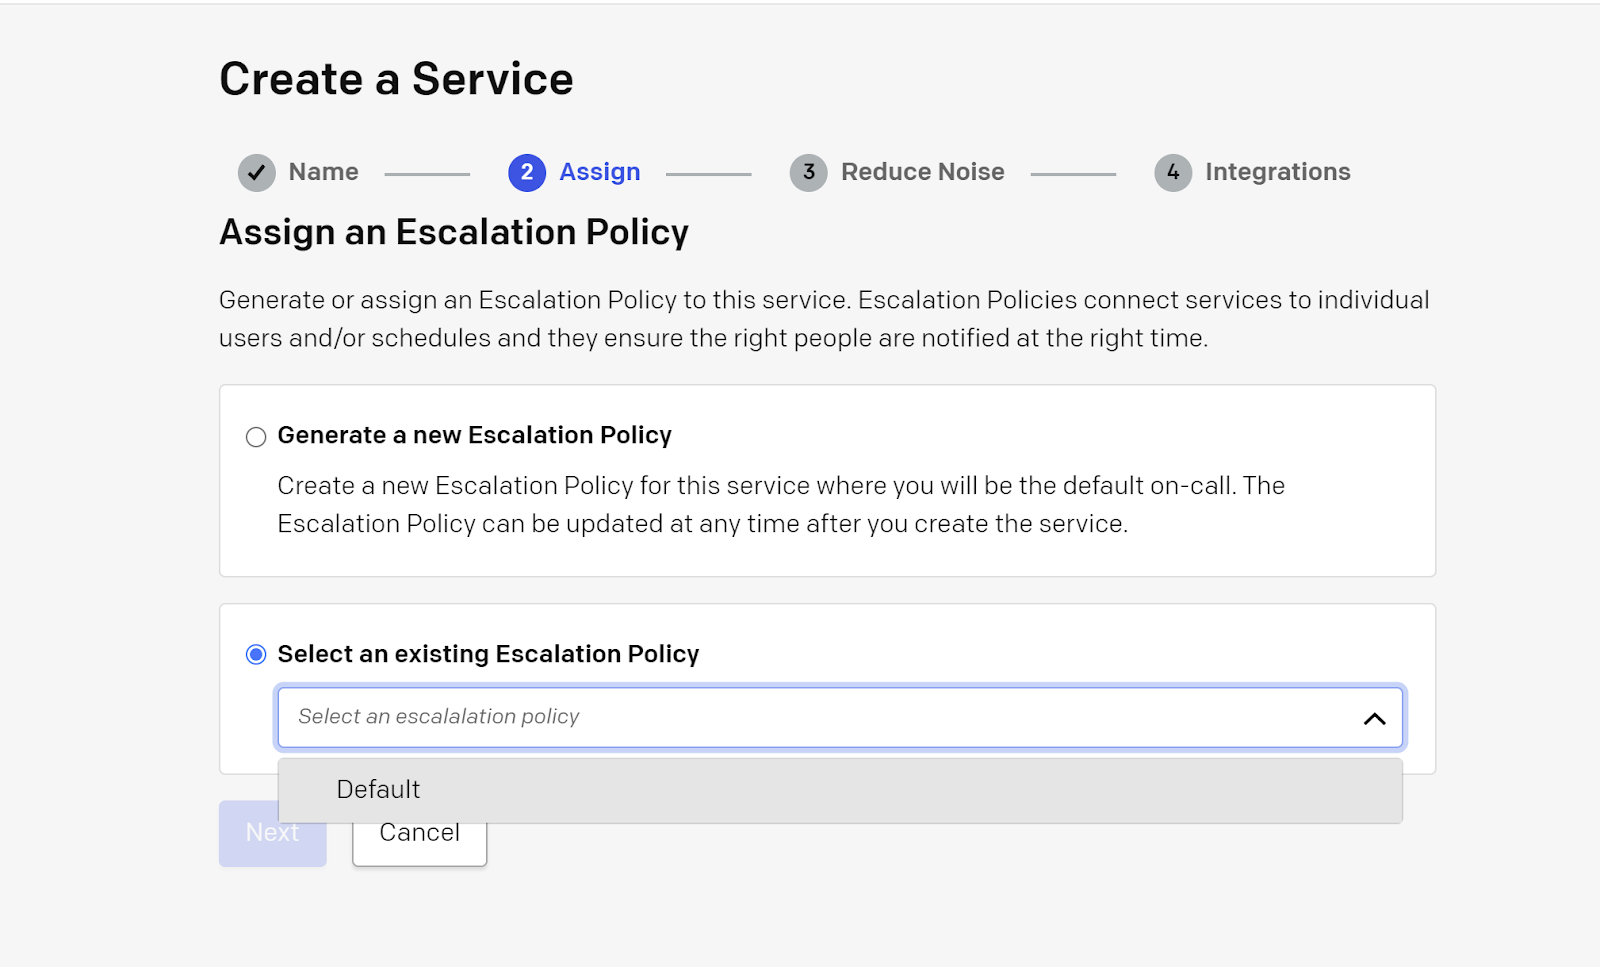
3 Select the Escalation Policy on the next page - generate your own or choose default and click Next.
4 Configure PagerDuty alerts on the next page - Alert Grouping and Transient Alerts. Click Next.
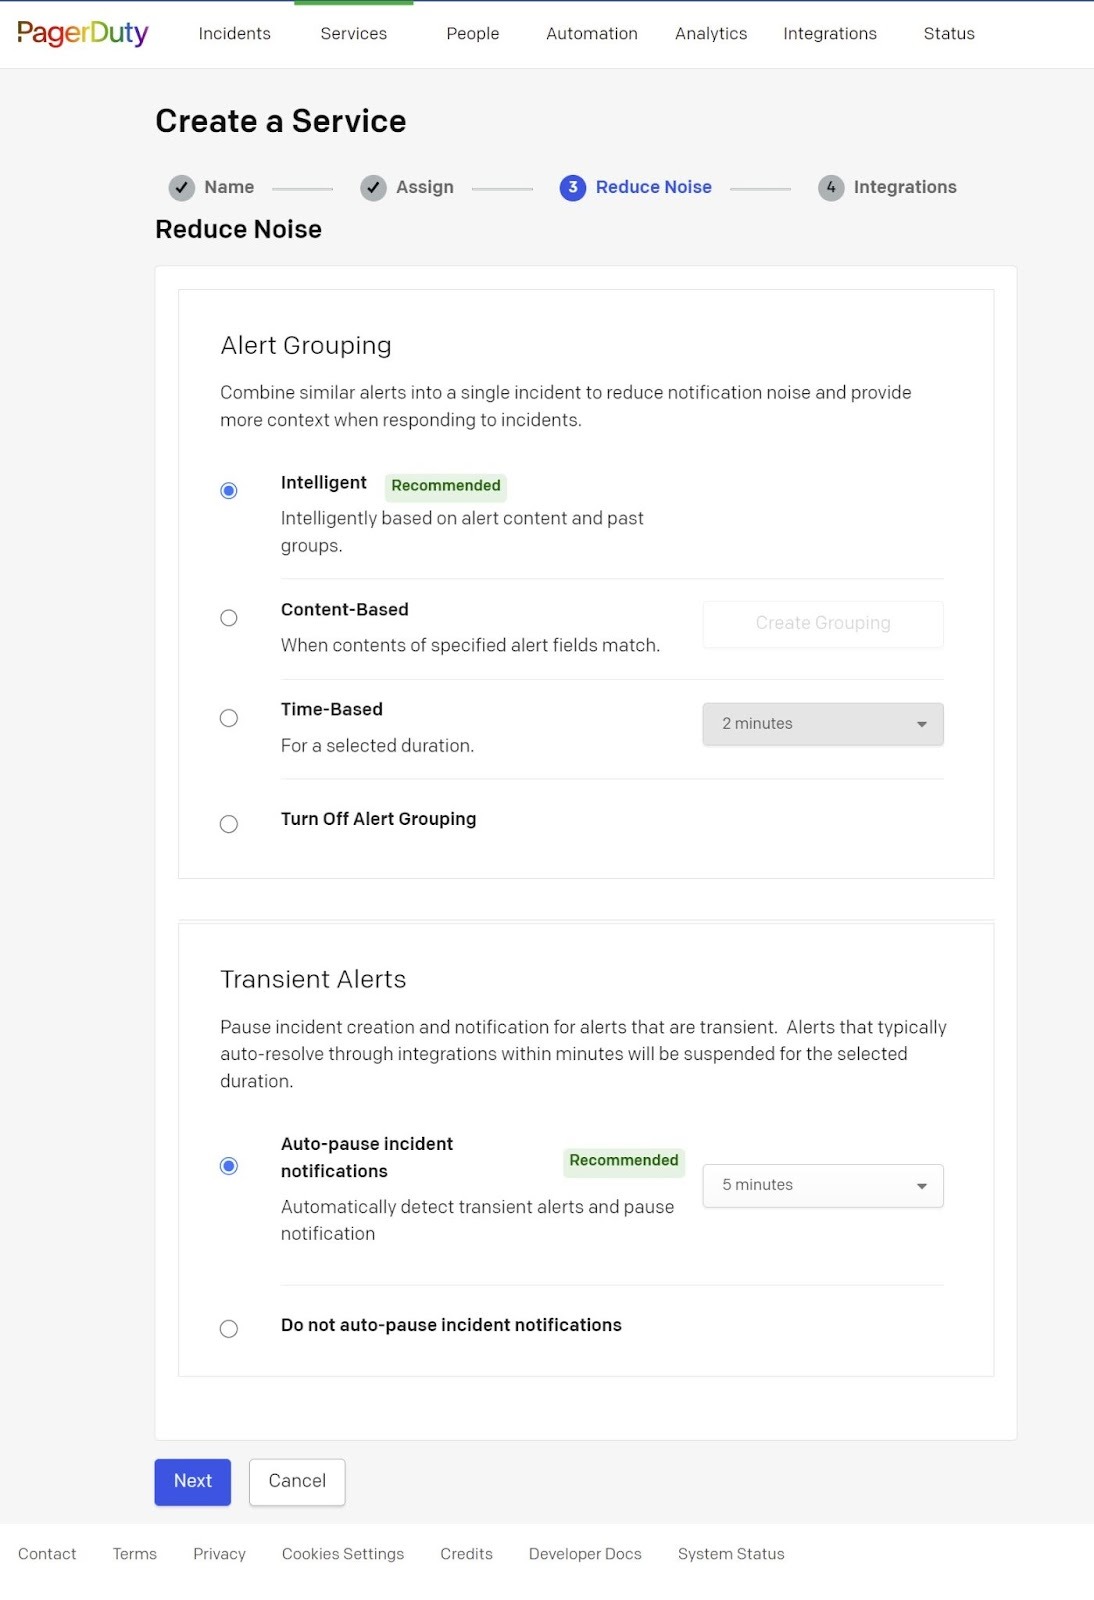
5 On the page Integrations, choose Events API v2 (framed in red) to add to the service or type in the needed integration name in the search tab. You can also choose Create service without an integration (framed in green). Click Create Service to finalize the procedure.
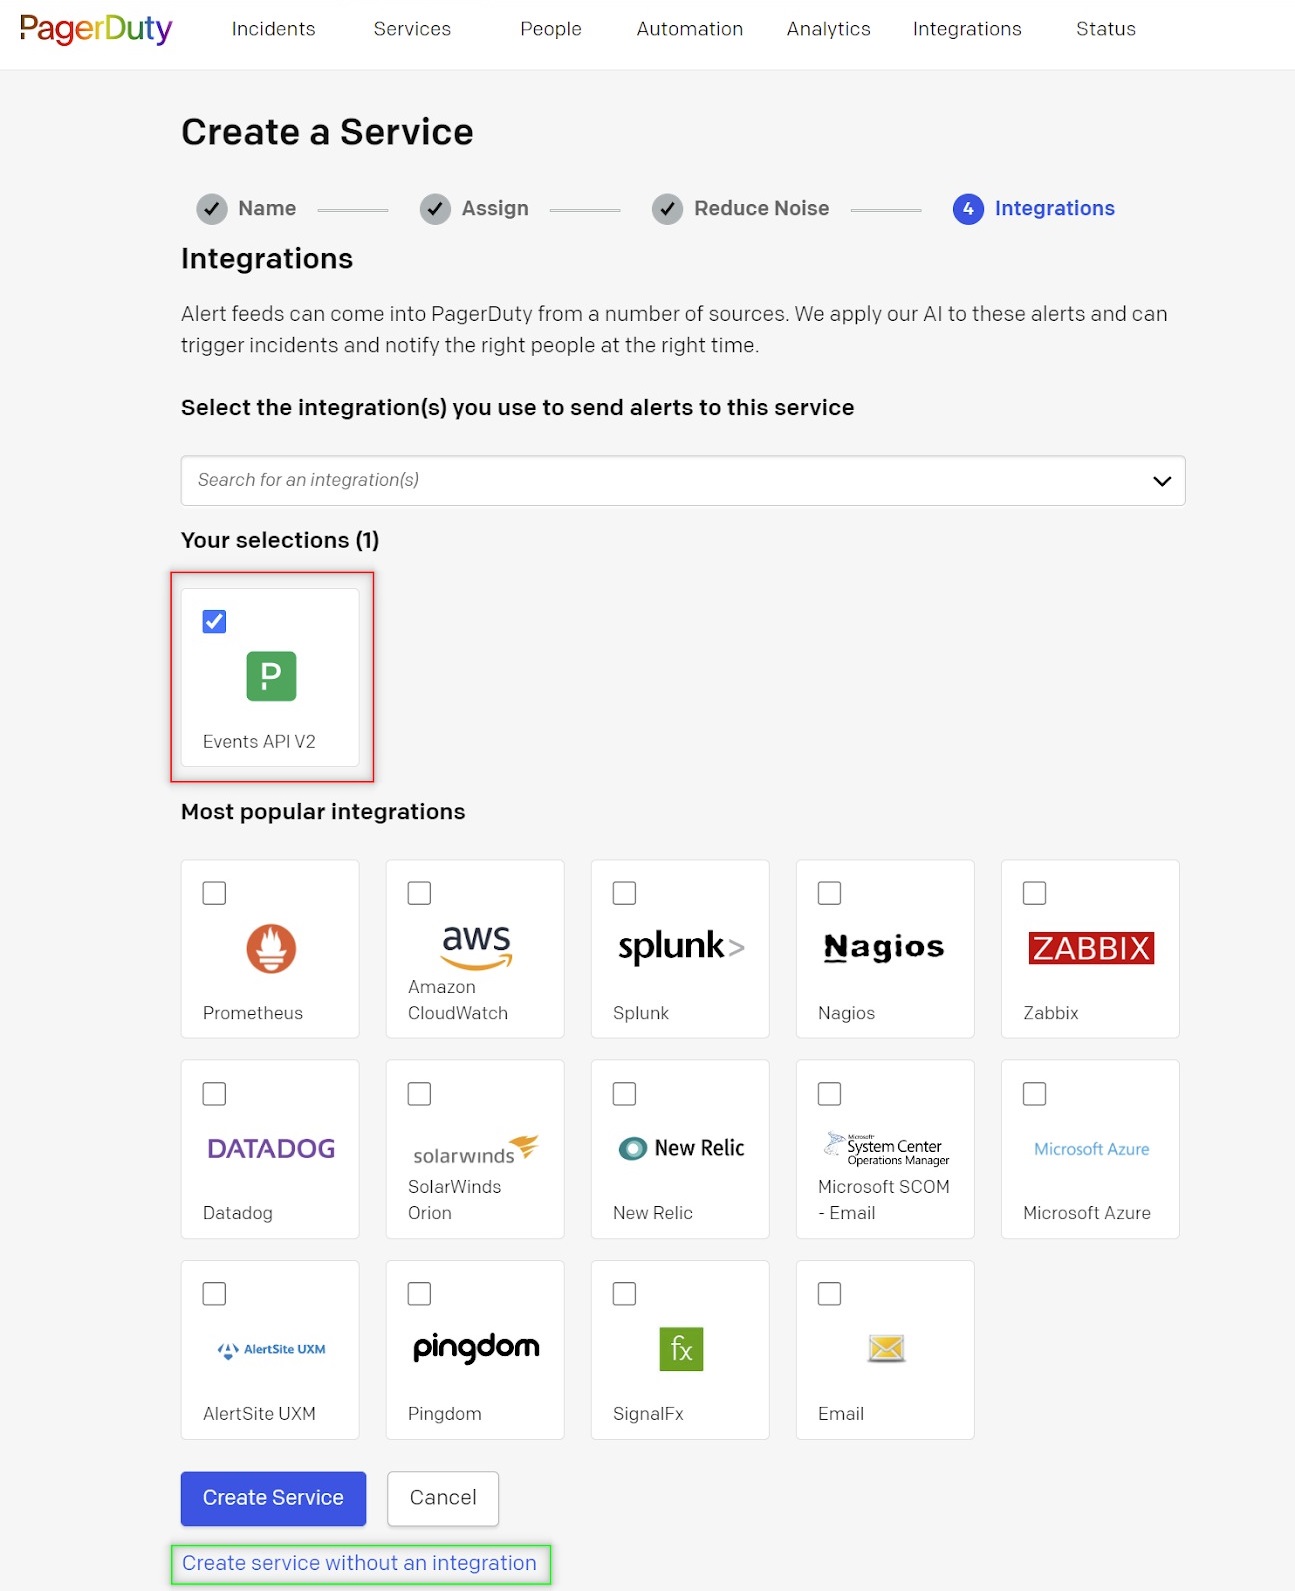
| You can add the integrations needed for your service later. Navigate to the Integrations tab, click Add a new integration button (framed in red), and perform the same action as in the previous screenshot. |
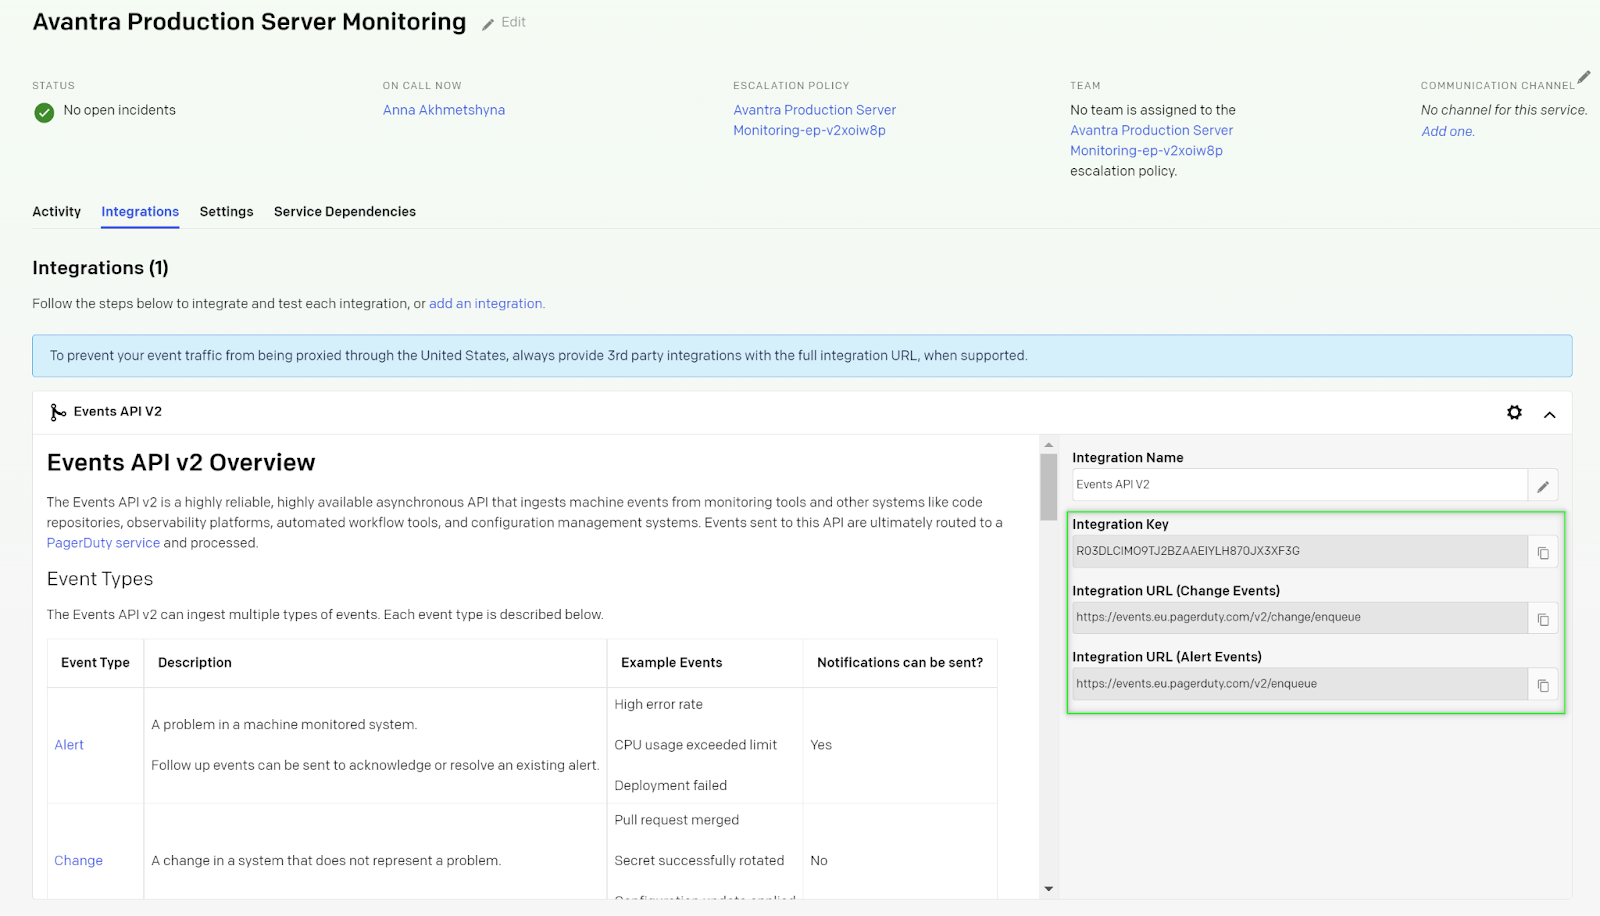
6 On the service page, go to the Integrations tab and click the drop-down menu. The opened page will contain the integration key and URLs for Change events and Alert Events (framed in green).
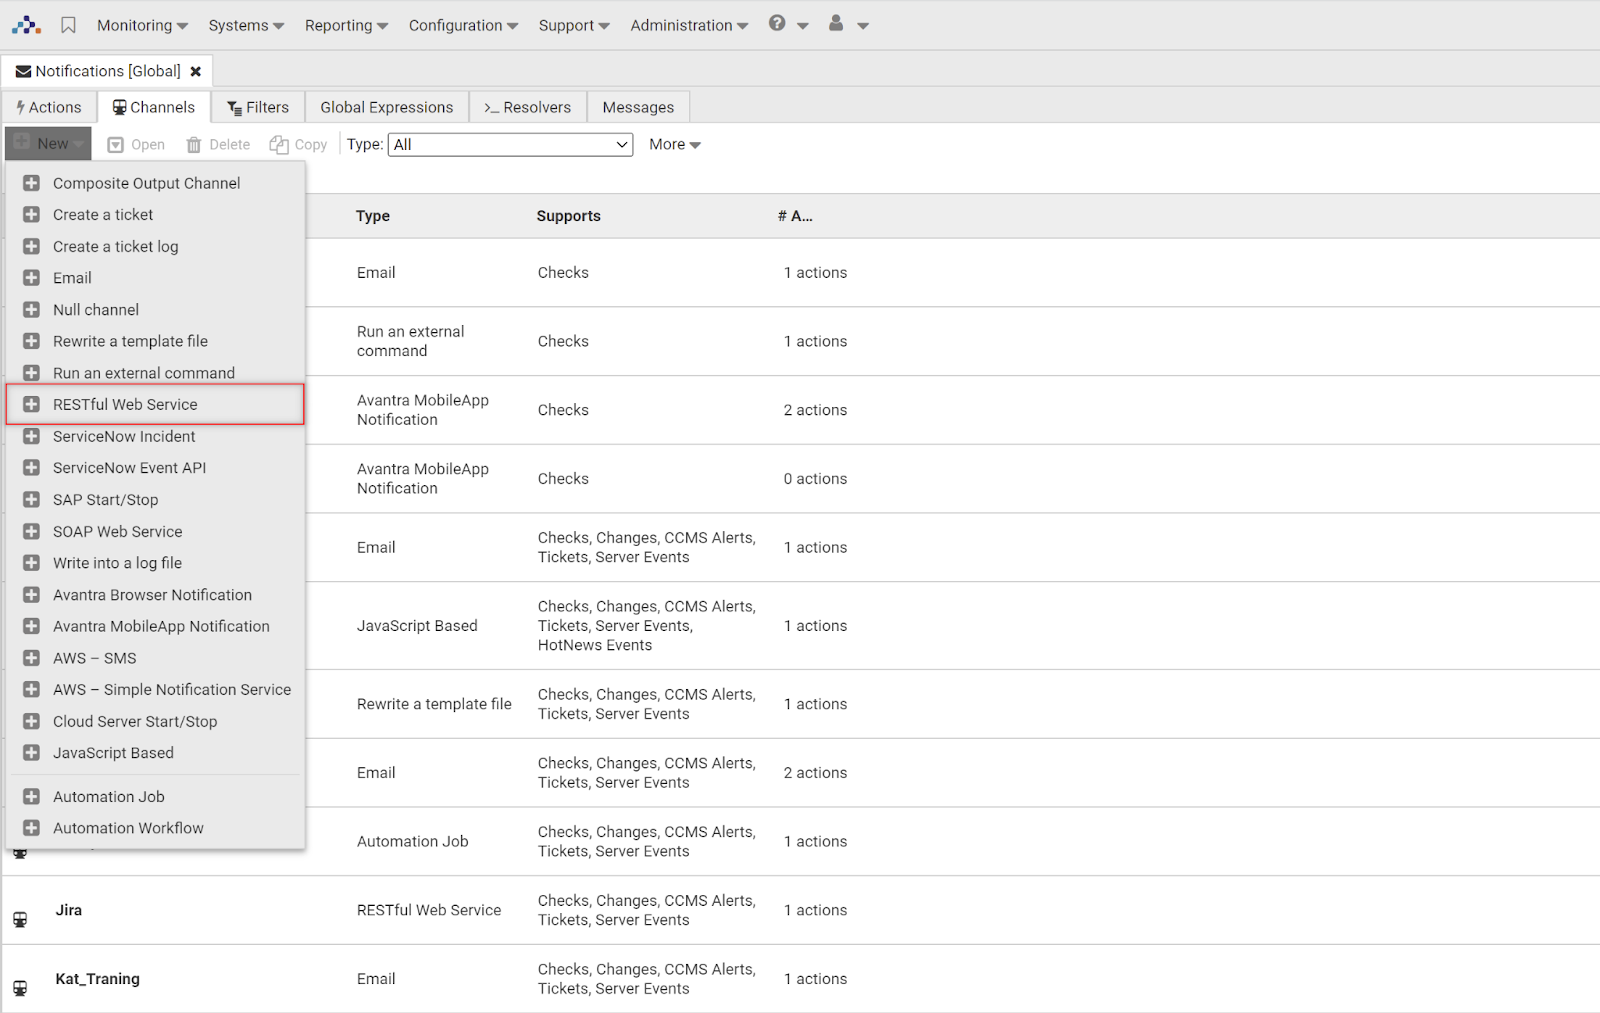
7 To define a REST Output Channel in Avantra UI, navigate to Configuration → Notifications → Notifications [Global] in the top-level menu. Select the Channels tab and choose New → RESTful Web Service in the toolbar (framed in red).
8 In the window that appeared, fill in a Name and Description [optional]. The name of the Output Channel has to be unique.
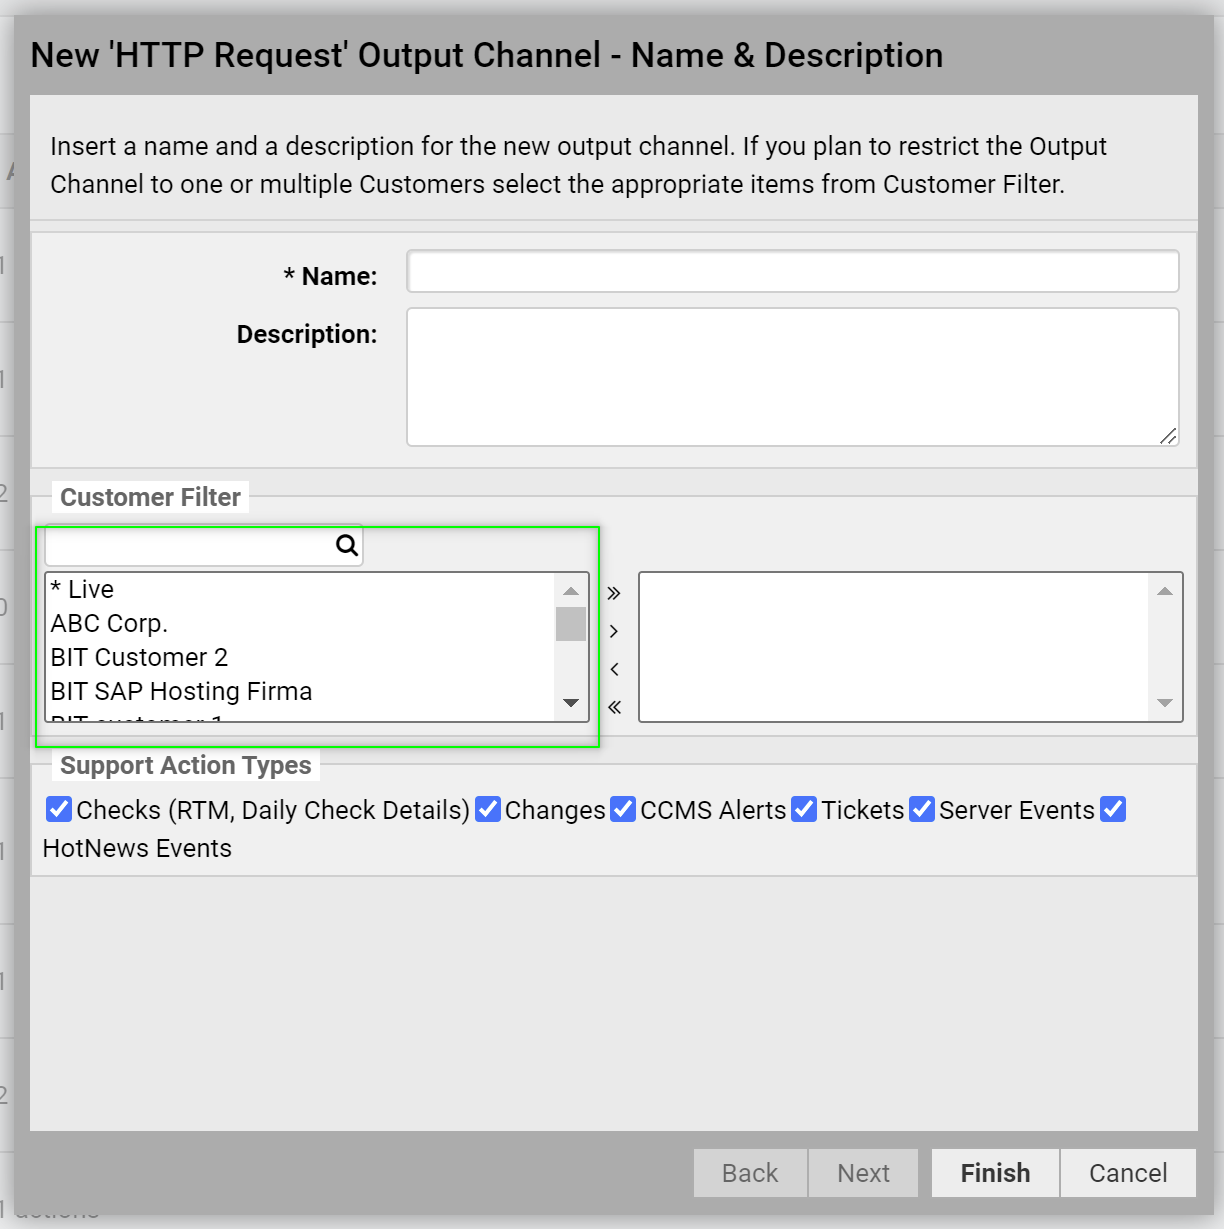
If you plan to restrict the Output Channel to one or multiple Customers, select the appropriate items from Customer Filter (framed in green).
9 Choose one or more of the Supported Action Types and click Finish. The Output Channel detail view is opened automatically in the lower part of the page.
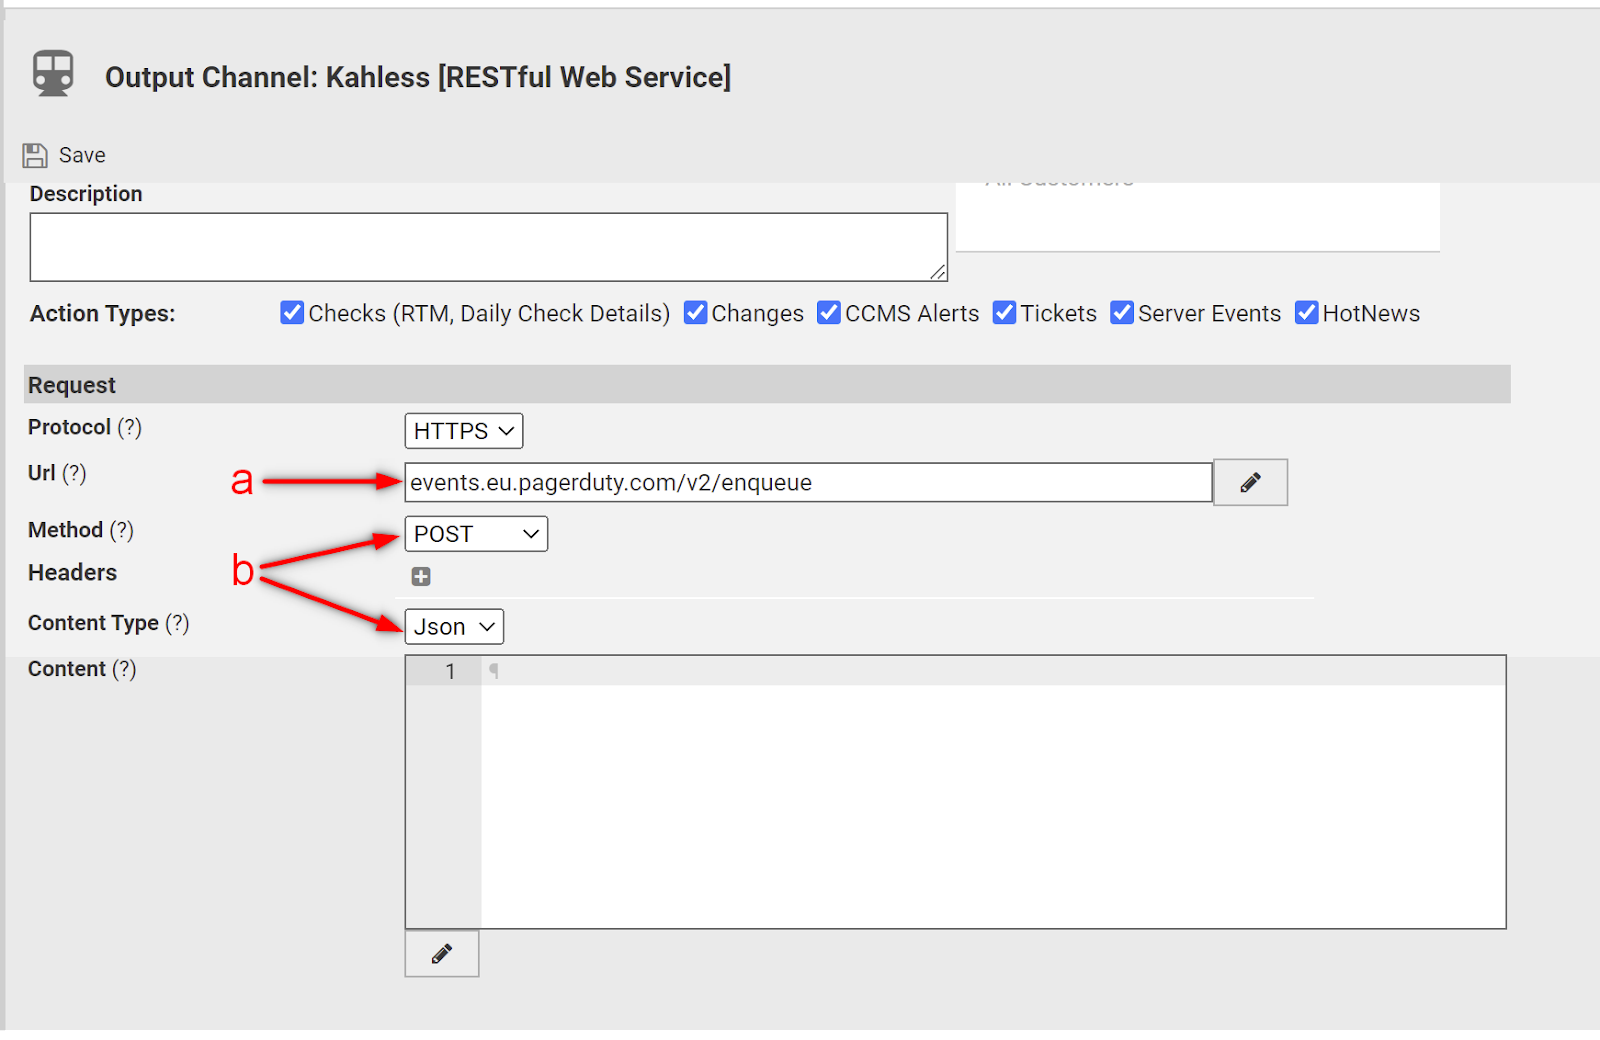
10 Modify the URL field as follows:
-
Add the correct API endpoint to the Url field. These endpoints are valid but may need verification with PagerDuty during your setup procedure.
-
Change the Method to
POSTand set the Content Type asJSON. Click Save once you finish editing.
Use the following parameters below to create a JSON file:
Parameters |
Type |
Description |
|---|---|---|
routing_key |
String |
This is the 32-character integration key for integration on a service or a global ruleset |
event_action |
String |
The type of event. Can be a trigger, acknowledge, or resolve |
dedup_key |
String |
Deduplication key for correlating triggers and resolves. The maximum permitted length of this property is 255 characters |
payload.summary |
String |
A brief text summary of the event used to generate the summaries/titles of any associated alerts. The maximum permitted length of this property is 1024 characters |
payload.source |
String |
The unique location of the affected system, preferably a hostname or FQDN |
payload.severity |
String |
The perceived severity of the event status is described concerning the affected system. This can be critical, error, warning, or info |
payload.timestamp |
Timestamp |
The time at which the emitting tool detected or generated the event |
payload.component |
String |
Component of the source machine that is responsible for the event, for example, MySQL or eth0 |
payload.group |
String |
Logical grouping of components of a service, for example, app-stack |
payload.class |
String |
The class/type of the event |
payload.custom_details |
Object |
Additional details about the event and affected system |
images |
Array of Objects |
List of images to include |
links |
Array of Objects |
List of links to include |
For more detailed information, go to https://developer.pagerduty.com/docs/ZG9jOjExMDI5NTgx-send-an-alert-event#parameters
11 To have more details in the event description, the real check information from Avantra can be added to the description field using the FreeMarker syntax. We recommend adding the following placeholders:
-
${check.name}
-
${system.name}
-
${check.statusString}
-
${check.date}
-
${check.resultSummary}
12 See the whole JSON example below for reference:
{
  "payload": {
    "summary": "The status of check ${check.name} on system ${system.name} turned to ${check.statusString} at ${check.date}. The check returned the following status message: ${check.resultSummary}",
    "source": "System: ${system.name}",
    "severity": "warning"
  },
  "routing_key": "bd1f0b636eb84d13b6dbba5764c63ec4",
  "event_action": "trigger"
}
The value routing key is the Integration Key from the service’s Integrations tab.
13 To configure a Notification Action, select Configuration → Notifications→ Notifications [Global] from the top-level menu.
14 In the Actions tab, choose New in the toolbar and select Action for Checks from the drop-down list.
15 Fill in the field Name and Description (optional). The name of the Notification Action has to be unique. Click Next.
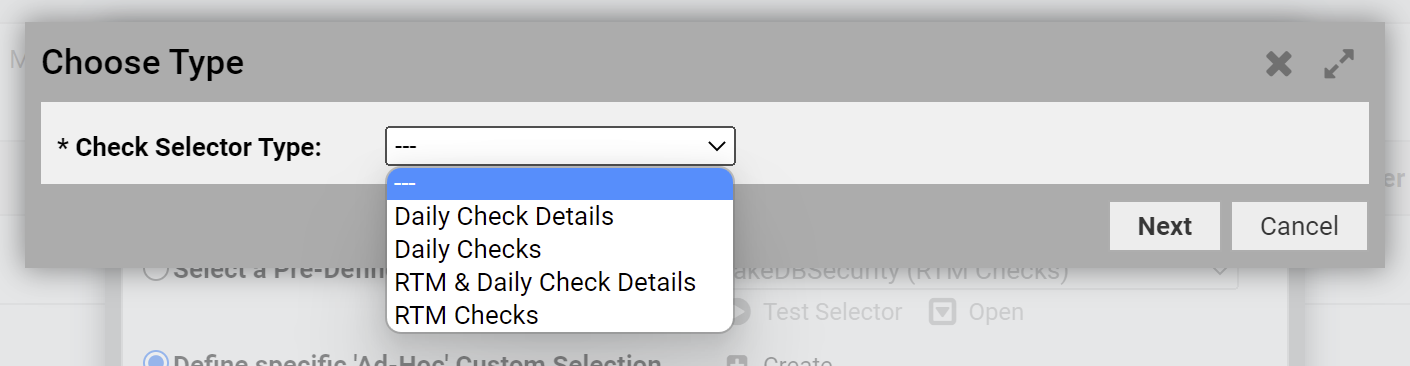
16 Choose either Select a Pre-Defined System Selector or Define a specific 'Ad-Hoc' Custom Selection. In the first case, choose the desired Check Selector from the list. If you choose the Define specific 'Ad-Hoc' Custom Selection, then define a specific ad-hoc custom selection (which is only valid for this particular Notification Action). Click Next.
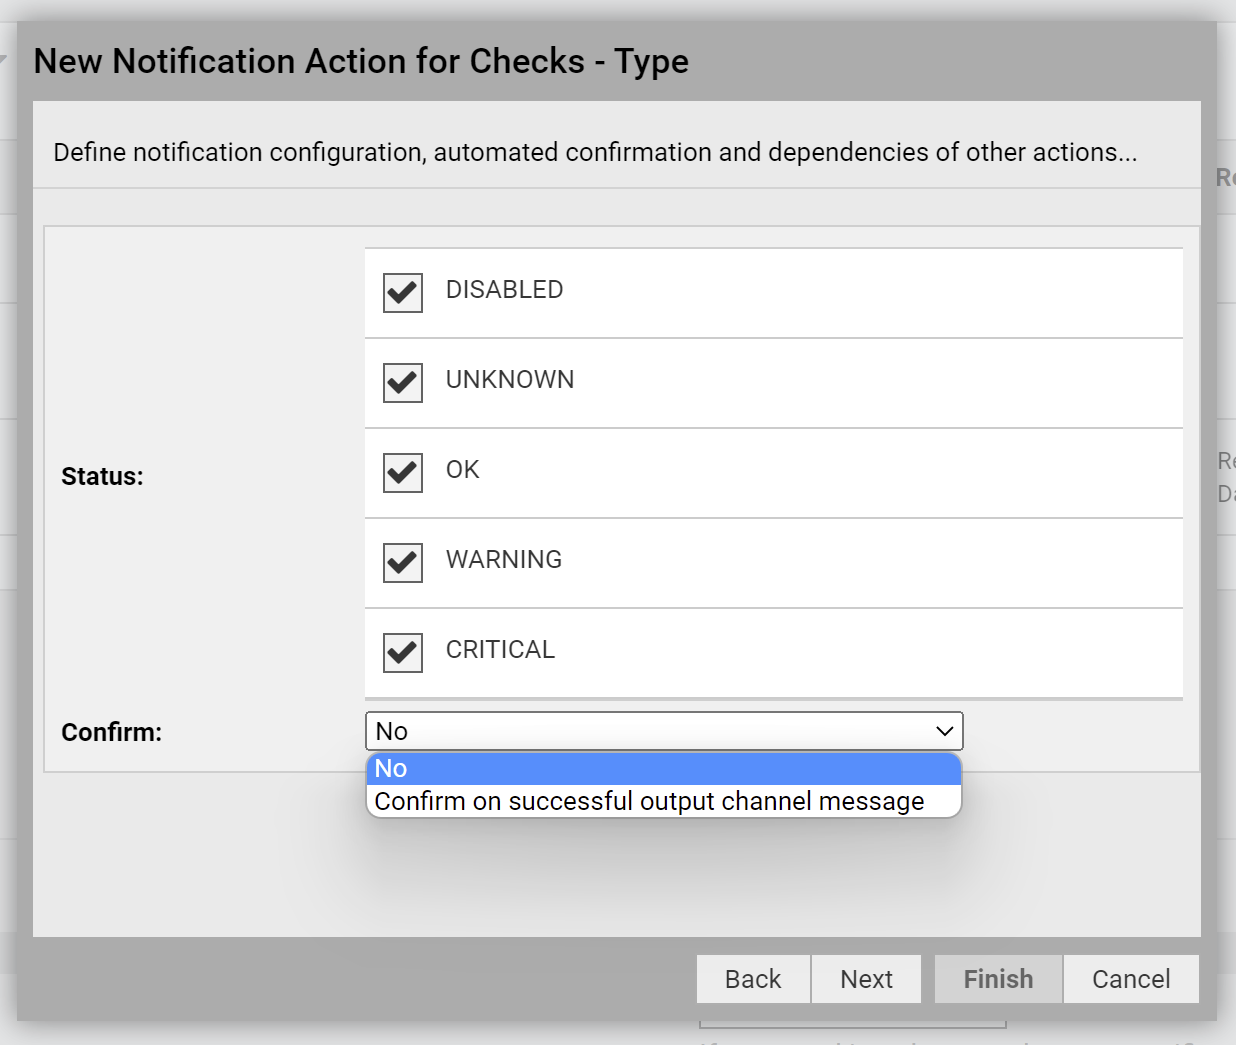
17 Tick the Status checkboxes and Confirm value. Click Next.
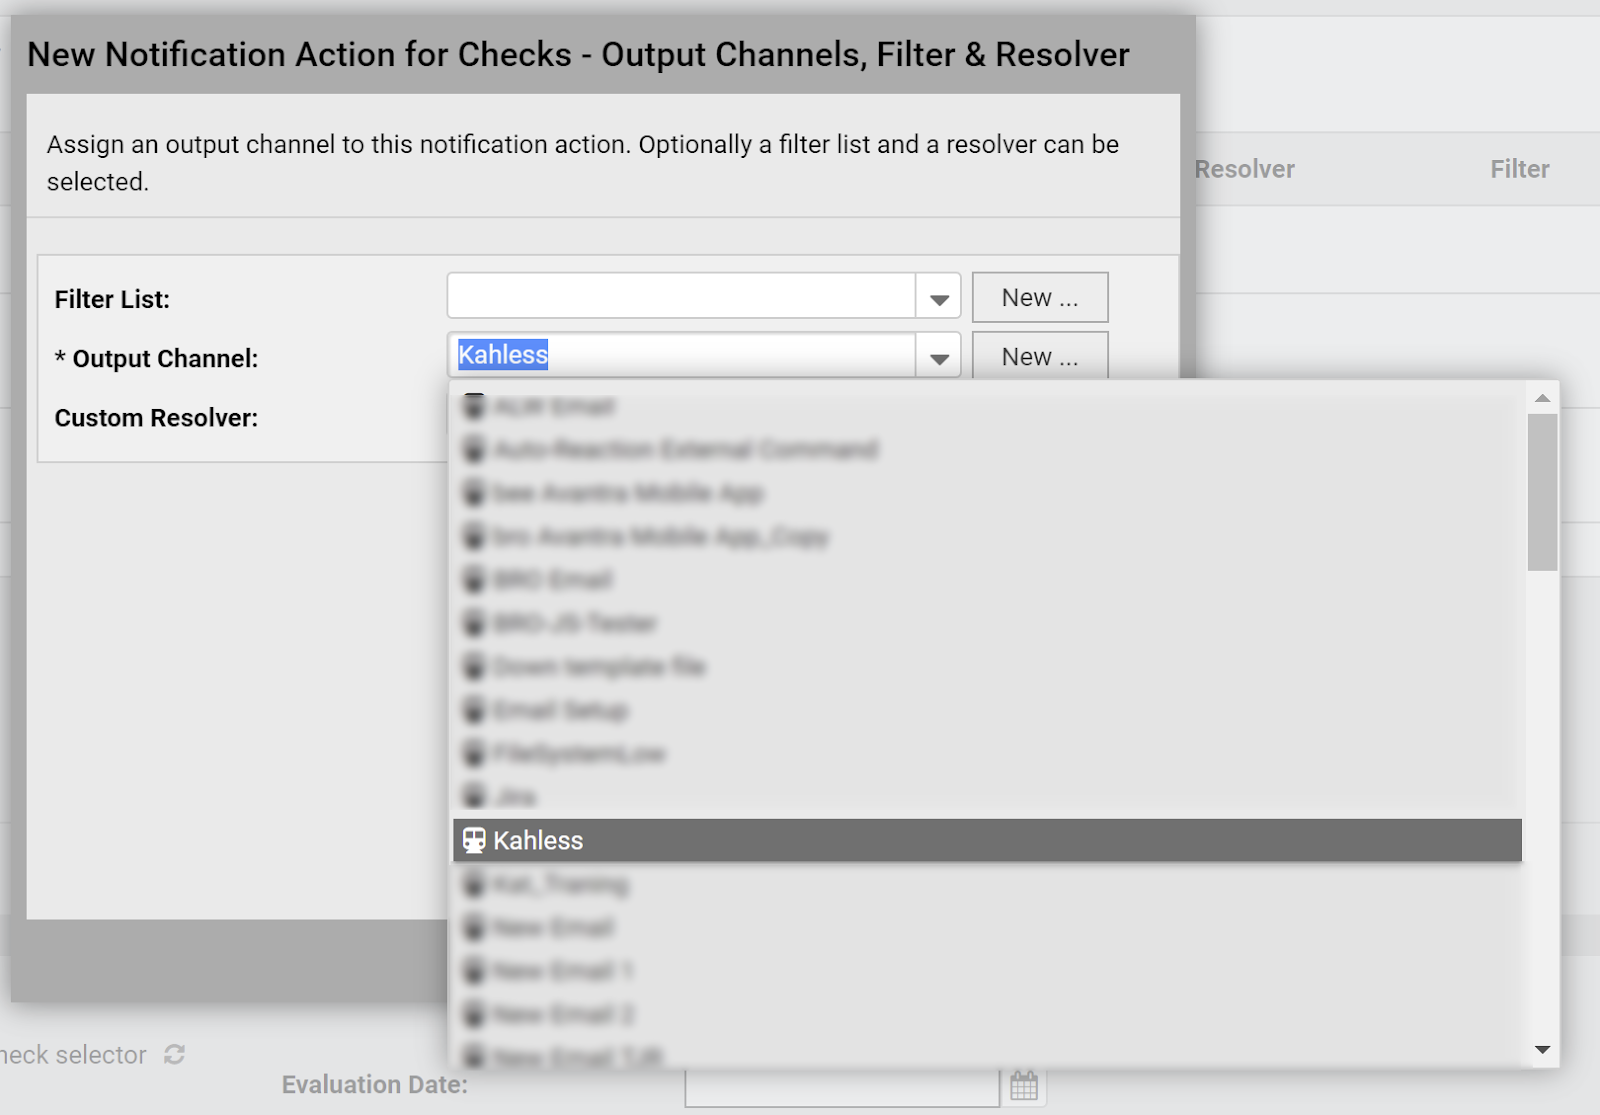
18 Choose the Output Channel created earlier from the drop-down menu and click Finish.
19 To test the configuration, switch to the Test tab. Choose the value for fields Monitored system and Check. Then, click the Test button (framed in red).
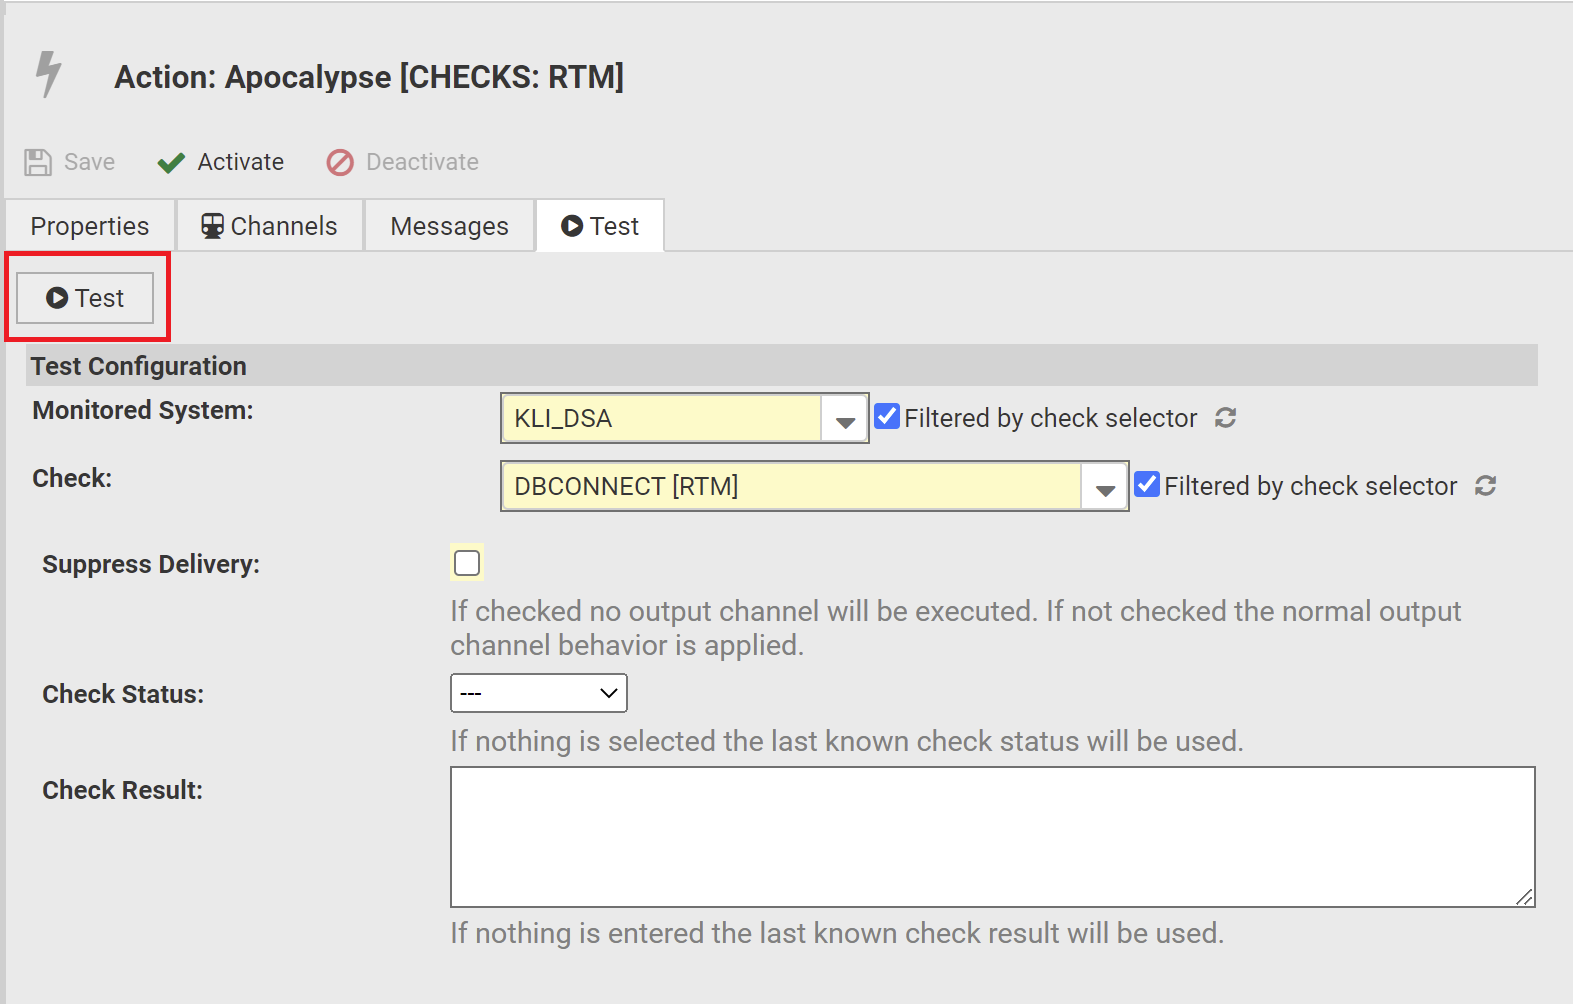
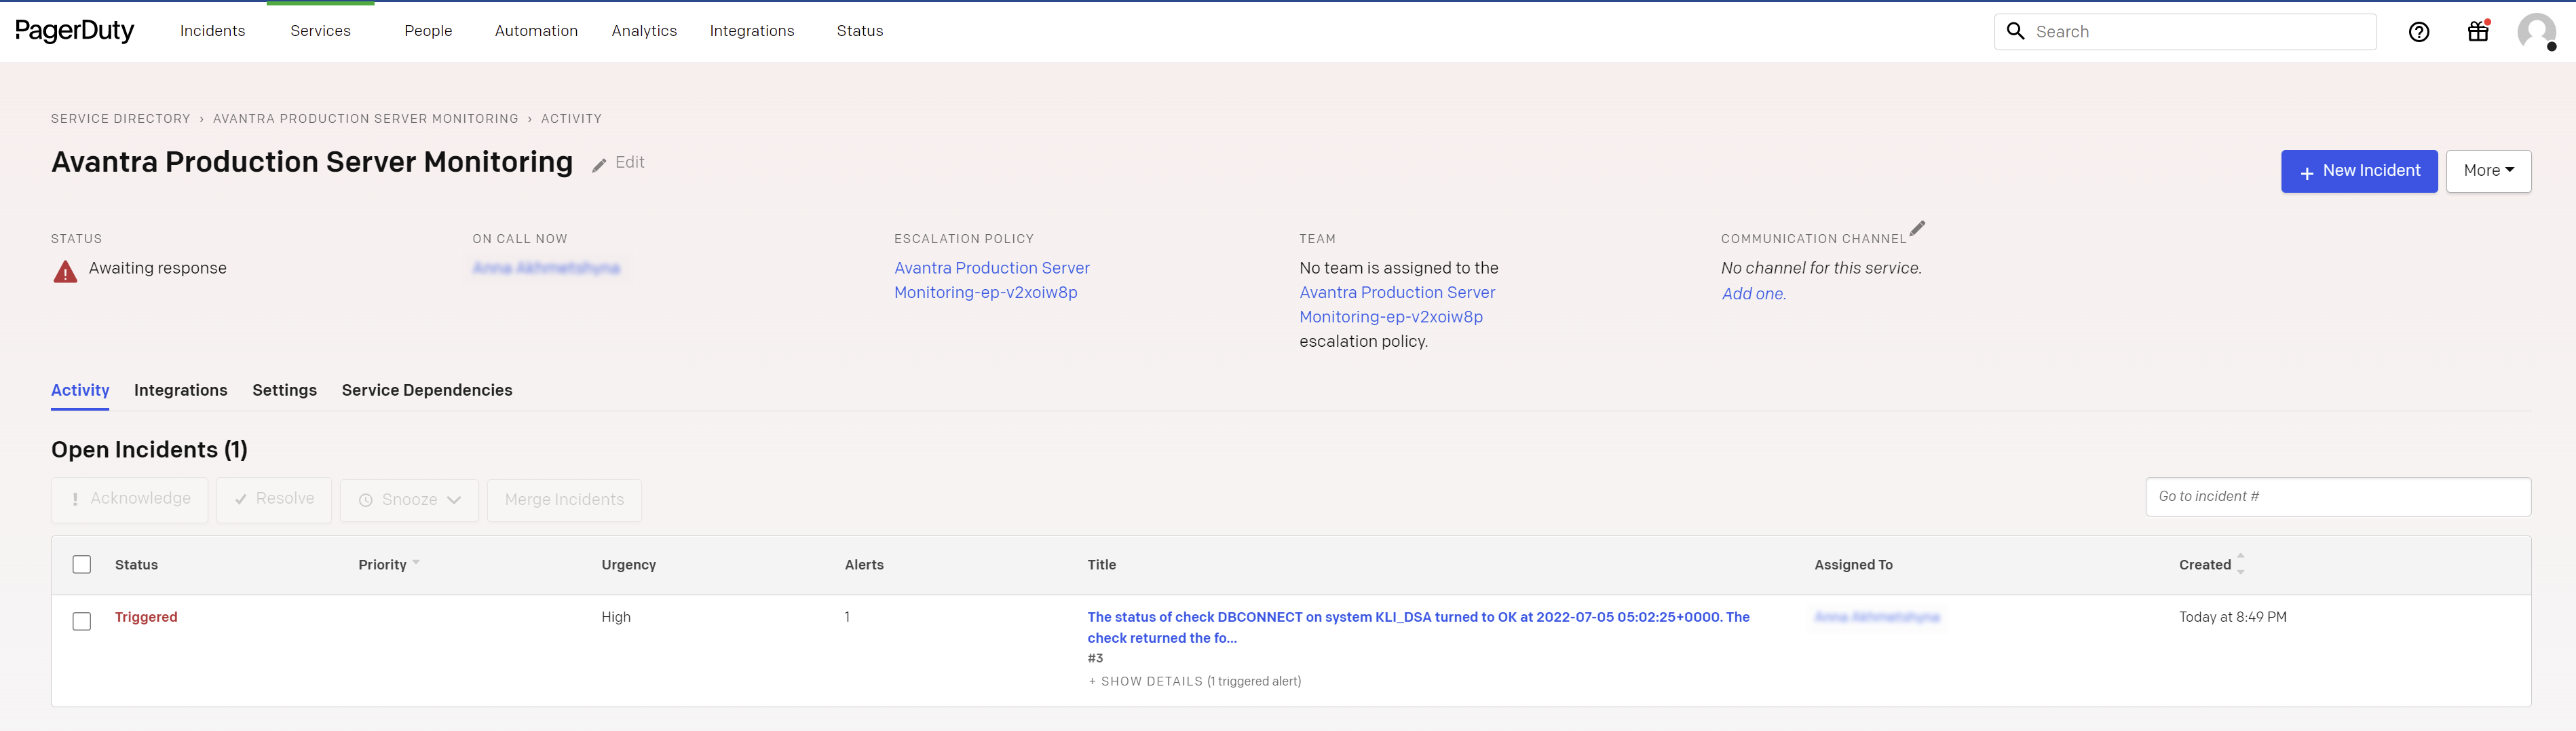
Once you test, your PagerDuty account will create the new incident and notify you according to PagerDuty settings.