System changes
Avantra provides a built-in Change Management solution allowing Customers to request changes on their Systems. Many of the System changes are recorded automatically using System Change Auto Detection.
Avantra is able to automatically detect the most important SAP System and Database changes and create corresponding records in its integrated change management system. This feature is also known as Automatic Change Detection.
If you use Virtual Cluster Servers, even switches of your cluster switchover solution will be recorded. The idea is to avoid documenting a system change manually if the change documentation can be retrieved from the system itself.
| Object | Data Source |
|---|---|
| SAP client settings | SAP System — see transaction SCC4 |
| SAP System change option | SAP System — see transaction SE06 |
| SAP component and SPAM version/patch level | SAP System — see transaction SPAM |
| SAP Instance kernel version/patch level | SAP System — see transaction SM51 |
| SAP System RDBMS version | SAP System — see transaction ST04 |
| SAP Instance profile parameters | Files located in profiles directory |
| J2EE System Properties per process (Dispatcher/ServerX) | J2EE JMX Interface |
| J2EE VM Properties per process (Dispatcher/ServerX) | J2EE JMX Interface |
| J2EE software components | Java SAP System Database |
| J2EE kernel/patch level | J2EE JMX Interface |
| Database parameters | depends on Database type |
| Oracle Database changes done with SAPDBA or BR*Tools | sapreorg directory |
| Virtual Cluster Server node switches | Physical Server |
| Version changes | Trex and Web Dispatcher SAP Instance |
| SAP HANA Configuration Layers | SAP HANA Database |
More details, although most things are pretty much self-explaining, can be found in the Knowledge Base article Automatic detection of system changes in Avantra.
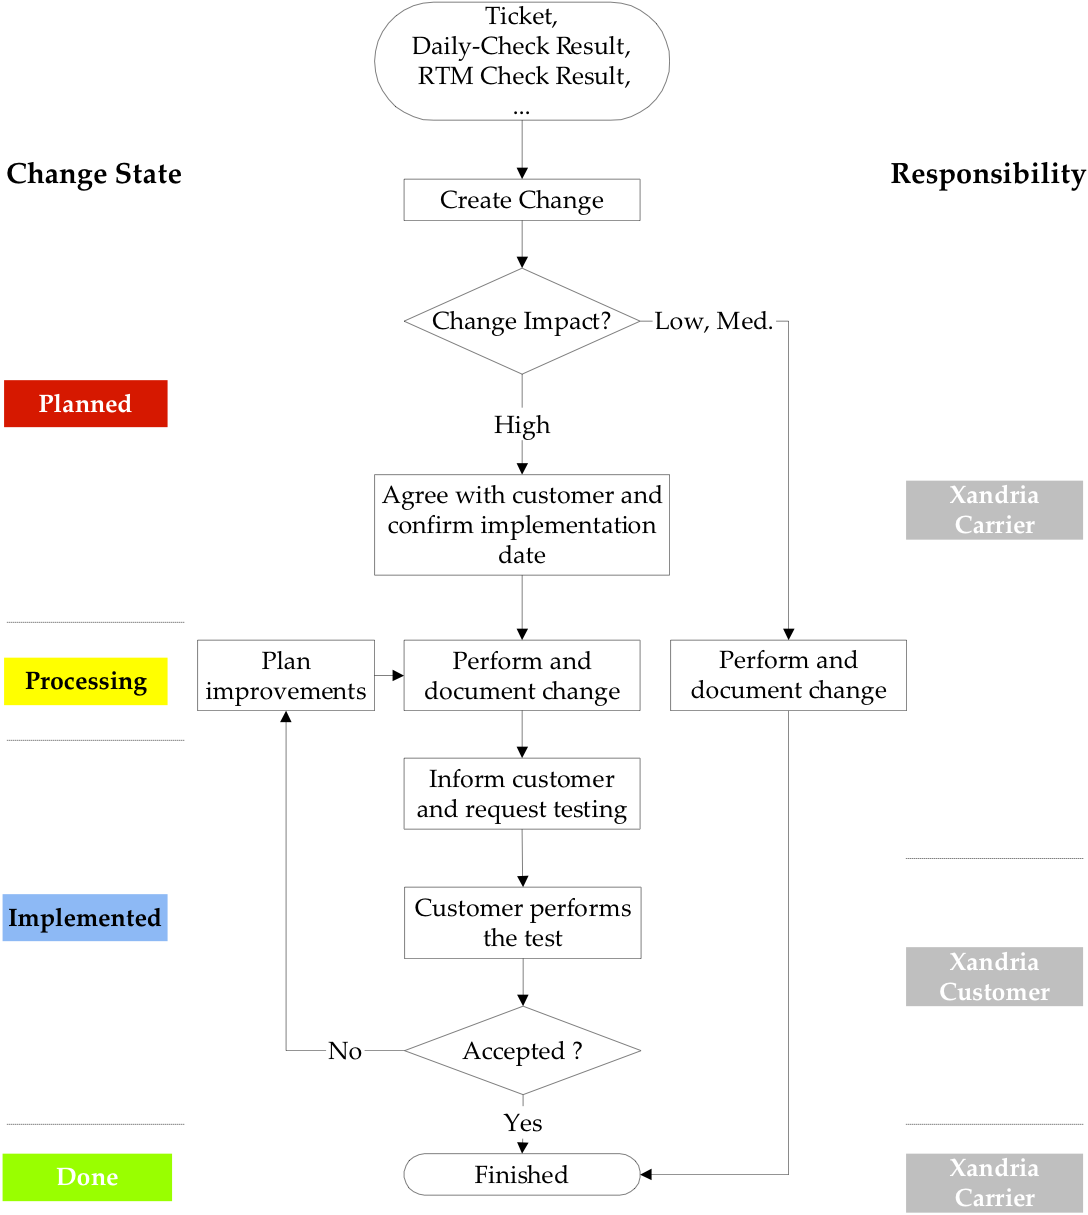
Working with changes
Avantra supports the following Change process:
Perform the following steps to create a change record
- Select Support > Changes from the top-level menu. Choose New from the toolbar.
- Select a Customer and click Next.
- Select a Customer Application and click Next.
- Choose values for Reason, Component, and Impact. Choose a Planned implementation date and fill in a Short Description.
- Click Create.
After the Change is created, it can be edited multiple times. The only restriction is once the Change status is changed to “Closed”, the Change record can no longer be edited.
You need the Permission Edit Changes in order to create or modify Changes.
You need the Permission Approve Changes in order to change the status from planned to processing.
You need the Permission Approve Implemented in order to change the status from implemented to done.
Viewing changes
In order to view Changes, choose Support > Changes. You may adjust the time period and the Change status.
In order to set many Changes to the status Done, choose More > Set Changes to Done.
You need the Permission View Changes in order to view Changes.