Building Workflows
In Avantra, workflows are defined as a collection of Steps that join these steps together to automate multiple tasks. A workflow can also contain other workflows to build even larger workflows and reuse workflows you’ve built before.
Workflows can also be scheduled or be triggered by notifications or externally through our API. See Running Workflows.
Workflow Concepts
A workflow is made up of the following components:
-
Definition
These settings control the visibility and permissions needed for executing this workflow and make it easier to group related workflows together.
-
Inputs
A workflow can be started with parameters that allow the user to customize the logic performed, for example use different credentials or choose the system to run the workflow on.
-
Types
Different types of workflows can replace an Avantra built-in task or perform their preconfigured actions before or after a task. The default selection is Start/Stop/Restart different systems, such as SAP System, Database, SAP Instance, etc.
-
Steps
These are the tasks that the workflow performs. Either our built-in steps, JavaScript Step Library steps or other workflows can be connected together here.
-
Outputs
If this workflow calculates a result and can be used inside other workflows, these outputs can be defined here.
-
Variants
If the workflow has input parameters, these values can be saved for future use to make executing workflows easier. See Variants.
-
Schedules
A workflow can be executed at defined times automatically by creating one or more schedules. See Schedules.
-
Executions
When a workflow is started the execution results are displayed here. Additionally it is where users can interact with a running workflow, for example to confirm a manual step or to fix an error. See Monitoring Workflows.
-
Choose .
-
Click the New button.
-
Fill in the required fields Name with the name of the workflow and Namespace which is used to keep related workflows and steps together.
-
Optionally, select a value from the Customer drop-down menu. Selecting a customer affects the visibility of a workflow and the permissions required to execute it.
-
Click the Create button.
The workflow details will now open.
Configuring Steps
Firstly, we will go through the process of adding a step to a workflow. We then show the procedure for creating workflow inputs
-
Choose .
-
Double click on the workflow you wish to add a step to.
-
Change to the Steps tab.
-
Without an existing steps selected, new steps are added at the end. Optionally, selecting existing step allows you to determine the initial position of the new step.
-
Press the + (add a new workflow step) toolbar button to open the Add Workflow Step dialog.
-
Choose a built-in step, a step library step or an existing workflow from the dialog.
-
The Name field is defaulted to the step name, however you should change this to reflect the purpose of the step in the workflow.
-
Click the OK button to add the step to the workflow.
-
The step configure window is now shown to assign any parameters to the step.
We will explain parameters next. Workflows steps are chained together so that the steps can use work performed or calculations of previous steps. This way steps can be reused in different combinations to do different tasks.
A step’s input parameters can either be:
-
Set to a Constant value
Useful when using a reusable step in a specific workflow that will only ever need a particular value for the input parameter. For example in restarting an SAP system, this is always the timeout to use.
-
Set to a Workflow input
Used when we would like the workflow to be generic and allow the user or parent workflow to select the option for this input parameter as it’s the main purpose of the workflow. For example a workflow that amount of memory assigned to a virtual machine - the amount could be a workflow input.
-
Set to a Step output
Used when we have some calculation or built-in step before that works out the answer for this step to use in it’s processing. For example using the built-in step to send a file then a subsequent step to execute that file.
-
Choose .
-
Double click on the workflow you wish alter.
-
Change to the Steps tab.
-
Double click on the step
-
For each input parameter, select either Constant value, Workflow input or Step output.
-
for Constant value, enter the value in the text box shown
-
for Workflow input, choose a created input from the dropdown
-
for Step output, choose a previous step from the dropdown, then choose one of it’s outputs
-
-
Click the Apply button to save these changes and close the window.
Import and export
To share workflows between systems the export and import buttons can be used.
Export
Select all workflows that should be included into the export and click on Export. Specify a filename and select whether sub-workflows, Step Library steps and/or variants should be included and click on Export. After that the export file is created and is downloaded.
File format
The export will create a zip will with the following folder structure.
steps
  / <namespace>
    / <step_name>.js
    / <step_name>.json
variants
  / <namespace>
    / <workflow_name>
      / <variant_name>.json
workflows
  / <namespace>
    / <workflow_name>.json
Each exported step consists of two files. One contains the meta data (.json) and the other one contains the JavaScript code (.js).
It is possible to change names and namespaces and repack it to a zip file to change them before an import.
Import
To start the import wizard click on Import. If a workflow consists of sub-workflows and steps and if they are included in the file they can be selected in the import wizard. If steps or sub-workflows are not imported steps or workflows with the corresponding names must be present in the system.
Loops in workflows
The sub-workflows can be added to a workflow as a loop step.
To add a sub-workflow as a loop, follow the next steps:
-
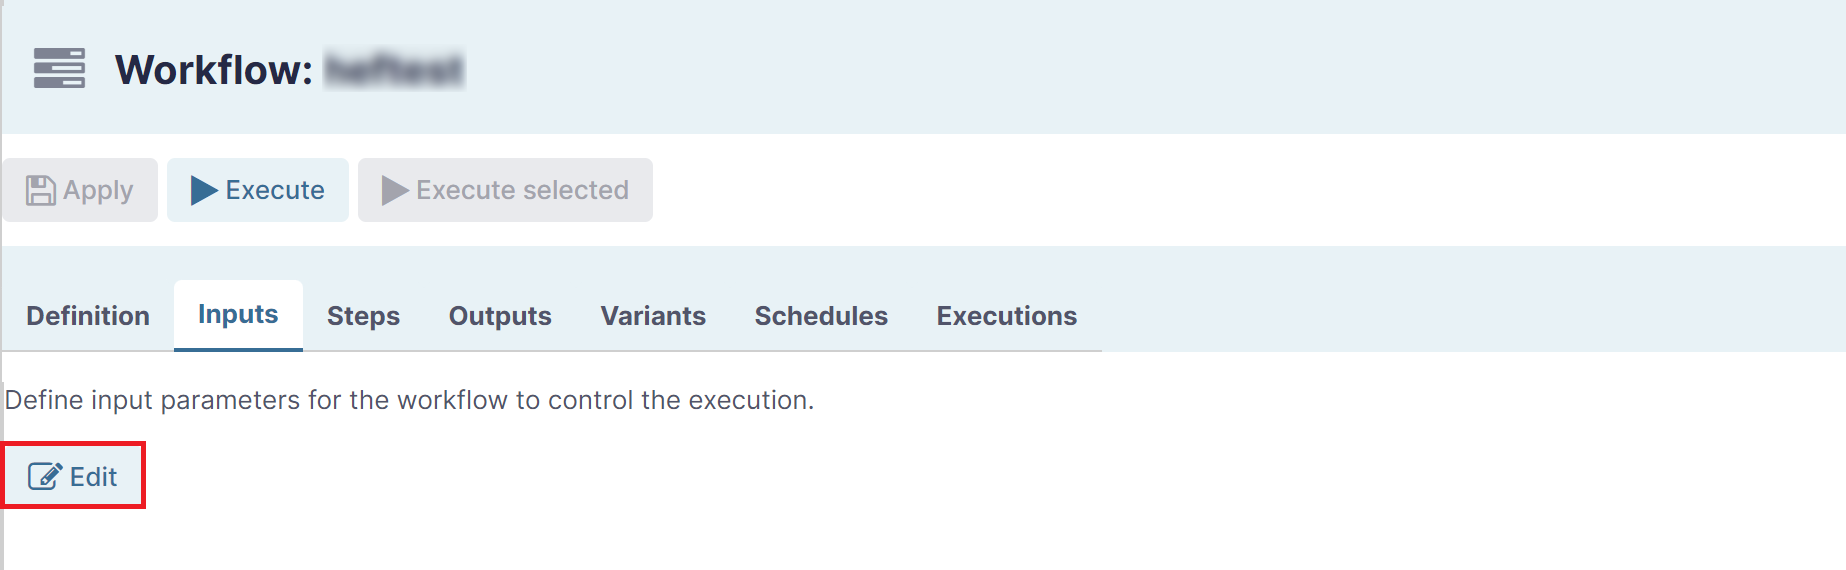
In the main workflow’s Properties section, choose the Inputs subsection and click Edit (framed in red) to add/edit the input workflow parameter/s.
-
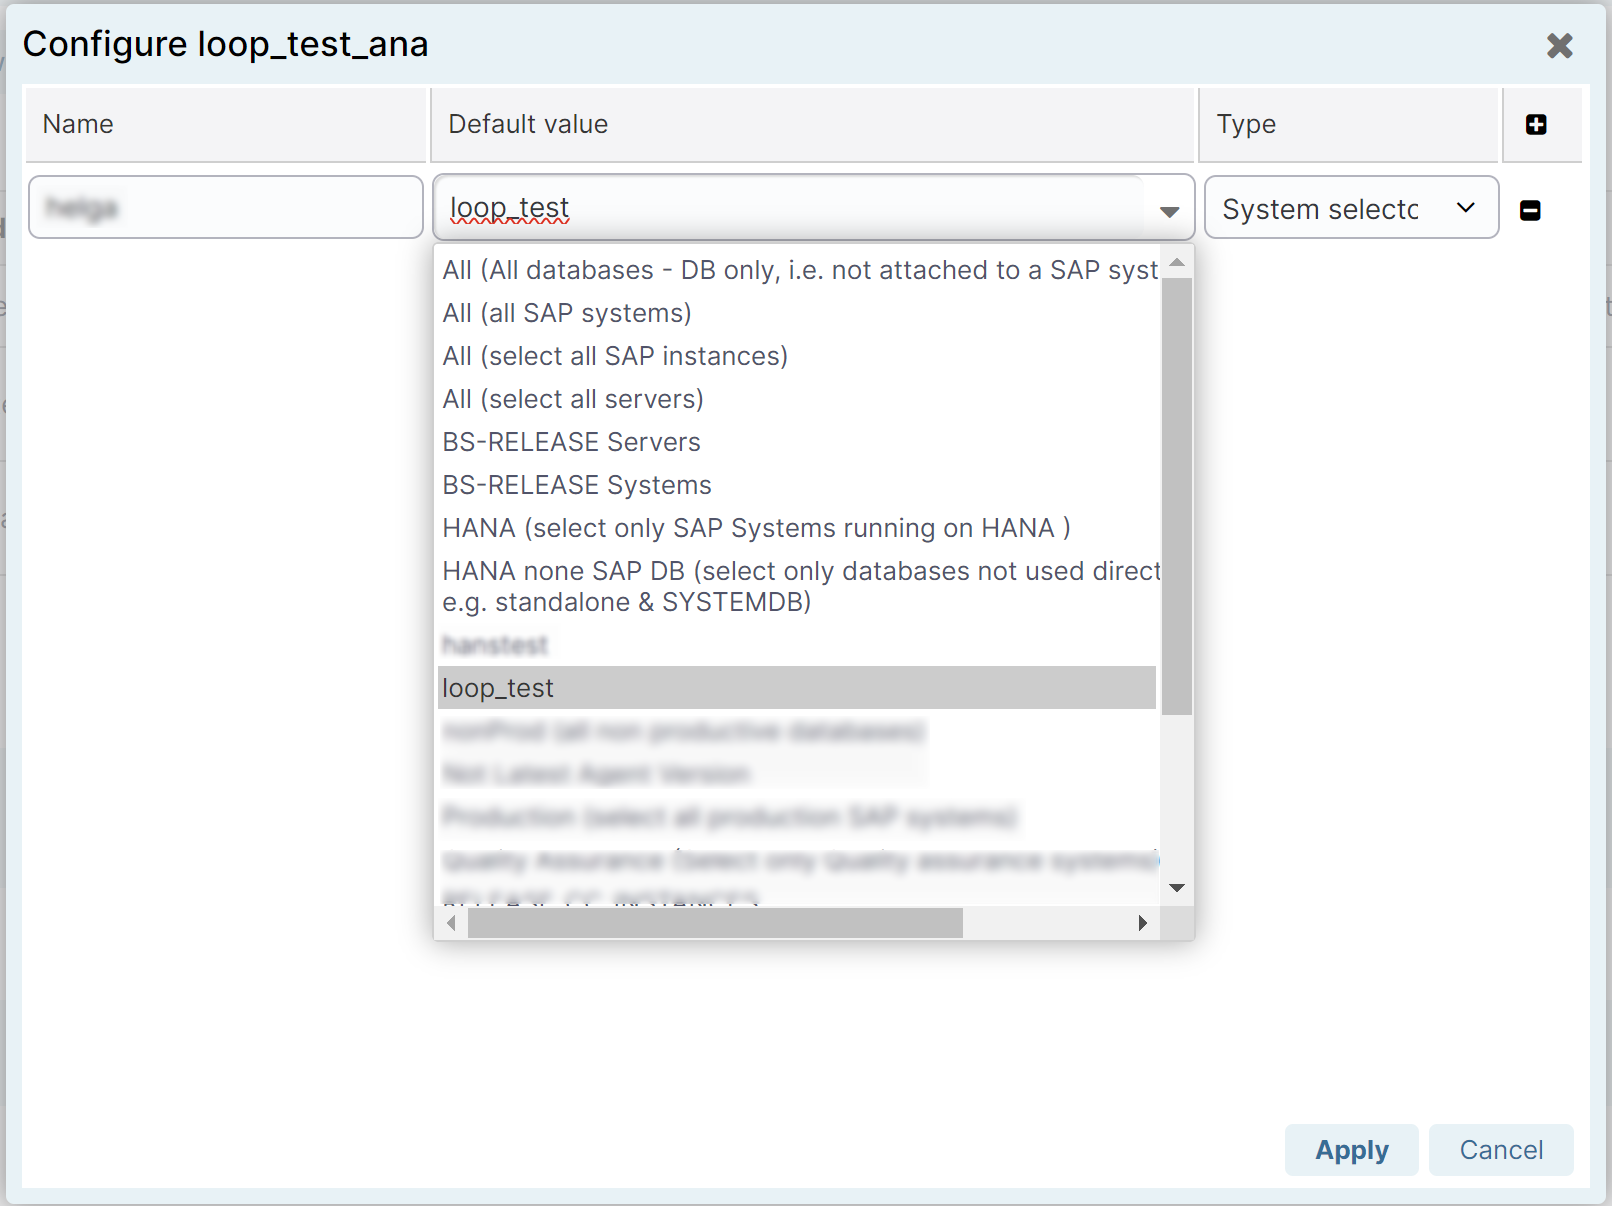
In the window that appeared, click Add a new row. Specify the new parameter’s name and type, and select the default value from the dropdown menu. Click Apply to save the changes.
-
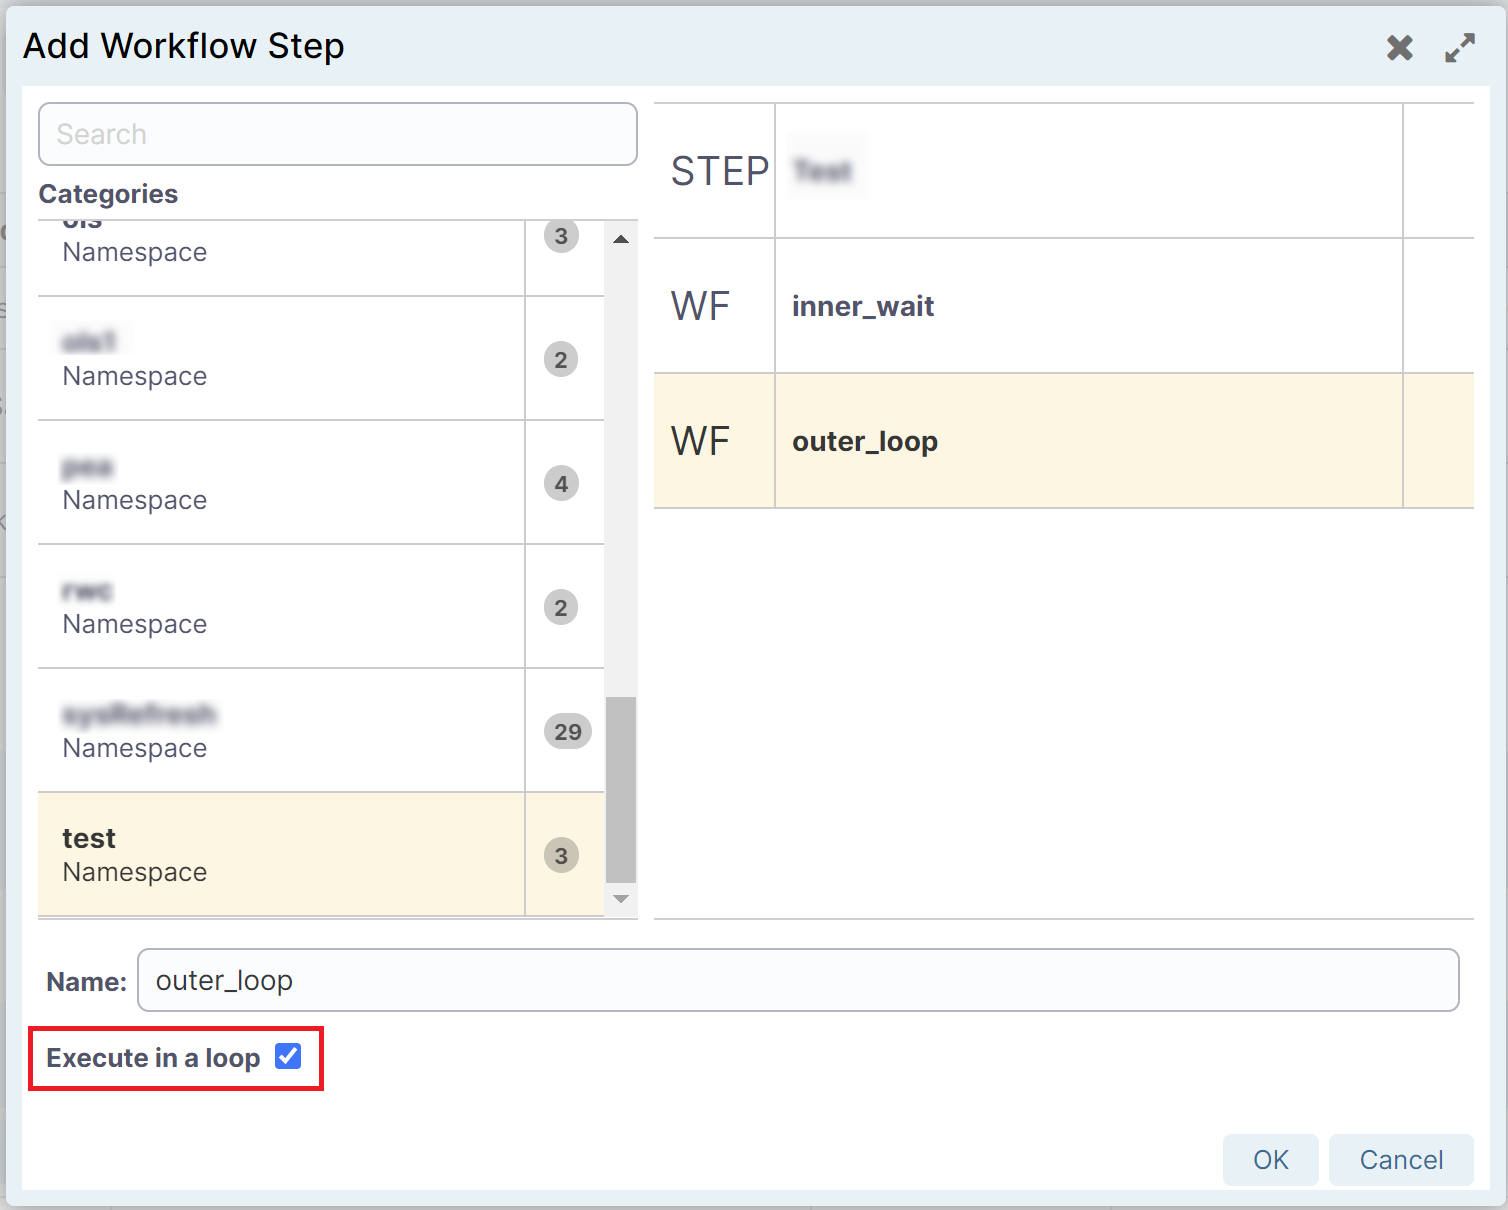
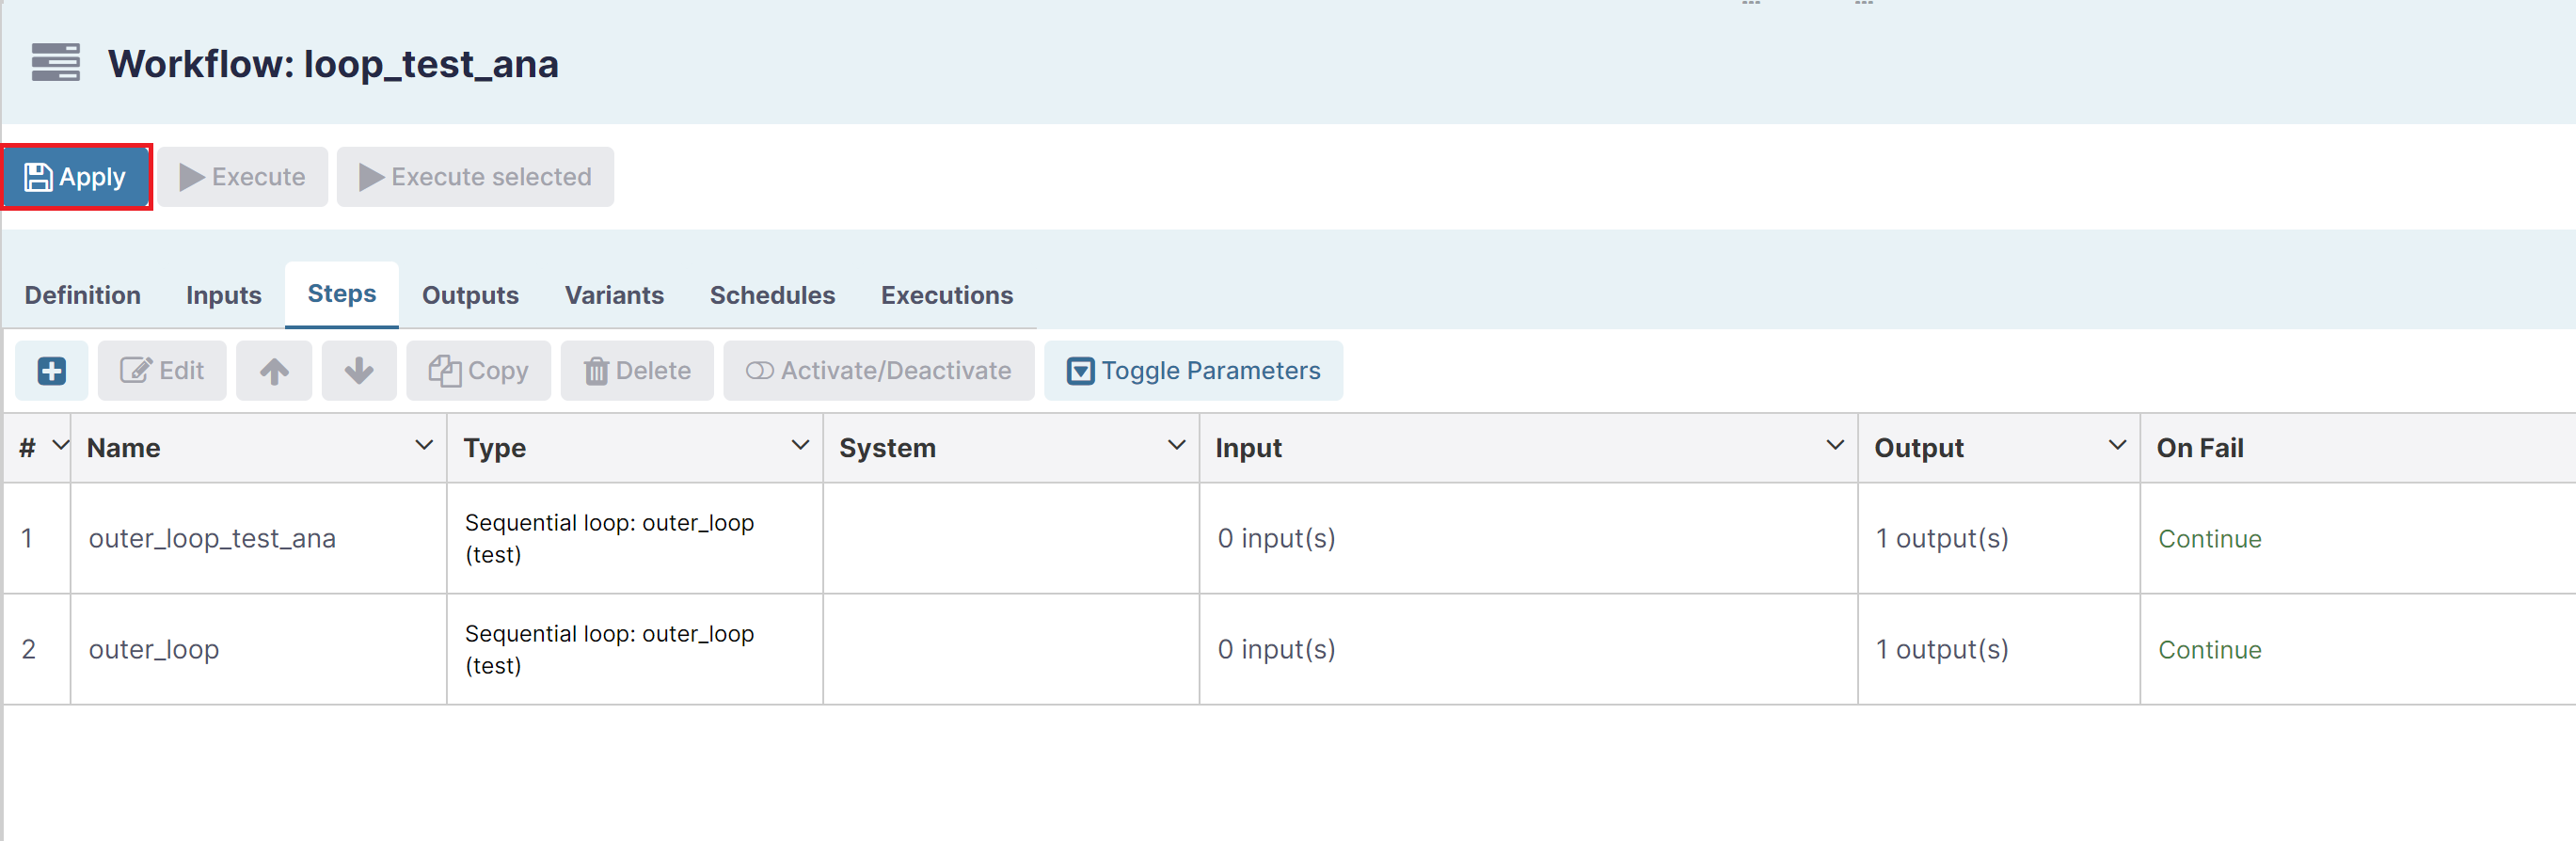
In the main workflow’s Properties section, choose the Steps subsection and click Add a new workflow step. In the window that appeared, choose the Namespace in workflow steps categories, then select the workflow (WF) and tick the checkbox Execute in a loop (framed in red). Click OK to save the changes.
-
In the next window, specify the loop item set, execution mode, and the action to be executed upon failure. Click Apply to save the changes.
The Loop items set is the system selector for the loop set input, containing the systems for loops to be run on. The sub-workflow will be executed for each system in that system selector.
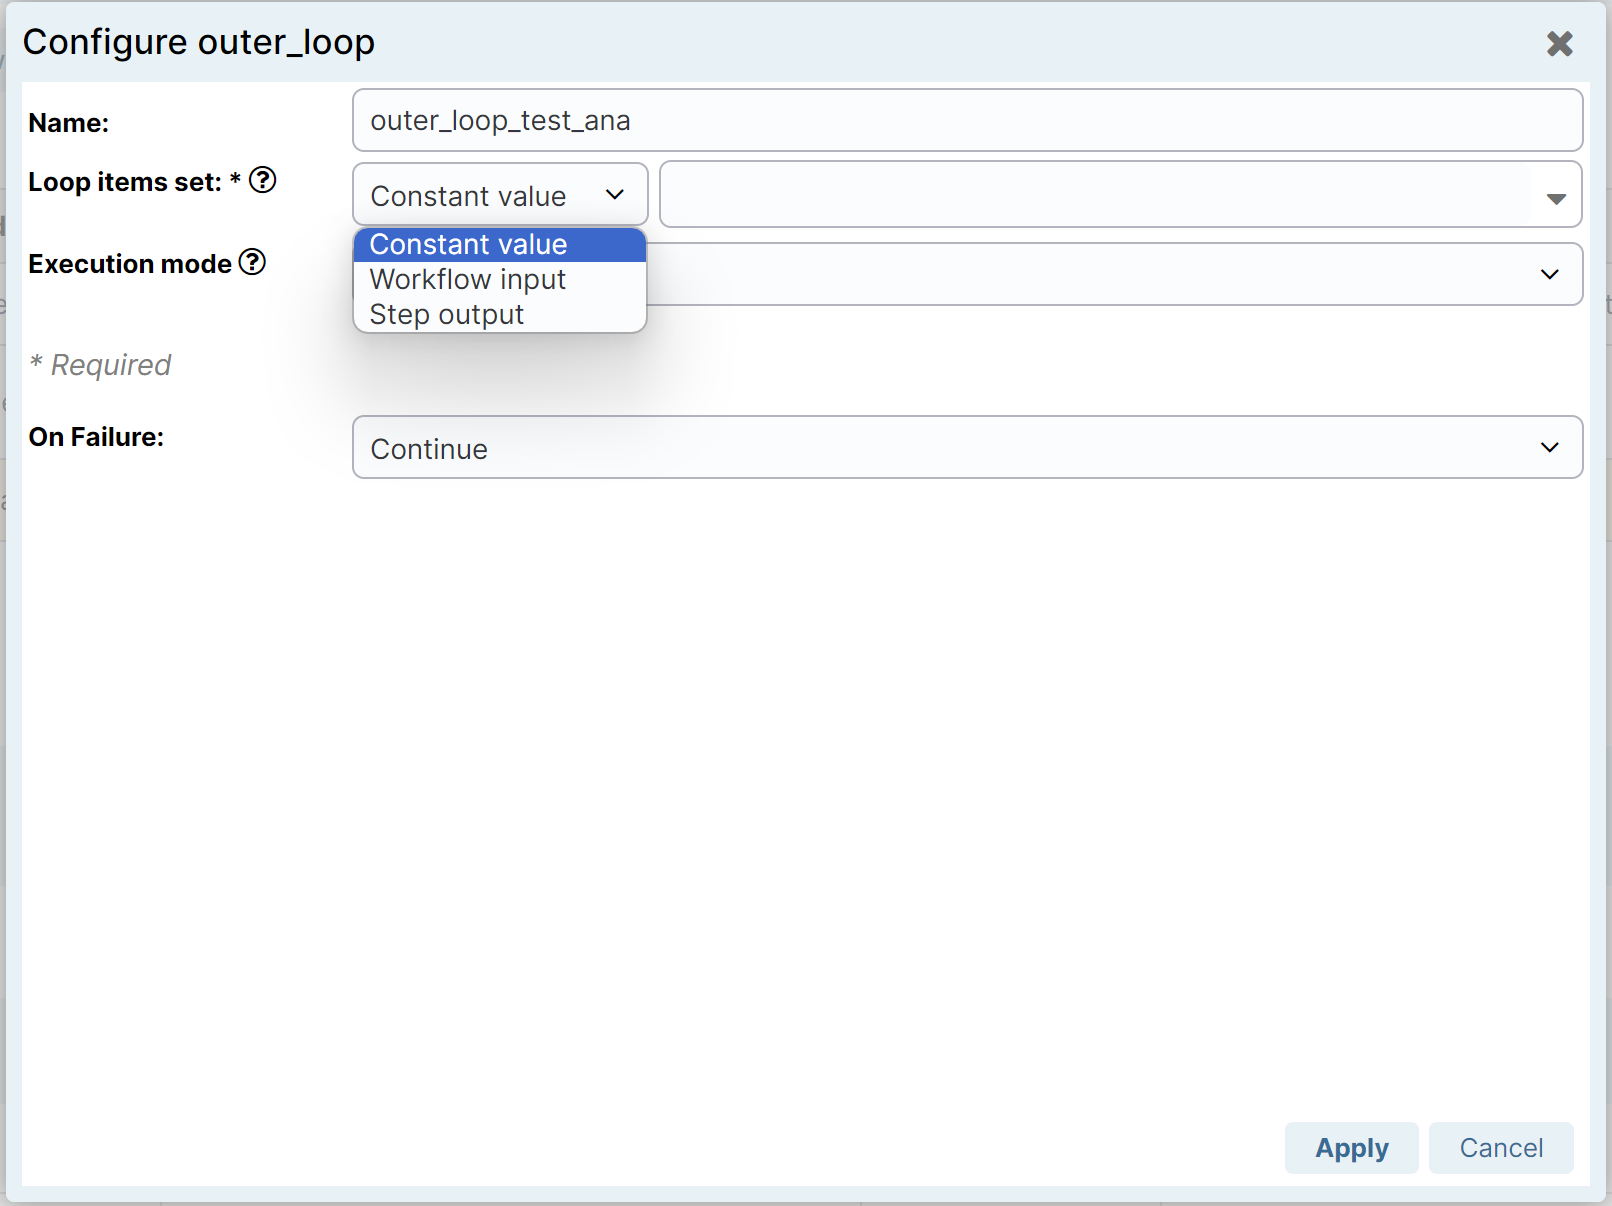
There are two execution modes for sub-workflows: sequential and parallel. In sequential mode, the next iteration will start if the previous one is finished. In parallel mode, all iterations are started in parallel at once. -
In the main workflow’s Properties section, click Apply.
The result of the loop step will have an output called results containing a JSON file with the execution details of each loop iteration of the sub-workflow, similar to the example below:
[
  {
    "result": "EXECUTED",
    "inputs": {
      "sys": "server1 (5601, Server)"
    },
    "outputs": {}
  },
  {
    "result": "EXECUTED",
    "inputs": {
      "sys": "server2 (5602, Server)"
    },
    "outputs": {}
  },
  {
    "result": "EXECUTED",
    "inputs": {
      "sys": "server11 (5611, Server)"
    },
    "outputs": {}
  },
  {
    "result": "EXECUTED",
    "inputs": {
      "sys": "server12 (5612, Server)"
    },
    "outputs": {}
  },
  {
    "result": "EXECUTED",
    "inputs": {
      "sys": "server13 (5613, Server)"
    },
    "outputs": {}
  }
]