Setting Up the Notification Process
Once you have configured your new Avantra instance and added your first systems, you will naturally want to be informed when something is not as it should be. We do this via notifications and the process to set up your first notification is very easy. For the purposes of this initial configuration we are assuming that our first notifications are going to be sent via an email.
There are three steps to setting up our notifications:
-
Configuring Avantra to send emails via your email server
-
Creating an Output Channel to allow notifications to use your newly configured email server
-
Creating a Notification Action to select the events we want to respond to and link it to the Output Channel
Configure Avantra to send email
To create a Mail Server, perform the following steps:
-
Select Choose the "@Messaging Services" tab and use the option.
-
Fill in a Name, an optional Description, and choose a Customer. For an email server that is not restricted to a particular configured customer simply select
ROOT, otherwise select the appropriate customer.Choose either
SMTPorSMTPSfrom the Protocol drop-down list.Define the server hostname in Target and optionally the Port number.
Choose if or if not the server requires TLS (i.e. the so-called
STARTTLSmethod).If your mail server requires authentication, please fill in a User and a Password.
-
Push the Create button to finish.
You can now use the mail server in the Mail Server field of the Email Output Channel.
Create your email output channel
To create an email based output channel which links a notification output to an email mail server (and all the configuration items you might need), perform the following:
-
Select .
-
Select the "Channels" tab and use the option
-
Fill in a Name and optionally a Description. The name of the Output Channel has to be unique.
-
If you plan to restrict the Output Channel to one or multiple Customers select the appropriate items from Customer Filter.
-
Choose one or more of the Supported Action Types.
Push the Finish button. The Output Channel detail view is opened automatically.
-
-
Define a valid sender e-mail address in field Sender Mail Address, a default for this value can be defined in Notifier.Mail.fromSenderName. A Sender Name can be configured also but is not mandatory. If more detailed control over the sender is required, open the sender details with the Edit Details… button after you have saved the Output Channel. The
Reply-Toand theReturn-Pathe-mail address can be entered there. -
Select a value for Recipient.
-
If you want this Output Channel to deliver only to a single user, select Single user. Choose a User from the User drop-down list. You can only select a User that has the "Receive Notification Messages" permission for the Customers selected in Customer Filter.
-
If you want this Output Channel to deliver to a group of users, select Group of users. You can only select a Group that has a Role containing the "Receive Notification Messages" permission for the Customers selected in Customer Filter.
-
If you want this Output Channel to deliver to all Users of the selected Customers (or all Customers) that have the "Receive Notification Messages" permission, select Users of selected/all customers.
-
-
Select a value for Priority. Possible values are Highest, High, Normal, Low, and Lowest. Please note that it depends on the recipient’s mail client how this value is interpreted. You can also choose to send the messages as blind carbon copies (
BCC) only. -
Define the Subject of the e-mail.
-
To edit the Mail Content press the Edit mail content… button. A dialog will be opened with the details of the mail content. It is possible to define either HTML or plain text content.When finished, Save your details and close the dialog.
-
Refer to Handling Mail Servers on how to create a mail server, and afterwards select a mail server from the Mail Server drop-down list.
-
Push the Save button.
You can test your settings using the Send Test Email button.
Create your Notification Action (link an event to your email output)
-
Select from the top-level menu. Select the Actions tab. Choose New in the toolbar. Select Action for Checks … from the drop-down list.
-
Fill in a Name and Description. The name of the Notification Action has to be unique.
If you want this to be customer-specific you can filter it here or else use the default for it to be non-specific.
Finally, under Support Action Types uncheck all options except Checks (RTM, Daily Check Details).
Push the Next button.
-
Now we need to define which events this action works for. For the purposes of this first configuration, we will create an 'Ad-Hoc' Custom Selection. Once you hit Create you will be asked to verify the "Check Selector Type" which will be "RTM & Daily Check Details" (basically alert for everything).
-
Push the Create button.
-
Choose the Check Selector Type "RTM & Daily Check Details" from the list and push Next.
-
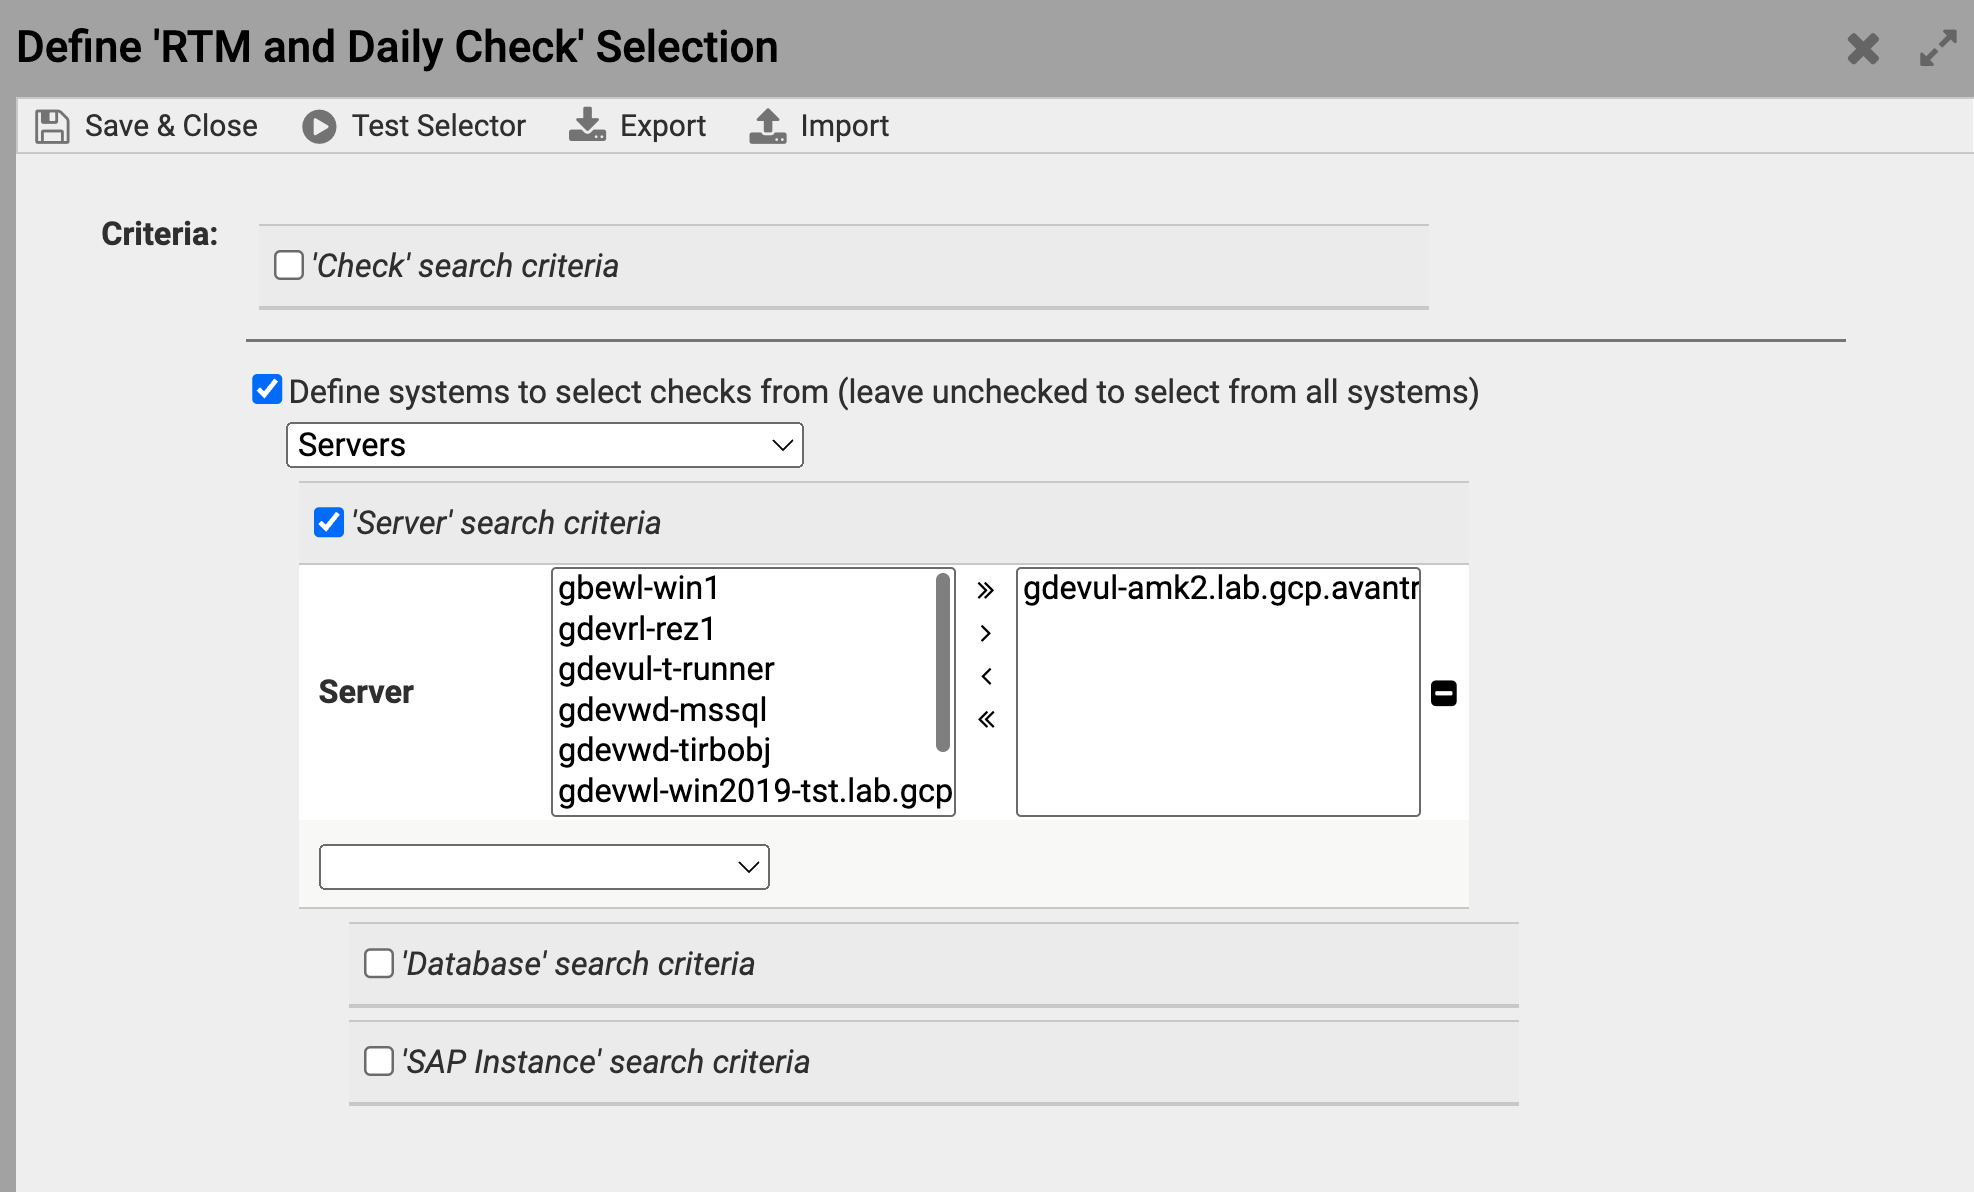
Fill in selection criteria by selecting a single system similar to the screen shot below (we recommend the Avantra server itself), push the Test Selector to verify the selection, and hit the Save & Close button.
Push the Next button.
-
-
Select the Status that you want alerts to be triggered for (usually WARNING and CRITICAL).
Push the Next button.
-
In the Output Channel drop-down list, select the output channel you created in the previous step. You can learn about the other options later: Defining Filter Lists and Defining a Resolver.
-
Push the Finish button. The Notification Action detail view opens.
-
Push the Save button.
-
Push the Activate button to make the whole chain active and begin to send notifications.
You have now created a (minimal) Notification Action for Checks, consisting only of a trigger definition and an Output Channel.
|
The Notification Action is not active unless you push Activate. However, you may want to leave it deactivated until you have it successfully tested. |