Setting Up the Notification Process
Concepts of Notifications
A Notification in terms of Avantra basically is the process of reacting to a certain event with a predefined action. A typical event would be a changed check status, and an action can be as simple as writing an entry into a log file, and as powerful as stopping an SAP System.
The events that serve as a trigger are called Notification Elements in Avantra. These are:
- Primary
-
-
A new RealTime Monitoring Check or a changed RealTime Monitoring check status
-
A new Daily Check
-
A new Daily Check Detail
-
A new Ticket record, or a changed Ticket status, or a changed Ticket priority
-
A new CCMS Alert record
-
A License that is about to expire
-
Whenever one of these events is processed and it triggers an action, we are talking about a Primary Notification. There are further events that can only trigger an action if a Primary Notification has been generated already:
- Resending
-
-
A RealTime Monitoring Check, Daily Check, or Daily Check Detail that is confirmed
-
A RealTime Monitoring Check that remains in a given check status for a defined period of time
-
A RealTime Monitoring Check that does not change its overal check status, but that consists of sub-checks and one of these sub-checks changes its status.
-
In this case we refer to Resending Notifications.
The operations you can trigger are called Output Channels and comprise of the following:
-
Send an Email (requires the Permission
Permission.receive_notification_messagesfor the recipient User) -
Send a Browser Notification (requires the Permission
Permission.receive_notification_messagesfor the recipient User) -
Send a XanMobile push message (requires the Permission
Permission.receive_notification_messagesfor the recipient User) -
Call a REST or a SOAP web service.
All these operations can be delegated to Customers, i.e. Customers in Avantra are able to define these Notifications themselves. Other operations, like shown below, can be defined only by the Service Provider because they may affect shared resources:
-
Write into a Log File or the Windows Event log
-
Write files based on templates (e.g. XML files)
-
Run arbitrary commands on the Avantra Server or the managing Avantra Agent
-
Send a text message via Amazon Web Services (requires the Permission
Permission.receive_notification_messagesfor the recipient User) -
Stop or start an SAP System, an SAP Instance, or a Cloud Server
Many of the Output Channels listed above can be used to deliver Notifications into third-party systems, such as other monitoring or system management applications.
The trigger criteria on the one hand and the Output Channels on the other hand combine to the so-called Notification Actions. While Notification Actions may comprise of more (for example, Filter Lists and Resolvers which we will describe later in this chapter), we want to outline the two different flavours of Notification Actions:
Global vs. Customer Notifications
Technically speaking, there are modular Notification Actions and all-in-one Notification Actions. In modular Notification Actions, the Output Channels (and the Filter Lists and Resolvers) are independent objects that can be combined into Notification Actions. This allows to re-use them easily but makes configuration a little harder. An all-in-one Notification Action is a single object that contains an Output Channel (and perhaps a Filter List and a Resolver). You cannot re-use these components, but configuration is a lot easier.
If a Service Provider wants to delegate the configuration of Notification Actions to a Customer, the Customer can only make use of all-in-one Notification Actions. The Service Provider of course can setup modular Notification Actions.
To distinguish those two, the modular ones are labelled Notifications [Global] and the all-in-one variant is labelled Notifications [Customer].
For Customers that have the Permission to create their own Notifications, the all-in-one actions are simply labelled Notifications.
We focus on Notifications [Global] in this chapter and describe Notifications [Customer] briefly in Defining Notifications [Customer].
Available Output Channels
The following list contains all available Output Channels with a detailed description:
-
For each Output Channel of this type you can define an SMTP Server, a sender address, username and password for SMTP authentication (if required), and a template for the e-mail subject and body.
You can define that an Output Channel of this type is restricted to a certain User (recipient), to a Group of Users, to one or multiple Customers — which implies that it is restricted to all Users of the selected Customers that have the necessary Permissions.
- Mobile Notification
-
Any Avantra user using the Avantra Mobile App on an iOS or Android device, is able to receive mobile notifications.
You can define that an Output Channel of this type is restricted to a certain User (recipient), to a Group of Users, to one or multiple Customers — which implies that it is restricted to all Users of the selected Customers that have the necessary Permissions.
- AWS — Simple Notification Service
-
Notification messages are sent to a topic by means of the Amazon Web Services Simple Notification Service.
This Output Channel provides all the options that are available for the Simple Notification Service in Amazon Web Services.
- AWS — SMS
-
Notification messages are sent as text messages by means of the Amazon Web Services Simple Notification Service.
This Output Channel provides all the options that are available for the SMS service in Amazon Web Services.
You can define that an Output Channel of this type is restricted to a certain User (recipient).
- Write into a log file
-
For each Output Channel of this type you can define an output file name, a template line defining the log file format, and a maximum line length.
- Run an external command
-
For each Output Channel of this type you can define an executable to run, a working directory, and the command line call as well as a timeout restricting the run time.
The command can be executed on the Avantra server, the Server hosting the Avantra Agent the Check is executed on, or on Servers defined by use of a System Selectors.
- Rewrite a template file
-
For each Output Channel of this type you can define an executable to run, a working directory, and the command line call as well as a timeout restricting the run time.
- Create a Ticket
-
This Output Channel creates a Ticket within Avantra. You can define a short and a long description. Critical Check Results create Tickets with priority
High, Warning Check Results create Tickets with priorityMedium. - Windows Event Log
-
This Output Channel creates an entry within the Windows Event Log if the Avantra Master is running on Microsoft Windows operating systems.
- RESTful Web Service
-
This Output Channel delivers Notifications by calling a REST API that is provided by a third-party Web Service. It offers Basic and OAuth 2.0 authentication schemes, the latter of which are provided by profiles that may be shared between different REST and SOAP Output Channels.
- SOAP Web Service
-
This Output Channel delivers Notifications by calling a SOAP Web Service. It offers Basic and OAuth 2.0 authentication schemes, the latter of which are provided by profiles that may be shared between different REST and SOAP Output Channels.
- Avantra UI Browser Notification
-
This Output Channel delivers Notifications to Users logged into Avantra UI.
You can define that an Output Channel of this type is restricted to a certain User (recipient), to a Group of Users, to one or multiple Customers — which implies that it is restricted to all Users of the selected Customers that have the necessary Permissions.
- Ticket Log
-
This Output Channel is only available for Ticket Notification Actions and allows updating the particular Ticket triggering the Notification Action.
- SAP Start/Stop
-
You can perform a Start, a Soft Shutdown, or a Hard Shutdown operation on
-
The affected SAP Instance or SAP System
-
A single SAP Instance or SAP System
-
All SAP Instances or SAP Systems defined in a Selectors.
-
- Cloud Automation
-
You can perform a Start or a Stop operation on:
-
The affected Cloud Server
-
A single Cloud Server
-
All Cloud Servers defined in a Selectors.
-
- Null Output Channel
-
An Output Channel that produces no output at all. Sounds useless, but you can use this if you want to only perform Check Confirmation.
- Composite Output Channel
-
This Output Channel combines multiple other Output Channels. You can configure the conditions under which a particular Notification message is passed to one or more of the combined Output Channels.
All Output Channels can be restricted to a single or multiple Customers. In this case they are only effective for Notifications generated for Notification Elements of Managed Objects owned by the defined Customers.
Every Notification takes some data with it. This data is primarily derived from the Notification Elements the Notification is triggered by, as well as the Managed Object the Notification Elements was running on, and the Customer owning the Managed Object. And there is even more, like the Notification reason, various time stamps, etc.
This data is available in the Output Channels by means of the so-called Interpolations. You best think of Interpolations as placeholders that are replaced by some real-world data once an Output Channel is executed.
|
If you are working with Filter Lists and Output Channels and you are working with Macros, you will find a button Convert to FTL that allows you to convert them into Interpolations. |
The following shows the default template value for an e-mail body used in the Email Output Channel:
The status of check ${check.name} on system ${system.name} turned to ${check.statusString} (${check.status})
at date ${check.statusChangeDate?string('yyyy-MM-dd HH:mm:ssZ')} (since ${check.statusAge} [h:mm:ss]).

The check returned the following status message:
${check.result}

Notification No. ${notification.number} was generated at ${notification.date}.

Generated by: ${xandria.release}
Each occurrence of format ${text} is an Interpolation.
In the following example the Output Channel was executed for an AGENTALIVE Check that turned from status Critical to Ok.
The Interpolations have been replaced in the following way:
The status of check AGENTALIVE on system saturn turned to OK (0)
at date 2016-03-30 09:45:44 (since 0:05:20 [h:mm:ss]).

The check returned the following status message:
Changed status from CRITICAL

Notification No. 1 was generated at 2016-03-30 09:51:04.

Generated by: Avantra 20.5.0
Once you define an Output Channel, Avantra UI provides a drop-down list with available Interpolations at all Output Channel definition fields where Interpolations can be used.
|
In the Notification Management, Interpolations replace Macros which are deprecated. |
The term Interpolation comes from the Apache Freemarker Template Language ( FTL) which is used in the Notification process since Avantra 6. For the sake of consistency and easier reference to FTL, we stick to the terminology used in there.
In the example above, there is one Interpolation different from the other ones. ${check.statusChangeDate} returns a date object. It cannot be used directly to produce output. In order to evaluate it in a string context, we have to use ${check.statusChangeDate?string('yyyy-MM-dd HH:mm:ssZ')} (Or any other option described in Built-ins for date/time/date-time values - Apache FreeMarker Manual).
Notification Actions
This section defines how a (simple) Notification Action glues together the triggers listed at the beginning of the chapter with the Output Channels listed in Available Output Channels.
Apart from the trigger criteria an Notification Action can cover:
- Selector
-
Notification Actions for Checks Changes, and Tickets can filter the observed elements by selectors. This helps to define the exact subset of Checks, Changes, or Tickets that has to be monitored. For CCMS Alerts there is no such option.
- Service Hours
-
The Notification Action is only executed during the time range defined by the selected Service Hours record.
- Maximum attempts
-
Assume your Output Channel fails to deliver; perhaps your SMTP server is not available temporarily. You can define how often the Output Channel shall be executed before the Notification Action fails.
- Filter Lists
-
In case you want a more fine grained control of your Notifications besides the restriction by Check Selectors and Service Hours, you can link Filter Lists to your Notification Action. Output Channels are executed only in case the defined filters are passed.
- Resolver
-
If you want additional data to be included in the Output Channels (i.e. data that is not available through the standard Interpolations) you can define a so-called Resolver that is executed whenever an Notification Action fires, and that provides additional variables. The Resolver basically is a program you need to provide that takes some of the standard Interpolations as input and provides custom data as result.
In order to distinguish the Resolver you may define from the internal one resolving standard Interpolations, we sometimes also use the term “Custom Resolver” .
- Confirmation of RealTime Monitoring Checks/Daily Checks
-
Notification Actions can be used to confirm RealTime Monitoring Checks or Daily Checks. This is especially helpful if you deliver a Notification into a third-party monitoring or problem management application and you want to make Avantra to reflect this in, for example, the RealTime Monitoring views.
If you only want to confirm RealTime Monitoring Checks or Daily Checks without delivering Notifications the Null Channel Output Channel will prove useful.
All these items are described in the upcoming sections.
Each Notification Action only supports one of the five available Action Types: Checks, Changes, Tickets CCMS Alerts, and Server Events
Once Avantra finds a Notification Element that matches the trigger criteria of a defined Notification Action, this Notification Action is going to be processed.
A Notification Element that is being processed by a Notification Action is also called a Notification message. Every Notification message has a status depending on the result of filter evaluation and — of course — on the success of the Output Channel.
The status information is saved in the Avantra Database and can be displayed in Avantra UI.
| Message Status | Description |
|---|---|
OK - Blocked |
The Notification has been blocked by a filter |
OK - Sent |
The has been successfully sent |
Pending |
A Notification attempt failed but will be retried |
Aborted |
The Output Channel failed to deliver |
Scheduled |
The Notification is scheduled to be sent |
Initial |
A Notification has not been processed by the defined Notification Action because e.g. the trigger criteria did not match |
Defining Output Channels
Although you can define an Output Channel while you are defining an Notification Action we describe the two steps separately in here.
Define an Email Output Channel
In order to define an Email Output Channel proceed as follows:
-
Select from the top-level menu. Select the Output Channels tab. Choose in the toolbar.
-
Fill in a Name and optionally a Description. The name of the Output Channel has to be unique.
-
If you plan to restrict the Output Channel to one or multiple Customers select the appropriate items from Customer Filter.
-
Choose one or more of the Supported Action Types.
Push the Finish button. The Output Channel detail view is opened automatically.
-
-
Define a valid sender e-mail address in field Sender Mail Address, a default for this value can be defined in [Notifier.Mail.fromSenderName]. A Sender Name can be configured also but is not mandatory. If more detailed control over the sender is required, open the sender details with the Edit Details… button after you have saved the Output Channel. The
Reply-Toand theReturn-Pathe-mail address can be entered there. -
Select a value for Recipient.
-
If you want this Output Channel to deliver only to a single user, select Single user. Choose a User from the User drop-down list. You can only select a User that has the Receive Notification Messages Permission for the Customers selected in Customer Filter.
-
If you want this Output Channel to deliver to a group of users, select Group of users. You can only select a Group that has a Role containing the Receive Notification Messages Permission for the Customers selected in Customer Filter.
-
If you want this Output Channel to deliver to to all Users of the selected Customers (or all Customers) that have the Receive Notification Messages Permission, select Users of selected/all customers.
-
-
Select a value for Priority. Possible values are: Highest, High, Normal, Low and Lowest. Please note that it depends on the recipient’s mail client how this value is interpreted.
You can also choose to send the messages as blind carbon copies (
BCC) only. -
Define the Subject of the e-mail.
You can include any of the available Interpolations in this field. Simply click and select the appropriate one from the list.
-
To edit the Mail Content press the Edit mail content… button. A dialog will be opened with the details of the mail content. It is possible to define either an HTML or plain text content.
You can include any of the available Interpolations in this field. Simply click and select the appropriate one from the list.
When finished, Save your details and close the dialog.
-
Refer to Handling Mail Servers on how to create a mail server, and afterwards select a mail server from the Mail Server drop-down list.
-
Push the Save button.
You can test your settings using the Send Test Email button.
Handling Mail Servers
To create a Mail Server, perform the following steps:
-
Select from the top-level menu. Select . Choose .
-
Fill in a Name, an optional Description, and choose a Customer.
Choose either
SMTPorSMTPSfrom the Protocol drop-down list.Define the server hostname in Target and optionally the Port number.
Choose if or if not the server requires TLS (i.e. the so called
STARTTLSmethod).If your mail server requires authentication, please fill in a User and a Password.
-
Push the Create button to finish.
You can now use the mail server in the Mail Server field of the Email Output Channel.
Define a Log File Output Channel
In order to define a Log File Output Channel proceed as follows:
-
Select from the top-level menu. Select the Output Channels tab. Choose in the toolbar.
-
Fill in a Name and optionally a Description. The name of the Output Channel has to be unique.
-
If you plan to restrict the Output Channel to one or multiple Customers select the appropriate items from Customer Filter.
-
Choose one or more of the Supported Action Types.
Push the Next button.
-
-
Define a File Name. If you do not enter an absolute path to the file, the file location will be relative to the
log/notifierdirectory of the Avantra Master.You can include any of the available Interpolations in this field. Simply click and select the appropriate one from the list.
If you use Interpolations within this field you may face problems if the resolved value contains characters that are invalid for the use with file or directory names (e.g. the
NOTIFICATION_DATEInterpolation contains a colon:). In this case you should write${escapeFile(text)}instead of${text}.escapeFileis a method that escapes these characters probably. -
Define a Line Format.
You can include any of the available Interpolations in this field. Simply click and select the appropriate one from the list.
-
You may define a maximum length for every line in Line Length. By default this is unrestricted.
You may define a maximum size of the log file in field Maximum File Size. If the maximum file size is reached, a timestamp is appended to the file name and a new log file is created. Make sure you define a value ≥ 1 in Number of old Files to keep in this case.
-
Push the Finish button.
Define a Command Output Channel
In order to define a Command Output Channel proceed as follows:
-
Select from the top-level menu. Select the Output Channels tab. Choose in the toolbar.
-
Fill in a Name and optionally a Description. The name of the Output Channel has to be unique.
-
If you plan to restrict the Output Channel to one or multiple Customers select the appropriate items from Customer Filter.
-
Choose one or more of the Supported Action Types.
Push the Next button.
-
-
Define a Working Directory (optional). If you do not enter an absolute path to the file, the file location will be relative to the
tmpdirectory of the Avantra Master.You can include any of the available Interpolations in this field. Simply click and select the appropriate one from the list.
If you use Interpolations within this field you may face problems if the resolved value contains characters that are invalid for the use with file or directory names (e.g. the
NOTIFICATION_DATEInterpolation contains a colon:). In this case you should write${escapeFile(text)}instead of${text}.escapeFileis a method that escapes these characters probably. -
You may define a value for Command Timeout.
-
You have to define the command line call (i.e. the executable plus all the arguments) in the field Command Line.
In the next step you can also choose different commands per operating system or select the host(s) where to execute the command.
You can include any of the available Interpolations in this field. Simply click and select the appropriate one from the list.
If you use Interpolations within this field you may face problems if the resolved value contains quotes. In this case you should write
${escapeCmd(text)}instead of${text}.escapeCmdis a method that escapes these characters probably. -
Push the Finish button. The Output Channel detail view is opened automatically.
-
By default, the command is executed on the host running the Avantra Master. But you can also choose a different Scope: either the Server hosting the Managed Object the Notification Element is generated for, or an arbitrary set of Servers defined by a Selectors.
For command executed on remote hosts, it may be handy to define different commands for Unix and Windows hosts. Push New in order to add an additional command for a different platform. Adapt the OS field accordingly.
Push the Save button in case you made any modifications.
Define a Rewrite a template Output Channel
In order to define a Rewrite a template Output Channel proceed as follows:
-
Select from the top-level menu. Select the Output Channels tab. Choose in the toolbar.
-
Fill in a Name and optionally a Description. The name of the Output Channel has to be unique.
-
If you plan to restrict the Output Channel to one or multiple Customers select the appropriate items from Customer Filter.
-
Choose one or more of the Supported Action Types.
Push the Next button.
-
-
Define a File Name. If you do not enter an absolute path to the file, the file location will be relative to the
log/notifierdirectory of the Avantra Master.You can include any of the available Interpolations in this field. Simply click and select the appropriate one from the list.
If you use Interpolations within this field you may face problems if the resolved value contains characters that are invalid for the use with file or directory names (e.g. the
NOTIFICATION_DATEInterpolation contains a colon:). In this case you should write${escapeFile(text)}instead of${text}.escapeFileis a method that escapes these characters probably. -
Define a template text in Template.
You can include any of the available Interpolations in this field. Simply click and select the appropriate one from the list.
If you use Interpolation>s within this field you may face problems if the resolved value contains characters that have a special meaning in XML, like
<or>. In this case you should write${escapeXml(text)}instead of${text}.escapeXmlis a method that escapes these characters probably. -
Push the Finish button.
Define a Ticket Output Channel
In order to define a Ticket Output Channel proceed as follows:
-
Select from the top-level menu. Select the Output Channels tab. Choose in the toolbar.
-
Fill in a Name and optionally a Description. The name of the Output Channel has to be unique.
-
If you plan to restrict the Output Channel to one or multiple Customers select the appropriate items from Customer Filter.
-
Choose one or more of the Supported Action Types.
Push the Next button.
-
-
Define a Ticket Summary.
You can include any of the available Interpolations in this field. Simply click and select the appropriate one from the list.
-
Optionally, define a template text in Ticket Detail Description.
You can include any of the available Interpolations in this field. Simply click and select the appropriate one from the list.
-
Push the Finish button.
Define an AWS — Simple Notification Service Output Channel
In order to define an Output Channel proceed as follows:
-
Select from the top-level menu. Select the Output Channels tab. Choose in the toolbar.
-
Fill in a Name and optionally a Description. The name of the Output Channel has to be unique.
-
If you plan to restrict the Output Channel to one or multiple Customers select the appropriate items from Customer Filter.
-
Choose one or more of the Supported Action Types.
Push the Next button.
-
-
Create an AWS – Simple Notification Service record as described in Handling AWS SNS Services and select it from the Service drop-down list.
-
Define a Topic ARN.
For more information hover over (?).
-
Define an optional Subject.
For more information hover over (?).
You can include any of the available Interpolations in this field. Simply click and select the appropriate one from the list.
-
Define a Message.
For more information hover over (?).
You can include any of the available Interpolations in this field. Simply click and select the appropriate one from the list.
-
Define Attributes.
For more information hover over (?).
Handling AWS SNS Services
You need to create an AWS Simple Notification Service record in Avantra before you can make used of the AWS – Simple Notification service.
This record contains the credentials of an Amazon Web Services user with programmatic access and a customer managed policy policy attached.
See Procedure: Create an API User with minimum access to EC2 on how to create such an AWS user and a policy, but use the the following JSON policy instead:
{
    "Version": "2012-10-17",
    "Statement": [
        {
            "Sid": "AllowPublishToTopic",
            "Effect": "Allow",
            "Action": [
                "sns:Publish"
            ],
            "Resource": "*"
        }
    ]
}-
Select from the top-level menu. Select . Choose .
-
Fill in a Name, an optional Description, and choose a Customer.
Fill in the AWS Access Key ID, the AWS Secret Access Key, and choose a Region.
-
Push the Create button to finish.
You can now use the AWS – Simple Notification Service in the Service field of the AWS — Simple Notification Service Output Channel.
Define an AWS — SMS Output Channel
In order to define an Output Channel proceed as follows:
-
Select from the top-level menu. Select the Output Channels tab. Choose in the toolbar.
-
Fill in a Name and optionally a Description. The name of the Output Channel has to be unique.
-
If you plan to restrict the Output Channel to one or multiple Customers select the appropriate items from Customer Filter.
-
Choose one or more of the Supported Action Types.
Push the Next button.
-
-
Create an AWS – Simple Notification Service record as described in Handling AWS SNS Services for SMS and select it from the Service drop-down list.
-
Define a Sender ID.
For more information hover over (?).
You can include any of the available Interpolations in this field. Simply click and select the appropriate one from the list.
-
Choose a Mode. See also AWS - Worldwide SMS Pricing
-
Define a Max. Price (USD) you are willing to pay per text message. For more information hover over (?).
-
Define a Message.
You can include any of the available Interpolations in this field. Simply click and select the appropriate one from the list.
-
Select a value for Recipients.
-
Push the Save button.
Handling AWS SNS Services for SMS
You need to create an AWS Simple Notification Service record in Avantra before you can make used of the AWS – SMS service.
This record contains the credentials of an Amazon Web Services user with programmatic access and a customer managed policy policy attached.
See Procedure: Create an API User with minimum access to EC2 how to create such an AWS user and a policy, but use the the following JSON policy instead:
{
    "Version": "2012-10-17",
    "Statement": [
        {
            "Sid": "AllowSendSms",
            "Effect": "Allow",
            "Action": [
                "sns:SetSMSAttributes",
                "sns:Publish"
            ],
            "Resource": "*"
        }
    ]
}-
Select from the top-level menu. Select . Choose .
-
Fill in a Name, an optional Description, and choose a Customer.
Fill in the AWS Access Key ID, the AWS Secret Access Key, and choose a Region that supports SMS sending.
-
Push the Create button to finish.
You can now use the AWS – Simple Notification Service in the Service field of the AWS — SMS Output Channel.
Define an UI Browser Output Channel
In order to define an UI Browser Output Channel proceed as follows:
-
Select from the top-level menu. Select the Output Channels tab. Choose in the toolbar.
-
Fill in a Name and optionally a Description. The name of the Output Channel has to be unique.
-
If you plan to restrict the Output Channel to one or multiple Customers select the appropriate items from Customer Filter.
-
Choose one or more of the Supported Action Types.
Push the Next button.
-
-
Select a value for Recipient:
-
If you want this Output Channel to deliver only to a single user, select Single user. Choose a User from the User drop-down list. You can only select a User that has the Receive Notification Messages Permission for the Customers selected in Customer Filter.
-
If you want this Output Channel to deliver to a group of users, select Group of users. You can only select a Group that has a Role containing the Receive Notification Messages Permission for the Customers selected in Customer Filter.
-
If you want this Output Channel to deliver to to all Users of the selected Customers (or all Customers) that have the Receive Notification Messages Permission, select Users of selected/all customers.
Push the Next button.
-
-
Define a Message.
You can include any of the available Interpolations in this field. Simply click and select the appropriate one from the list.
-
Push the Finish button. The Output Channel detail view is opened automatically.
-
You can also select a Severity and upload an audio file for Audio Source. The audio file is played whenever a browser notification is generated.
Define a Mobile Output Channel
To define an Output Channel, proceed as follows:
-
Select from the top-level menu. Select the Channels tab. Choose in the toolbar.
-
Fill in a Name and optionally a Description. The name of the Output Channel has to be unique.
-
If you plan to restrict the Output Channel to one or multiple Customers select the appropriate items from Customer Filter.
-
Choose one or more of the Supported Action Types.
Push the Next button.
-
-
Select a value for Recipient.
-
If you want this Output Channel to deliver only to a single user, select Single user. Choose a User from the User drop-down list. You can only select a User that has the Receive Notification Messages Permission for the Customers selected in Customer Filter.
-
If you want this Output Channel to deliver to a group of users, select Group of users. You can only select a Group that has a Role containing the Receive Notification Messages Permission for the Customers selected in Customer Filter.
-
If you want this Output Channel to deliver to to all Users of the selected Customers (or all Customers) that have the Receive Notification Messages Permission, select Users of selected/all customers.
-
-
Push the Next button.
-
Define an Alert Message.
You can include any of the available Interpolations in this field. Simply click and select the appropriate one from the list.
-
Push the Finish button.
Define an EventLog Output Channel
|
This Output Channel is only available if the Avantra Master is running on Microsoft Windows operating systems. |
In order to define an EventLog Output Channel proceed as follows:
-
Select from the top-level menu. Select the Output Channels tab. Choose in the toolbar.
-
Fill in a Name and optionally a Description. The name of the Output Channel has to be unique.
-
If you plan to restrict the Output Channel to one or multiple Customers select the appropriate items from Customer Filter.
-
Choose one or more of the Supported Action Types.
Push the Next button.
-
-
Define a Message Format.
You can include any of the available Interpolations in this field. Simply click and select the appropriate one from the list.
-
You can also define an Event Source, Event Server, Event ID, Category ID, and select a Type.
-
Push the Finish button.
Define a REST Output Channel
| Consult the documentation of the REST API of the Web Service you plan to connect to. |
In order to define a REST Output Channel proceed as follows:
-
Select from the top-level menu. Select the Output Channels tab. Choose in the toolbar.
-
Fill in a Name and optionally a Description. The name of the Output Channel has to be unique.
-
If you plan to restrict the Output Channel to one or multiple Customers select the appropriate items from Customer Filter.
-
Choose one or more of the Supported Action Types.
Push the Finish button. The Output Channel detail view is opened automatically.
-
-
Define the REST API Url.
You can include any of the available Interpolations in this field. Simply click and select the appropriate one from the list.
-
Choose a Protocol, and the request Method.
-
You can define additional headers using the next to Headers.
-
If you desire authentication or authorization, you can choose between Basic and OAuth 2.0. For Basic authentication, fill in User and Password. For the setup of OAUth 2.0 see Using OAuth 2.0 with the RESTful Web Service Output Channel.
-
Push the Save button.
Define a ServiceNow Incident Output Channel
| This function is only available with the Avantra Pro Edition. |
Before you start, please perform the steps described in ServiceNow Integration, in particular Authorizing Avantra with ServiceNow.
To define a ServiceNow Incident Output Channel, proceed as follows:
-
Select from the top-level menu. Select the Output Channels tab. Choose in the toolbar.
-
Fill in a Name and optionally a Description. The name of the Output Channel has to be unique.
-
If you plan to restrict the Output Channel to one or multiple Customers select the appropriate items from Customer Filter.
-
Choose one or more of the Supported Action Types.
Push the Finish button. The Output Channel detail view is opened automatically.
-
-
Choose a value for ServiceNow Authentication, the Urgency.
-
Adapt Short Description and Additonal Comments, if desired.
You can include any of the available Interpolations in this field. Simply click and select the appropriate one from the list.
-
Push the Save button.
Use Additional Attribute Mapping
In order to map additional fields, proceed as follows:
-
In your ServiceNow instance, under System Definition search for
tablesand select it.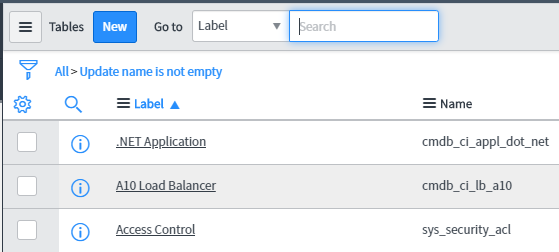
-
Search for
imp_incidentand select it. This table has been imported with the Avantra Integration:
-
Use New to create additional attributes:
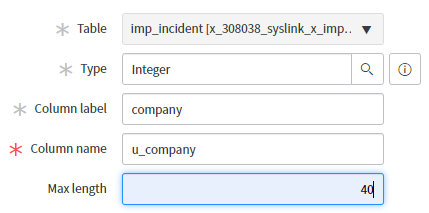
Please note that the field Column Name gets filled automatically. Keep a note of these values. You will need them later for the definition in the Output Channel.
-
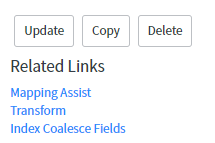
Map the new fields to the existing ServiceNow table, Search for
transformin your ServiceNow instance. Under Administration, click on Transfrom Maps. Select table Transform Incidents.
Map all the fields using the Mapping Assist:
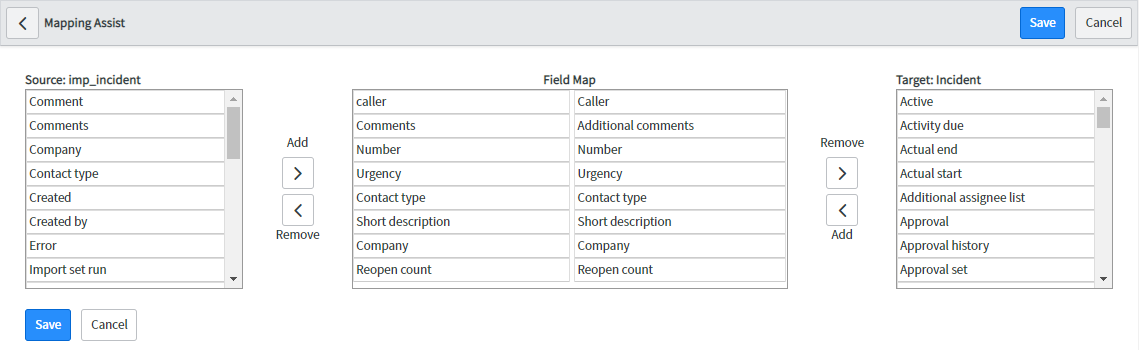
Push the Save button once you are done.
-
In Avantra UI, proceed to the ServiceNow Output Channel and fill in the mappings:

Define a SOAP Output Channel
| Consult the documentation of the Web Service you plan to connect to. |
In order to define a SAP Output Channel proceed as follows:
-
Select from the top-level menu. Select the Output Channels tab. Choose in the toolbar.
-
Fill in a Name and optionally a Description. The name of the Output Channel has to be unique.
-
If you plan to restrict the Output Channel to one or multiple Customers select the appropriate items from Customer Filter.
-
Choose one or more of the Supported Action Types.
Push the Finish button. The Output Channel detail view is opened automatically.
-
-
Define the WSDL Url.
You can include any of the available Interpolations in this field. Simply click and select the appropriate one from the list.
-
Choose a Protocol, and the request Method.
-
You can define additional headers using the next to Headers.
-
If authentication or authorization is needed, you can choose between Basic and OAuth 2.0. For Basic authentication, fill in User and Password. For the setup of OAUth 2.0 see Using OAuth 2.0 with the RESTful Web Service Output Channel.
-
Push the Save button.
Define a Cloud Automation Output Channel
| This function is only available with the Avantra Pro Edition. |
To define an Cloud Automation Output Channel, proceed as follows:
-
Select from the top-level menu. Select the Output Channels tab. Choose in the toolbar.
-
Fill in a Name and optionally a Description. The name of the Output Channel has to be unique.
-
If you plan to restrict the Output Channel to one or multiple Customers select the appropriate items from Customer Filter.
-
Choose one or more of the Supported Action Types.
Push the Finish button. The Output Channel detail view is opened automatically.
-
-
In Selection choose the Cloud Server you want to stop or start. This can be:
-
A single Cloud Server whose name you have to choose from the list in Server.
-
The affected Cloud Server. This is, for instance, the Server a notified Check is executed for.
This Selection usually is only useful for Server Checks. For other Notification Elements it may not have the desired result.
-
-
In Action, you can choose whether to start or stop the System.
-
Push the Save button.
Define a SAP Automation Output Channel
| This function is only available with the Avantra Pro Edition. |
To define an SAP Automation Output Channel, proceed as follows:
-
Select from the top-level menu. Select the Output Channels tab. Choose in the toolbar.
-
Fill in a Name and optionally a Description. The name of the Output Channel has to be unique.
-
If you plan to restrict the Output Channel to one or multiple Customers select the appropriate items from Customer Filter.
-
Choose one or more of the Supported Action Types.
Push the Finish button. The Output Channel detail view is opened automatically.
-
-
In Selection choose the Systems you want to stop or start. This can be:
-
A single SAP Instance or SAP System whose name you have to choose from the list in SAP System or SAP Instance, respectively.
-
The affected SAP Instance or SAP System. This is, for instance, the System a notified Check is executed for.
This Selection usually is only useful for SAP Instance or SAP System Checks. For other Notification Elements it may not have the desired result. -
A pre-defined or ad-hoc Selectors of SAP Instances or SAP Systems.
-
-
In Action you can choose whether to start the System or to perform a soft or hard shutdown. For a soft shutdown – which is only available for ABAP SAP Instances and SAP System – you can also define a soft shutdown timeout.
-
Push the Save button.
Define a Ticket Log Output Channel
|
This Output Channel is only available for Ticket Notification Actions. It modifies the Ticket that triggers the Notification Action. |
To define a Ticket Log Output Channel, proceed as follows:
-
Select from the top-level menu. Select the Output Channels tab. Choose in the toolbar.
-
Fill in a Name and optionally a Description. The name of the Output Channel has to be unique.
-
If you plan to restrict the Output Channel to one or multiple Customers select the appropriate items from Customer Filter.
-
Choose one or more of the Supported Action Types.
Push the Finish button. The Output Channel detail view is opened automatically.
-
-
Choose values for Type, Author, and Ticket Log. Optionally choose a New Status and if or if not the entry will be flagged Hidden.
-
Fill in a text for the Log Content.
You can include any of the available Interpolations in this field. Simply click and select the appropriate one from the list.
-
Push the Save button.
Define a Null Output Channel
To define Null Output Channel, proceed as follows:
-
Select from the top-level menu. Select the Output Channels tab. Choose in the toolbar.
-
Fill in a Name and optionally a Description. The name of the Output Channel has to be unique.
-
If you plan to restrict the Output Channel to one or multiple Customers select the appropriate items from Customer Filter.
-
Choose one or more of the Supported Action Types.
Push the Finish button.
-
Define a Composite Output Channel
To define a Composite Output Channel, proceed as follows:
-
Select from the top-level menu. Select the Output Channels tab. Choose in the toolbar.
-
Fill in a Name and optionally a Description. The name of the Output Channel has to be unique.
-
If you plan to restrict the Output Channel to one or multiple Customers select the appropriate items from Customer Filter.
-
Choose one or more of the Supported Action Types.
Push the Next button.
-
-
Fill in at least two Output Channels using , and for the second one choose whether it is executed in any case, only if the previous Output Channel fails, or only if the previous Output Channel succeeds. Repeat for a third, forth, and fifth Output Channel, if desired.
-
Push the Finish button.
|
You cannot add a Composite Output Channel into another Composite Output Channel. |
|
If you are working with Filter Lists and Output Channels and you are working with Macros, you will find a button Convert to FTL that allows you to convert them into Interpolations. |
Defining Actions
To configure a Notification Action, proceed as follows:
-
Select from the top-level menu. Select the Actions tab. Choose New in the toolbar. Select Action for Checks … from the drop-down list.
-
Fill in a Name and optionally a Description. The name of the Notification Action has to be unique.
Push the Next button.
-
Choose one of Select a Pre-Defined System Selector or Define specific 'Ad-Hoc' Custom Selection. In the first case choose the desired Check Selector from the list.
You can define a specific ad-hoc custom selection (which is only valid for this particular Notification Action if you have set the flag next to Define specific 'Ad-Hoc' Custom Selection.
-
Push the Create button.
-
Choose the Check Selector Type from the list and push Next.
-
Fill in selection criteria, push the Test Selector to verify the selection, and hit the Save & Close button.
-
-
Select the Status. Please note that you may also have included the check status in the Selector already. The values you choose here do further restrict the Selector. But they do not extend its selection.
-
You may choose if or if not this Notification Action shall confirm the check status (Confirm).
Push the Next button.
-
In the Output Channel drop-down list, select the output channel defined in Defining Output Channels. The other options are covered in Defining Filter Lists and Defining a Resolver.
-
You may restrict the Notification Action to certain Service Hours. (See also Defining Service Hours)
-
Switch to the Channels tab and add one or more of the Output Channels defined in Defining Output Channels.
-
Push the Finish button. The Notification Action detail view opens.
-
You can define resending options:
-
you may select if Notifications triggered by Check Confirmation are effective for this Notification Action. Select
UNCONFIRMED,CONFIRMED, orBOTHin Resend When Confirmation Changes To in this case. -
you may define an interval for periodic resending in Resend RTM Notifications Every (in minutes).
-
you may select if Notifications due to sub-status changes are effective for this Notification Action. Mark the check box Resend When RTM Sub-Status Changes in this case.
-
you have to select the check status that are effective for resending in Resend on Status. You can only select a subset of the overall values selected in Notification Status previously.
You need to choose at least one of them. Keep in mind that only the resending due to confirmation changes is effective for Daily Checks and Daily Check details.
-
-
Push the Save button.
You now have created a (minimum) Notification Action for Checks, consisting of only the trigger definition and an Output Channel.
|
The Notification Action is not active unless you push Activate. However, you may want to leave it deactivated until you have it successfully tested. |
-
Select from the top-level menu. Select the Actions tab. Choose New in the toolbar. Select Action for Changes … from the drop-down list.
-
Fill in a Name and optionally a Description. The name of the Notification Action has to be unique.
Push the Next button.
-
Fill in selection criteria, push the Test Selector to verify the selection, and hit the Save & Close button.
-
In Event choose the trigger criterion for the Notification. Select an Output Channel in Output Channel.
|
The Notification Action is not active unless you push Activate. |
-
Select from the top-level menu. Select the Actions tab. Choose New in the toolbar. Select Action for Tickets … from the drop-down list.
-
Fill in a Name and optionally a Description. The name of the Notification Action has to be unique.
Push the Next button.
-
Fill in selection criteria, push the Test Selector to verify the selection, and hit the Next button.
-
Select an Output Channel in Output Channel and push the Finish button.
-
You can adapt the Trigger Criteria: Choose Status and Priority in order to be notified if Ticket status or priority change to the selected values. You can also choose to be notified in case a new Ticket log entry is added, either by the
Owner, theCalleror both.The other options are covered Defining a Resolver.
-
You may restrict the Notification Action to certain Service Hours. (See also Defining Service Hours)
-
Push the Save button in case you made any changes.
-
Select from the top-level menu. Select the Actions tab. Choose New in the toolbar. Select Action for CCMS Alerts … from the drop-down list.
-
Fill in a Name and optionally a Description. The name of the Notification Action has to be unique.
Push the Next button.
-
Select the Status for the CCMS Alerts.
Push the Next button.
-
In the Output Channel drop-down list select the output channel defined in Defining Output Channels. The other options are covered in Defining Filter Lists and Defining a Resolver.
-
You may restrict the Notification Action to certain Service Hours. (See also Defining Service Hours)
-
Push the Finish button.
|
In the Channels tab you can define multiple Output Channels. If you fill in more than one, the Channels tab behaves like a Composite Output Channel. |
Verifying Action Results
Testing Check Actions
Once you have defined a new Notification Action, you should test it. You can choose if a test Notification Action shall run through the Output Channel or suppress it. If it runs through, the Notification is delivered indeed (e.g. you will find it in the defined log file, or a mail is sent), but it will not interfere with the other Notifications work flow, i.e. it will not increase Notification numbers, etc.
|
You should keep the Notification Action inactive while you perform testing and only activate it once you are satisfied with the test results. |
The test facility provides the option to select an existing Check, to apply the currently selected Notification Action to this Check, and to report the Notification Action result.
But you also have the option to overwrite the current Check properties with other values: assume the current check status is Ok but your Notification Action fires only for Critical states. In this case you can overwrite the check status and see what would happen if the check status was Critical. Or you perform testing during office hours and you would like to know how the Notification Action is processed during night time. Or what would happen if the particular check status has not change 10 minutes before, but 2 hours before. All these kind of modifications can be supplied within the test facility.
In order to test an Notification Action proceed as follows:
-
Select from the top-level menu. Select the Actions tab. Open the desired Notification Action and switch to the Test tab.
-
Select a Check Type and a Monitored System.
By default the selection boxes filter the Systems or the Checks not applicable to the defined Check selector. This can be turned off by clearing the Filtered by check selector box.
The field features a type-ahead search!
Depending on the selection, several other selection criteria have to be filled in:
-
In case of a RTM Check you have to select a Check from the drop-down lists.
-
In case of a Daily Check there is nothing left to do. The latest Daily Check is selected automatically.
-
In case of a Daily Check Detail, you have to select a Daily Check Detail (of the latest Daily Check).
-
-
By default Suppress Output Channel Delivery guarantees that Output Channel is not passed. Clear the flag otherwise.
-
You may override the current check status — select a Test Check Status.
-
You may override the current check message — fill in a value in Test Check Result.
-
You may select a different evaluation date and time, i.e. do as if this test would run at a different point in time — fill in values in Test Evaluation Date.
-
In case you want to test periodic resending, fill in values for Test Last Status Change Date, Test Last Notification Date, and optionally Test Notification Number.
-
You may also want to test the behaviour in case the Check is confirmed or unconfirmed.
-
Push the Test button. The result will be displayed in a pop-up.
-
You may modify the filled in values and repeat testing.
For this example, we define an Output Channel:
| Name |
Log to notifier_action.log |
| Customer Filter |
Empty |
| Support Action Types |
Checks |
| File name |
Leave default |
| Line Format |
Leave default |
We continue with a Notification Action for Checks:
| Name |
Check Action for AgentAlives |
| Define specific 'Ad-Hoc' Custom Selection |
Using 'Check' search criteria with Check Name only |
| Status | |
| Channels Tab |
Select the Output Channel#Log to notifier_action.log# as defined above |
Assume you test the defined Notification Action with the following parameters:
| Check Type: |
|
| Monitored System: |
|
| Check: |
|
| Suppress Output Channel Delivery: |
checked |
| Check Status: |
|
After pushing the Test, the output would be like:
INFO set evaluation time to: Mon Jan 25 13:39:06 CEST 2020.
INFO Mode: RTM Check.
INFO Load last check result:
Last message from Avantra Agent is at least 5:23:00 ([h]:mm:ss) old
INFO set last check date to: 2017-09-25 13:38:29
INFO set last status change date to: 2020-01-24 15:40:08
INFO Output channels will not deliver anything. (1)
INFO Set check status to [2] ([CRITICAL]) (2)
INFO Processing action 'Check Action for AgentAlives'. (3)
INFO ----------------------------------- MESSAGE  -----------------------------------
INFO Action 'Check Action for AgentAlives' applied to 'AGENTALIVE'.

INFO Message is: (4)
INFO - - - - - - - - - - - - - - - - - - - - - - - - - - - - - - - - - - - - - - - -
INFO Last message from Avantra Agent is at least 5:23:00 ([h]:mm:ss) old
INFO - - - - - - - - - - - - - - - - - - - - - - - - - - - - - - - - - - - - - - - -

INFO No resolver set.
INFO No filter list set.
INFO Delivery is suppressed.
INFO Channel 'Output Channel: Log to notifier_action.log'
INFO Generated notification message was suppressed.| 1 | The actual writing of the output is suppressed for testing purposes unless you clear the Suppress Output Channel Delivery flag. |
| 2 | The real check status is overridden by the value we defined in Test Check Status (i.e. Critical). |
| 3 | The name of the processed Notification Action |
| 4 | The check message as processed. |
Now we repeat the test as if we would try to resend the Notification after a certain period of time. Thus we have to provide values in the following fields:
| Notification Number |
|
| Evaluation Date |
now |
| Last Notification Date |
10 minutes in the passt |
| Last Status Change Date |
15 minutes in the past |
After pushing the bnt[Test] button the following result is shown:
INFO set evaluation time to: Mon Sep 25 13:46:00 CEST 2017. this timestamp.
INFO Mode: RTM Check.
INFO Load last check result:
Last message from Avantra Agent is at least 5:37:00 ([h]:mm:ss) old
INFO set last check date to: 2017-09-25 13:31:00
INFO set last status change date to: 2017-09-25 13:31:00
INFO Set check status to [2] ([CRITICAL])
INFO Processing action 'Check Action for AgentAlives'.
INFO Resend is not active on this action. Therefore notification number '2' can not be applied.
As you can see in the very last line, there was no resending defined for the action. So the selected Check is not being processed.
We modify the Notification Action used in the examples above and include a Service Hours record (see also Defining Service Hours).
-
Select from the top-level menu. Select the Actions tab. Open the desired Notification Action.
-
Choose a value for Service Hours.
-
Push the Save button.
In our example we choose the Service Hours record Office Hours.
Now we proceed to Test and provide the following values:
| Notification Number |
|
| Evaluation Date |
22:10 |
| Last Status Change Date |
22:05 |
As you can expect, this Check is also not going to be processed:
INFO set evaluation time to: Mon Sep 25 22:10:00 CEST 2017. Service hours do not cover this timestamp.Testing Actions for CCMS Alerts and Changes
Due to the more simple nature of CCMS Alerts and Changes in comparison with Checks, the testing facilities for the corresponding Notification Actions are simpler as well. The available options are self-explaining once you have understood the variant for Checks.
Getting Action Results
As you can see in Notification Action is pretty helpful. The same output is available once the Notification Action made active.
In order to process the recently defined Notification Action productively, we first have to set the Active flag.
-
Select from the top-level menu. Select the Actions tab. Open the desired Notification Action.
-
Push the Activate button.
Once a Check matches the trigger criteria of the defined Notification Action, the Notification Message is generated and stored in the Avantra Database.
It can be viewed at three different locations:
- From the Notification Action perspective
-
-
Select from the top-level menu.
-
Select the Messages tab.
-
- From Check perspective
-
See Working with RealTime Monitoring Results and Working with Daily Checks:
- For a RealTime Monitoring Check
-
-
Proceed to a Check list, for example, select , adjust your filter, if required, and choose the desired item from the list.
-
Push the Open button and proceed to the Notification Messages tab.
-
- For a Daily Check
-
-
Select , adjust your filter, if required, push the Open button and proceed to the Notification Messages tab.
-
- For a Daily Check Detail
-
-
Select , adjust your filter, if required.
-
Select the desired Daily Check Detail from the list and push the Notification Messages… button.
-
- From a global perspective
-
-
Select from the top-level menu.
-
Select the Messages tab.
-
Besides the Notification Element information, you can see the processing date of the Notification Action, the Notification Action status, and the Notification reason. For a more detailed view, double-click on the item.
In the Log field you see most of the details you already have seen during testing. Other information include the Notification Number, the Ntf.-Reason, and the First Attempt Date. More information is contained in the following sections.
|
There is a Test button on the Notification Messages tab in order to quickly run a test based on a given Notification Action result. |
Defining Filter Lists
|
The option to use Check and Change selectors as well as Service Hours in Notification Actions directly reduces the need to define Filter Lists tremendously. Even more, the usage of selectors provides a tremendous performance improvement. Filter Lists are available for Check and CCMS Alert Notification Actions. |
Avantra offers advanced filtering options for Notifications. A filter can be either certain Service Hours (in other words the definition of some time periods), or Service Hours combined with a filter expression.
|
The option to build Filters only on Service Hours is first of all provided for backward compatibility. You are encouraged to define Service Hours directly on the corresponding Notification Action instead. |
A Filter List is a list consisting of one or multiple filters. In this context they are also called Filter List Entries.
Filters are meant to be "positive", i.e. you define exactly which Notifications are supposed to "pass" the filter. If there are multiple filters defined in a Filter List, the list is processed until a filter is found that permits the Notification to "pass".
Only if no such filter is found the Notification is "blocked". In other words, multiple Filter List Entries are combined by a Boolean OR operator. Filter Lists are processed in the order of their definition, i.e. the top-most one of the list is processed first.
The reason why these OR-combined expressions are represented by an ordered list is because the Service Hours mentioned above can be defined overlapping.
There are the following options available for Filters:
- Simple Filter Lists
-
It is possible to restrict passing Notifications to certain Customers, System Roles, Checks, check status, Notification numbers, or a combination of these using simple select boxes. See Defining Simple Filter Lists.
- Advanced Filter Lists
-
In addition to the Simple Filter List you can define virtually any expression in an Expression Editor to define which Notifications to pass. See Defining Advanced Filter Lists.
|
If you are working with Filter Lists and Output Channels and you are working with Macros, you will find a button Convert to FTL that allows you to convert them into Interpolations. |
Defining Simple Filter Lists
Perform the following steps in order to create a Simple Filter List:
|
Simple Filter Lists are useful in conjunction with Notifications for CCMS Alerts. If you notify Checks, almost any function of the simple Filter List can be implemented by means of a selector, which is the far better choice from a performance perspective. However, see the end of this section for a general discussion about Filters and Selectors. |
-
Choose one of the following options:
- Creating a Simple Filter List from scratch
-
-
Fill in a Name and optionally a Description. The name of the Filter List has to be unique. If you do not want the Filter List to be active immediately, clear the Active flag.
-
Press the Next button.
-
Fill in a Name for the Filter List Entry and choose a value for Service Hours and push the Next.
Unless you are sure you need multiple Filter List Entries, you most likely want to choose the
7 x 24 hoursService Hours.
-
- Adding a Simple Filter List Entry to an existing Filter List
-
-
Select from the top-level menu. Select the Filter Lists tab.
-
Choose the appropriate Filter List
-
Push the New … button in the Entries section.
-
Fill in a Name and choose a Service Hours record. Press the Next button.
-
-
Select appropriate values for at least one of the following lists: Customer, System Role, Monitored System, Check, Check Status. Push the Next button.
-
You may also choose an Escalation Type, i.e. define the number(s) or number ranges of Notifications you want to pass. Select the appropriate item from the check boxes and fill in values in the field Notification Number(s).
Escalation only works for Notification Actions having resending defined, i.e. in Notification Actions for RealTime Monitoring Checks.
-
Push the Finish button.
Consider you have defined one or more CCMS Custom Checks and chosen to report the CCMS Alerts to Avantra. If you only want to notify these CCMS Alerts for e.g. dedicated Customers or System Roles, a Simple Filter is a good choice.
Defining Advanced Filter Lists
We provide a slightly more complex example that cannot be accomplished with a Simple Filter List. Assume you want to forward RealTime Monitoring Check Notifications for every Critical Check Result, but only once. And you have a couple of Checks you consider important for immediate Notification. And the remaining Checks you want only be forwarded if they stay in Critical status for more than 15 minutes. In this case you need an Advanced Filter List:
(
  InList('${check.name}','AgentConnect','RFCCONNECT','SystemAlive',
    'PI_CONNECT', 'J2EECONNECT','TREX Connect','DBCONNECT',
    'WD_Connect','AGENTALIVE')

  and
    ${notification.number}==1
)
or
(
  (
    not InList('${check.name}','AgentConnect','RFCCONNECT','SystemAlive',
            'PI_CONNECT','J2EECONNECT','TREX Connect','DBCONNECT','WD_Connect',
            'AGENTALIVE')
    )
    and ${check.statusAgeInSeconds}>900
    and ${notification.lastCheck.status}!=${check.status}
)
The meaning of this expression is:
-
It passes the Checks AgentConnect, RFCConnect, SystemAlive, PI_CONNECT, J2EECONNECT, TREX Connect, DBCONNECT, WD_Connect, and AGENTALIVE once if they are created or the check status changes.
-
All other Checks are passed only, if they remain in its check status for more than 900 seconds (i.e. 15 minutes), and if the current check status is different from the previoulsy notified one.
The last part of the expression assures that although we will use periodic resending in the Notification Action only a single Notification passes.
For a formal description of the Advanced Filter syntax see Reference: Advanced Filter Syntax.
-
Create a Simple Filter List as described in Procedure: Defining Simple Filter Lists.
-
Open the newly created Filter List Entry and push the Convert button. Push Yes on the pop-up.
-
Open the converted Filter List Entry.
-
Modify your expression. There is a Content Assist available hitting
Ctrl-Space.The editor verifies your expression on the fly.
-
Push the Save button.
We implement the Filter outlined in Example for a complex Filter expression.
-
Create a Simple Filter List as described in Procedure: Defining Simple Filter Lists.
Flag the following Checks:
AgentConnect, RFCConnect, SystemAlive, PI_CONNECT, J2EECONNECT, TREX Connect, DBCONNECT, WD_Connect, and AGENTALIVE
Select filtering of a single Notification and enter
1in the filed Notification Number. -
Open the newly created Filter List Entry and push the Convert button. Push Yes on the pop-up.
-
Open the converted Filter List Entry. It should look like:
InList('${check.name}','AgentConnect','RFCCONNECT','SystemAlive','PI_CONNECT', 'J2EECONNECT','TREX Connect','DBCONNECT','WD_Connect','AGENTALIVE') and ${notification.number}==1 -
Extend the expression as shown in Example for a complex Filter expression and push the Save button.
Include the recently created Filter List in a Notification Action that selects e.g. all Critical RealTime Monitoring Checks, notifies all Critical check status, and resends every 10 minutes Critical check status.
You may use the testing facility to verify your filter.
Reference: Advanced Filter Syntax
The following list describes the elements available in an Advanced Filter expression:
-
The filter should be surrounded by brackets
(). -
The filter may contain any of the provided Interpolations.
-
Macros of type String must be quoted by use of the single quote
'. -
Any other string used in comparison or in the
InListor in theLikefunction must be quoted as well. -
A filter can be created by logically grouping conditional expressions. The following conditional operators are available:
and,or,not. -
The most simple conditional expressions are:
-
The number
0. This expression is always false. -
Any positive or negative number. This expression is always true.
-
The empty string
''. This expression is always false. -
Any other string. This expression is always true.
-
-
A string expression has the format string <op> string with <op> one of the operators
-
lt: string-wise less than -
gt: string-wise greater than -
le: string-wise less than or equal -
ge: string-wise greater than or equal -
eq: string-wise equal -
ne: string-wise not equal
-
-
A conditional numerical expression has the format number <op> number _ with _<op> one of the operators
-
<: numerically less than -
>: numerically greater than -
⇐: numerically less than or equal -
>=: numerically greater than or equal -
==: numerically equal -
!=: numerically not equal
-
-
For strings as well as numbers, there is a
InListfunction with syntax:InList(<macro>, <item 1 >, …, <item n >). This expression evaluates true if the<macro>is equal to one of the list items from<item 1 >to<item n > -
For strings there is a
Likefunction with syntaxLike(<macro>, <pattern>)where<pattern>is a string that may contain the wildcards?and*. This expression evaluates true if the<macro>matches the<pattern>. Matching is performed always at the beginning and the end of the string, so you may want to use*at the beginning and/or end of the<pattern>for in-string matches. -
Basic arithmetic expressions can be used as well within filters. The arithmetic operators comprise
+,-,*,/,%(the modulus operator).
Using Global Expressions
Global Expressions are available to re-use certain parts of a Filter. Assume you have a certain expression you use in many of your Filters. Whenever you need to change this expression, you have to adapt all Filters. But you can also define the common parts in a Global Expressions and include this one in your Filters.
-
Select from the top-level menu. Select the Global Expressions tab. Push the New button.
-
Fill in a Name.
-
Fill in an expression.
-
Push the Create button.
If you create a Global Expressions with name globalExpression, you would reference it as <@globalExpression />. (If you have defined the Global Expression in the previous version of Avantra already, you can still reference it as %%globalExpression%%. However, this syntax is deprecated.)
If you define a Global Expressions isImportantCheck with value
InList('${check.name}','AgentConnect','RFCCONNECT','SystemAlive','PI_CONNECT',
                    'J2EECONNECT','TREX Connect','DBCONNECT','WD_Connect','AGENTALIVE')
and a Global Expressions firstNotificationAfter15Minutes with value
(${check.statusAgeInSeconds}>900 and ${notification.lastCheck.status}!=${check.status})you can simplify Example for an Advanced Filter Entry to
(<@isImportantCheck /> and ${notification.number}==1)
    or
(not <@isImportantCheck /> and <@firstNotificationAfter15Minutes />)
Defining a Resolver
As we have already seen you can use all the provided Interpolations to format the data you use in Output Channels. But what if the provided data is not sufficient to connect to, for example, your third-party monitoring systems? One of the most common "problems" is that other monitoring applications do use other numerical or string representations for the severity of an issue than Avantra does. Avantra maps the numerical severity values from -2 to 2 to the string values Disabled, Unknown, Ok, Warning, Critical.
In order to cope with these kind of things easily, Avantra provides the so-called Resolver. A Resolver can replace the values of some standard Interpolations or add new Interpolations for use in Output Channels and Filter expressions.
Avantra provides two kinds of (Custom) Resolvers:
- Simple Resolver
-
A simple Resolver allows to replace the values of the check status directly with values different from Disabled, Unknown, Ok, Warning, Critical. In addition, it allows to replace newline characters easily with a different value which is a convenient way to fit, for example, values of Interpolations having line breaks into a single log entry.
- Resolver with Executable
-
In a Resolver with Executable you can provide your own program or script that adds new variables.
Defining a Simple Resolver
Perform the following steps in order to define a simple Resolver:
-
Select from the top-level menu. Select the Resolvers tab.
-
Select .
-
Fill in a Name and optionally a Description.
-
Choose Simple Resolver and push the Next button.
-
If you want to replace newlines, fill in a value for Replace `Newline´.
The following keywords are available in addition to any other character:
[blank]for a space,[tab]for a tabulator, and[newline]for a newline itself. -
If you want to replace any of the standard check status strings, fill in values into the fields Replace `Disabled´, Replace `Unknown´, Replace `Ok´, Replace `Warning´, Replace `Critical´.
-
Push the Finish button.
Defining Resolver with Executables
We first describe how to create a Resolver with Executable. However, we urgently recommend to work through Resolvers.
-
Select from the top-level menu. Select the Resolvers tab.
-
Select .
-
Fill in a Name and optionally a Description.
-
Choose Resolver with Executable and push the Next button.
-
Fill in the Command Line.
You can include any of the available Interpolations in this field. Simply click and select the appropriate one from the list.
You may fill in a Working Directory and a Execution Timeout.
-
For every new Interpolation the executable defines perform the following steps:
-
Push the + button.
-
Fill in the Interpolation name and select the appropriate data type.
-
Push the Add button.
-
Repeat the steps for all new Interpolations.
-
-
Push the Finish button.
In order to reference the newly defined Interpolations in a Filter List or an Output Channels, you need to add the object name resolver, i.e. if you have added the Interpolation myText, you have to use it as ${resolver.myText} in an advanced Filter List or an Output Channel.
|
You will still be able to reference a newly created Interpolation In the old syntax, it was possible to override existing Macros. If your executable returned CHECK_STATUS_STRING = FATAL this value replaced the original value of the Macro. While this is still possible with Avantra 20.5, it is as well deprecated and you are strongly discouraged to do so. If you want to use the same Interpolation in a Filter or an Output Channel for Notification Actions with and without a Resolver, or you want to return new Interpolations in some cases only, make use of a Global Expressions: Define a Global Expressions and use it as |
In production environments, things are probably more complicated. Assume you have a third-party monitoring system that uses a more fine-grained severity, a string severity FATAL if, for example, the important Checks AGENTALIVE and SystemAlive are Critical in Avantra.
In order to achieve this, you need a custom executable or a custom script that adds new Interpolations depending on the condition mentioned above. As an example, we use a script that writes the following output
checkStatusString = FATAL
text = Check Status increased by custom resolvercheckStatusString = [the original value]
text = Check Status as provided by {avantra}otherwise.
The following perl script may be used to achieve the requested results if it is called with ${check.statusString} and ${check.name} as arguments:
#!/usr/bin/perl
#
# Usage: check_status_resolver.pl ${check.statusString} "${check.name}"
#
# This script is called with the numeric check status provided
# by {avantra} and the check name.
# If the check name represents one of our <important> checks, and
# the ${check.statusString} is CRITICAL in {avantra} we
# return a new status with value set to 'FATAL'
#
# We also provide a modification.Text that indicates if we have
# changed any value or if it comes from {avantra} originally

use strict;
use English;

use constant MESSAGE_UNMODIFIED =>
'Check Status as provided by {avantra}';
use constant MESSAGE_MODIFIED =>
'Check Status increased by custom resolver';

# These are considered the most important checks:
my %importantChecks =
map { $_ => 1 } qw(AGENTALIVE SystemAlive);

my ($outputCheckStatusString, $outputResolverModification);

# Get the command line arguments and verify
my ($inputCheckStatusString, $inputCheckName) = @ARGV[0,1];
unless (defined $inputCheckStatusString and defined $inputCheckName) {
    print STDERR "Insufficient arguments\n";
    exit 1;
}

if ($inputCheckStatusString eq 'CRITICAL' and $importantChecks{$inputCheckName} ) {
    $outputCheckStatusString = 'FATAL';
    $outputResolverModification = MESSAGE_MODIFIED;
} else {
    $outputCheckStatusString = $inputCheckStatusString;
    $outputResolverModification = MESSAGE_UNMODIFIED;
}

print "checkStatusString = $outputCheckStatusString\n";
print "text = $outputResolverModification\n";
exit 0;
We create a Write into a log file Output Channel, the Resolver mentioned above and a Notification Action sending RealTime Monitoring Checks while using those two objects:
| Name |
|
| Support Action Types | |
| File Name |
|
| Line Format |
|
| Name |
|
|
Macros
Name |
|
| Type |
|
| Name |
|
| Type |
|
| Command Line |
|
| Working Directory |
|
| Name |
|
|
Define specific 'Ad-Hoc' Custom Selection
Check Selector Type |
|
| Check Search Criteria |
Select check status Critical and Warning |
| Service Hours |
|
| Notification Status |
|
| Output Channel |
|
| Custom Resolver |
|
We will run the Test using the following values:
| Monitored System: |
|
| Check: |
`SystemAlive [RTM] ` |
| Suppress Output Channel Delivery: |
cleared |
| Check Status: |
|
The output will be like:
INFO Mode: RTM Check.
INFO Load last check result:
Database server is paragon
DBCONNECT check is OK for PIP
Central instance is paragon_PIP_00
ABAP central services instance is paragon_PIP_01
J2EE central services instance is paragon_PIP_02
RFCCONNECT check is OK for paragon_PIP_00
J2EECONNECT check is OK for paragon_PIP_00
ASCS_MSGSRV check is OK for paragon_PIP_01
SCS_MSGSRV check is OK for paragon_PIP_02
INFO set last check date to: 2017-10-06 07:06:57
INFO set last status change date to: 2017-10-03 11:28:55
INFO Set check status to [2] ([CRITICAL])
INFO Processing action 'Log WARNING and CRITICAL RTM'.
INFO ----------------------------------- MESSAGE  -----------------------------------
INFO Action 'Log WARNING and CRITICAL RTM' applied to 'SystemAlive'.

INFO Message is:
INFO - - - - - - - - - - - - - - - - - - - - - - - - - - - - - - - - - - - - - - - -
INFO Database server is paragon
DBCONNECT check is OK for PIP
Central instance is paragon_PIP_00
ABAP central services instance is paragon_PIP_01
J2EE central services instance is paragon_PIP_02
RFCCONNECT check is OK for paragon_PIP_00
J2EECONNECT check is OK for paragon_PIP_00
ASCS_MSGSRV check is OK for paragon_PIP_01
SCS_MSGSRV check is OK for paragon_PIP_02
INFO - - - - - - - - - - - - - - - - - - - - - - - - - - - - - - - - - - - - - - - -

INFO Resolver 'Increase Severity for important Checks'.
INFO Executing command line: '[perl, check_status_resolver.pl, CRITICAL, "Check Status as provided by {avantra}"]'.
INFO Adding custom variable [%%checkStatusString%%] with value [CRITICAL]
INFO Adding custom variable [%%text%%] with value [Check Status as provided by {avantra}]
INFO No filter list set.
INFO Initial -> Scheduled: Enqueue message
INFO ----------------------- Run Output Channel, Attempt # 1  -----------------------
INFO Resolving following variables:
INFO OC ['Write to notifier_action.log']: logged 480 characters to file [/syslink/master/log/notifier/notifier_action.log].
INFO Scheduled -> OkSent: OC 'Write to notifier_action.log': Successfully sent!
And the output in `notifier`action.log_:
2017-10-06 07:07:16+0200: Status [CRITICAL] for [PIP [SystemAlive]]: Database server is paragon
DBCONNECT check is OK for PIP
Central instance is paragon_PIP_00
ABAP central services instance is paragon_PIP_01
J2EE central services instance is paragon_PIP_02
RFCCONNECT check is OK for paragon_PIP_00
J2EECONNECT check is OK for paragon_PIP_00
ASCS_MSGSRV check is OK for paragon_PIP_01
SCS_MSGSRV check is OK for paragon_PIP_02 [Note: Check Status as provided by {avantra}]
Works as expected.
|
Please review any Filter List eventually included in a Notification Action that also includes a Resolver. If add values you will probably need to adapt your Filter Lists. |
Converting an Action into a confirming Action
There is one final feature of Avantra Notifications we have not yet covered. Notification Actions can be used to confirm RealTime Monitoring and Daily Checks.
|
It is not possible to confirm a single Daily Check detail, a Change or a CCMS Alert. |
There are a few important things to note about confirming Notification Actions:
-
Only unconfirmed Checks can be confirmed. If an Notification Action is supposed to confirm a Check that is already confirmed, it does neither update the confirmation message, nor any confirmation time limit.
-
RealTime Monitoring Checks are only confirmed if they have not changed their check status until the time of confirmation. In theory a Notification may be triggered and remain in pending state for a while until it succeeds to confirm. In the meanwhile the check status might have changed. In this case the confirmation will be suppressed.
-
Notification Actions are processed by priority, i.e. they are processed in the order they appear in the Actions tab. If one of the Notification Actions has confirmed a Check other Notification Actions processed later will not confirm (this is virtually the first item rephrased).
-
Avantra confirms Checks with the built-in user
messenger. There is no option to change this. -
Notification Actions do only confirm if a Notification passed the Output Channel. If a filter blocks, the Notification Action does not perform confirmation.
|
Do not let the Notification Action confirm if the Notification Action itself is triggered by a Check Confirmation! |
In order to make an existing Notification Action a confirming Notification Action, proceed as follows:
-
Select the Notification Action in question and open it. Unless you have defined an Notification Action operating only on Daily Check details there is a Confirm RTM/Daily Check: radio button.
-
Select Confirm on successful output channel message in case you want the Notification Action to confirm if one of the defined Output Channel succeeds
-
You may define a Confirmation Timeout. If so, the Check will automatically be unconfirmed after the timeout has passed. or if the check status changes.
If you leave the field blank the Check is confirmed until the check status changes.
This works for RealTime Monitoring Checks only.
-
Push the Save button in order to finish.
Defining Notifications [Customer]
To create an all-in-one Notification Action perform the following steps:
-
-
If you are in the role of a Customer: Choose
-
If you are in the role of a Service Provider: Choose ]
-
-
Create an Notification Action as defined in Defining Actions.
-
Switch to the Channels tab and define one or more Output Channels according to the description in Defining Output Channels.
-
If desired, switch to the Filter tab and define one or more Filter Lists according to Defining Filter Lists.
-
If desired, switch to the Resolver tab and define a Resolver according to Defining a Resolver.
-
Switch to the Test tab and test the Notification Action according to Testing Check Actions.
Disabling Notifications
There are several ways to disable Notifications:
- Disable all Notifications
-
Choose and push the Disable Notifier switch.
- Users can disable the personal Notifications
-
-
Choose User Settings from the header.
-
Set the Disable Notifications flag and push OK to save the setting.
-
- Or you can disable Notifications for particular Checks
-
- For a RealTime Monitoring Check
-
-
Proceed to a Check list, e.g. select , adjust your filter, if required, and choose the desired item from the list.
-
Select .
-
- For Checks from a System perspective or from a Parameter Set
-
Follow the procedure described in Disabling and Enabling Checks, but with the Check Notification tab instead of the Check Execution tab.
- You can also disable Notifications using a Maintenance Window
-
Follow the Procedure: Defining a Maintenance Window and choose for During maintenance: the value
leave monitoring ON.
Predefined Notification Templates
If Avantra is installed the very first time on a new system, some predefined Notification Actions and Output Channels are automatically created. The predefined Notification Actions and Output Channels might help you to create your own notification rules. The names of the predefined Notification Actions and Output Channels start with TEMPLATE. You can copy, and or modify the predefined Notification Actions and Output Channels to your needs. If you delete them, Avantra does not recreate them again. The predefined Notification Actions and Output Channels are not active after a fresh installation.
Notification Action name |
Type |
Usage |
TEMPLATE Avantra License |
Notify of license notification of the Avantra server. Alarm x days before. |
|
TEMPLATE Critical system health |
RTM |
Raise an event in case of critical checks status |
TEMPLATE Critical Checks |
RTM |
Raise an event in case of checks turning to CRITICAL |
TEMPLATE Backup critical events |
RTM,Daily Check |
Raise event in case of backup problems |
Output Channel name |
Description |
TEMPLATE Email to administrators for Avantra server events |
SMTP Servers and Administrator’s email should be modified appropriately. |
TEMPLATE Email to administrators for Changes |
SMTP Servers and Administrator’s email should be modified appropriately. |
TEMPLATE Email to administrators for Check notification |
SMTP Servers and Administrator’s email should be modified appropriately. |
Recommendations and Remarks
This section contains some remarks and recommendations you should consider while defining Notification Actions. Most of them are implied by performance consideration.
- Be as specific as possible while defining trigger criteria
-
The more specific you define the Notification Actions properties (first of all by using selectors, but also defining Notification Reason, Status, Resending, etc.) the less is the number of processed Notification Elements, and the better is the overall performance of this Notification Action.
It is much more efficient to trigger Notification Actions only for e.g. Critical and Warning Check states instead of trigger Ok Checks also and define a filter that blocks all Ok Notifications again.
- Do you really need Notifications for Ok check status?
-
Especially in large scale environments you should consider carefully if you really need to notify Ok check status. Usually the vast majority of your Checks will be in Ok state. Thus processing Ok messages — first of all when it comes to resending — may be expensive in terms of processing time.
- Keep Resolver executables small and fast
-
If you use a custom executable or script in a Resolver make sure it terminates quickly again. Please note that this custom executable is called for every Check processed by the Notification Action the resolver is linked to. Resolvers running multiple seconds (e.g. while picking some bits and pieces from your enterprise data warehouse) will spoil your Notification process!
Consider using signal handlers (on Unix-like operating systems) if your executable has the slightest chance to hang for whatever reason.
- Keep external command Output Channels small and fast
-
This is for the same reason as outlined in the previous paragraph.
- Use proper exit states for external commands
-
In custom resolver executables and external command Output Channels use exit state
0to indicate the program ran successfully. Use an exit state different from0in case of a problem.