Avantra Mobile App
Avantra Mobile App provides an intuitive mobile interface to Avantra, a System Management application for all SAP® Solutions and major databases, like Oracle®, IBM DB2®, MaxDB, and Microsoft® SQL Server®.
Avantra Mobile App offers you immediate access to your Avantra installation, all you need to do is to provide your Avantra server https URL and your credentials. There is no further configuration work required.
With Avantra Mobile App you can:
-
Get instant system landscape status overview
-
React on issues immediately - confirm check results or pause monitoring
-
Contact impacted customers directly by phone, email, or text message
Installing Avantra Mobile App
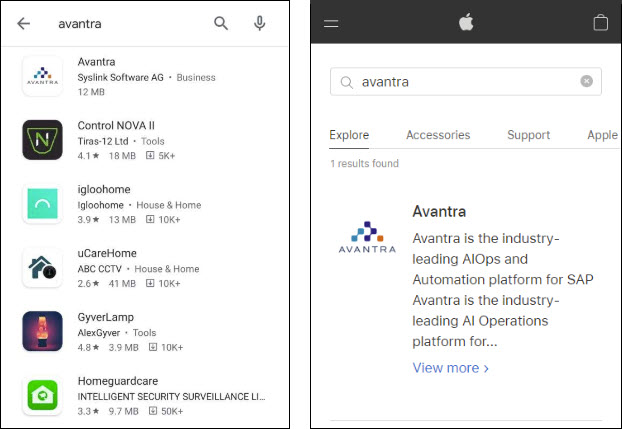
Avantra Mobile App is available on Android and iOS mobile devices. To install the application on your mobile device, simply type in “Avantra” in Google Play Store or in Apple App Store and tap Install:
Once installed, tap the Avantra icon in the list of installed applications to launch Avantra Mobile App.
Creating a Server
Before you can start monitoring your SAP landscape, you need to add the Avantra Server to the mobile app.
-
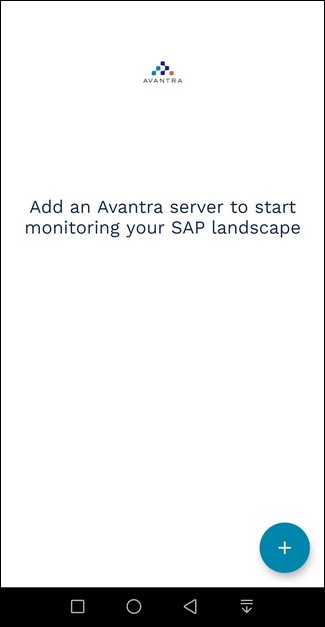
Open the application.
The welcome screen is displayed where you are proposed to add a new server.
-
Click the icon.
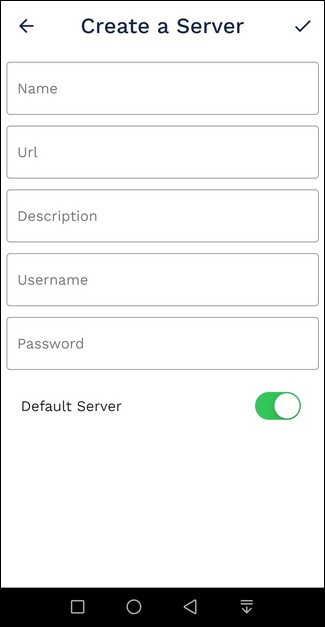
The Create a Server dialog opens.
-
Fill in the following fields:
-
Name - descrptive name for your server
-
URL - link to the server where the Avantra UI is installed. The server must be communicating via the HTTPS protocol and be accessible to the public (e.g. in a DMZ, not on a private network, etc.)
-
Description - optional field
-
Username - the User ID of the existing user on the Avantra server you are connecting to
-
Password - the password for the User ID
-
Default Server - if enabled, the system will automatically open this server next time you open the application. If this option is not selected for any of the added servers, the system will display the Registered Servers screen with the list of added servers.
-
-
Tap the check mark icon in the top-right corner of the screen to add the server to the application.
If configured correctly and the server is reachable, the system opens the added server. To add more servers, tap the Avantra logo at the top-left corner of the screen and repeat the process. To edit the server, tap and hold the server’s name until the server details screen appears. Alternatively, swipe the name of the server to the right and tap the Pencil icon. To delete the server from the list, swipe its name to the left and tap the Trash box icon.
Systems Monitoring
Once you enter the server, the Monitored Systems screen is displayed:
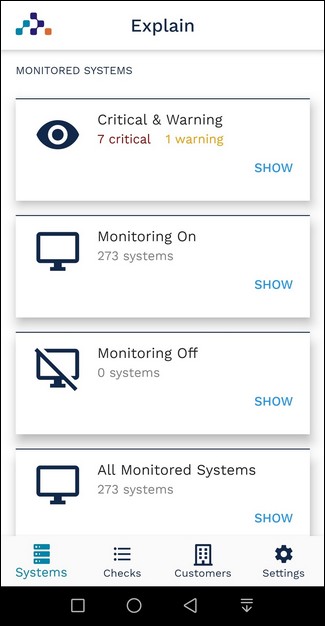
From this screen you can:
-
View the systems in the Critical and Warning states
-
View the systems with monitoring on
-
View the systems with monitoring off
-
View all monitored systems
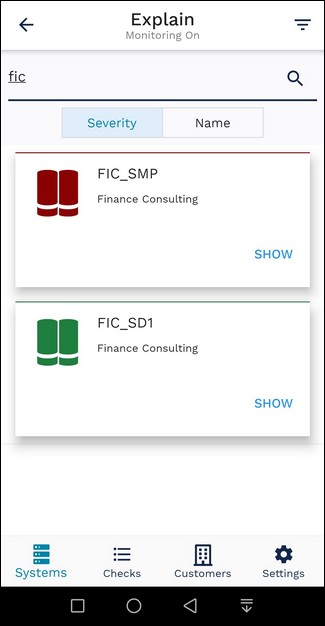
Tapping on the correspondent option opens the screen with the list of monitored systems:
 - Server
 - SAP system
 - SAP instance
 - Database
 - Business service
 - SAP business object
 - Cloud service
The color of the icon reflects the system’s status: Red > Critical, Yellow > Warning, Green > OK, Grey > data is not available.
You can search for a system or filter systems by Severity or Name by tapping the  icon at the top-right corner of the screen:
Tapping on a system opens the detailed information about it:
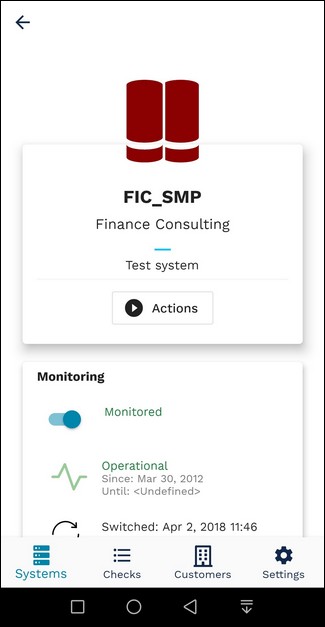
From the system’s screen you can:
-
Execute an action by tapping the Actions button. The list of actions available for the system depends on the type of the system you are currently viewing and varies for each type.
-
Add or remove the system from being monitored by toggling the Monitored option.
-
Go to the system’s checks.
-
View additional information about the system.
Every screen within the Systems menu can be refreshed by swiping down.
Checks Management
The Checks screen of the application allows you to monitor and manage all checks from all systems.
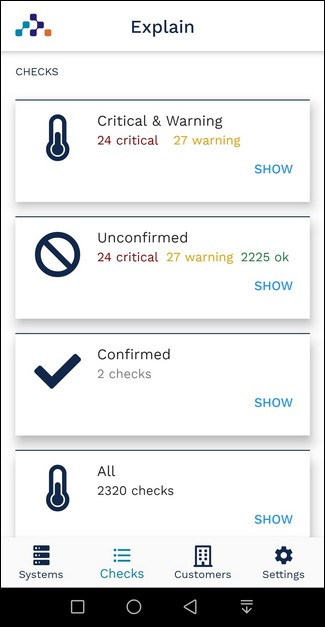
The screen has four tabs grouping the checks into the following categories:
-
Critical & Warning - shows the checks in Critical and Warning statuses
-
Unconfirmed - shows all unconfirmed checks
-
Confirmed - shows all confirmed checks
-
All - shows all checks
Tapping on any of the tabs opens the checks within it.

Each check in the list provides information about its name, status change date and time, the system it is assigned to and a short description of the latest action. The colored pictogram to the left of the check’s name depicts the severity status: Red > Critical, Yellow > Warning, Green > OK, Grey > Disabled and Purple > Unknown. The confirmed checks have a white checkmark inside the pictogram.
You can search for a check or filter checks by Severity, Name or Last Refreshed by tapping the icon at the top-right corner of the screen.
Tap the check to go to its details screen.

From the check’s details screen you can view its full description, confirm the check or go to the system the check is assigned to.
To confirm the check, tap the Confirm button. The Confirm Check screen is displayed.
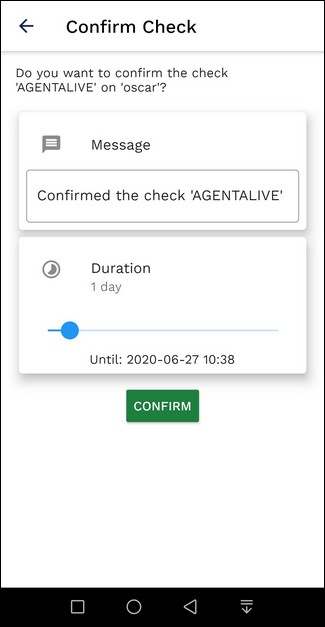
On this screen you can:
-
Enter the confirmation message which is displayed in the Confirmation section of the confirmed check. The default confirmation message is configured on the Settings screen.
-
Select the confirmation duration.
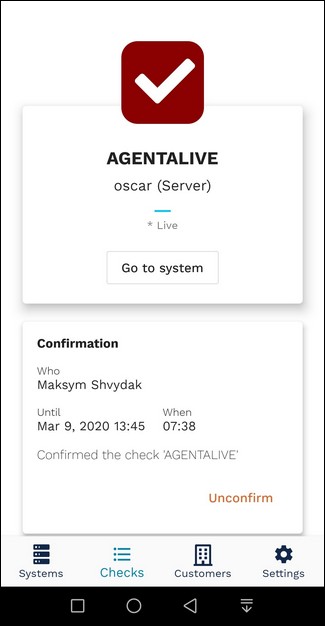
Tap Confirm to confirm the check and go to its details screen where you can see the confirmation info. From here you can also unconfirm the check or go to the check’s system.
Every screen within the Checks menu can be refreshed by swiping down.
Customers
The Customers screen lists all customers added to the system.

Tapping the customer’s name opens the Customer Details screen where you can view the customers’ details (Timezone and SAP number) and contact information (website, email, phone, mobile and fax).
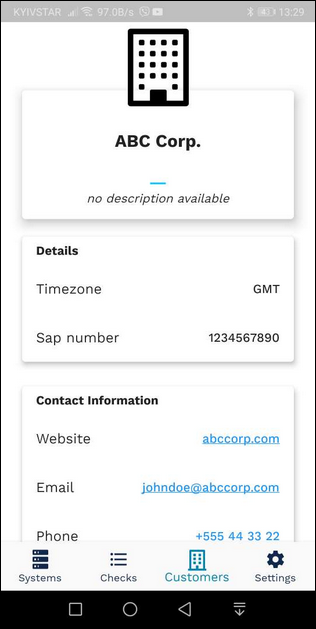
The contact information needs to be configured in Administration > Customers > Customer settings.
Settings
The Settings screen allows you to change the following application options:
-
Push Notifications - toggles the push notifications for the application
-
Analytics - toggles collection of user data for analytics
-
Check Confirmation
-
Message - enter the default message to be applied to confirmed checks
-
Duration - define the default confirmation period
-
-
About - opens the Avantra.com website in browser
Sending Push Notifications to Application
In a Production setup you can use the Notification Management service of the Avantra Server to automatically push alerts. For more information, refer to Setting Up the Notification Process.
It is also possible to send push notifications to Avantra users via Avantra-CLI with the send-push command. For more information, refer to How to use the Avantra Web Service by Command Line Executable.
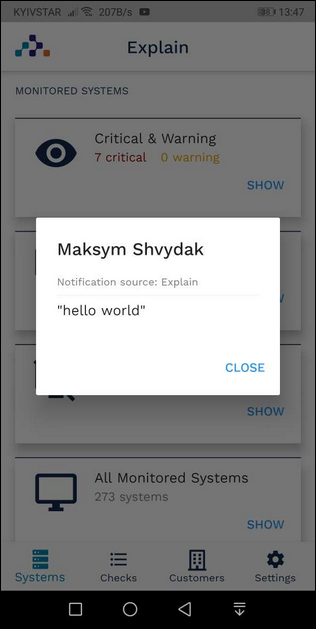
For testing push notifications from Avantra to mobile application, you can enter the following string into the Command line:
sendpush: <user id> “<message text>”

The message will be displayed in an overlay window in the application: