Generic Services
If you need to monitor a SaaS solution that has no dedicated integration, you can do so by creating and configuring a {_generic-service} in Avantra.
Creating Generic Services
To create a Generic Service:
-
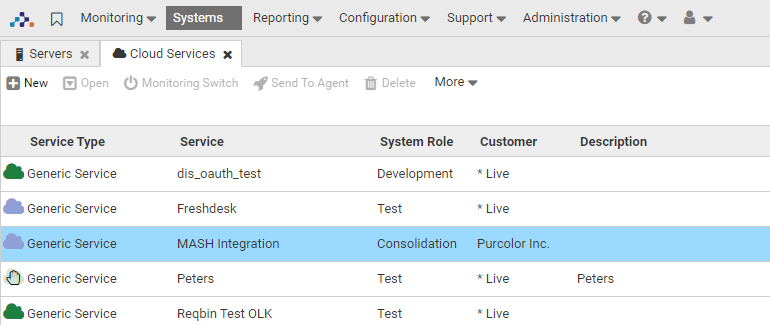
Select from the top menu.
The list of existing services is shown in the table.
-
Click New.
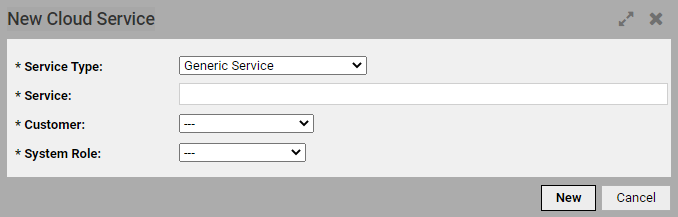
The New Cloud Service dialog opens.
-
In the dialog, fill in the following fields (all fields are mandatory):
-
Service Type - select Generic Service
-
Service - enter the name for the new monitored cloud service
-
Customer - select the customer to which the service will be available
-
System Role - select a system role which users will have access to the service
-
-
Click New.
The service is created and is shown in the Services table. The cloud icon by the service’s name is grey since the service is not configured and its status is UNKNOWN to the system.
Now you need to configure the service.
-
Double-click your service (alternatively, select your service in the table and click Open in the toolbar).
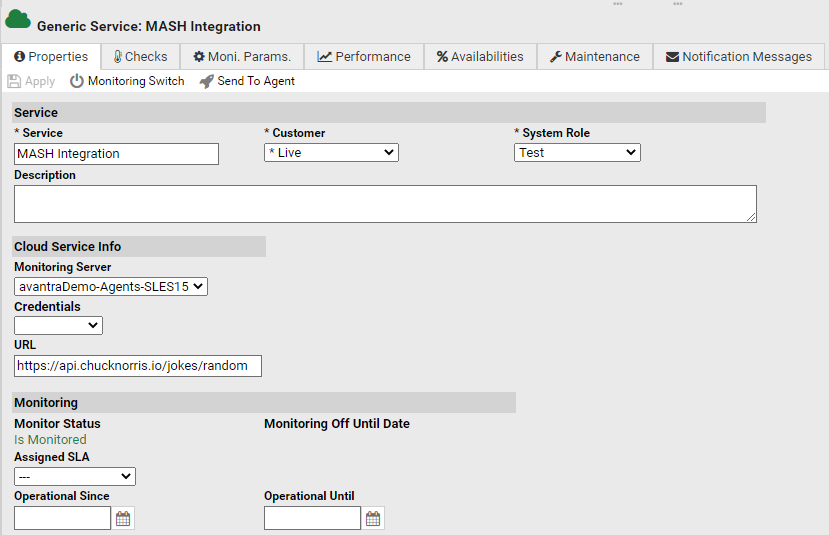
The detailed view of the service is displayed with the Properties tab displayed by default. Most of the properties here are self-explanatory, we will only focus on the properties vital for the service monitoring.
-
In the Cloud Service Info section, select the Monitoring Server from the drop-down list.
-
From the Credentials drop-down list, select one of the following:
-
Empty - implies basic authentication which requires no username and password. Applicable for open services and is mostly used for testing.
-
Pre-defined - opens an additional drop-down list where you can select the previously created credentials.
-
Ad-hoc - allows creating a new authentication method. Available methods are:
-
Basic Authentication
-
SSH
-
OAuth (Authorization Code)
-
OAuth (Client Credentials)
For detailed information on available authorization methods, refer to {_credential-types}. You may need to check the solution’s documentation on how to connect to the API from a security perspective.
-
-
-
In the URL field, enter the URL of the SaaS solution.
-
In the toolbar, click Apply.
The system will try to connect to the service, and if successful, the service’s icon will turn green. The system also automatically creates the SO_Connect Check which can be seen in the Checks tab.
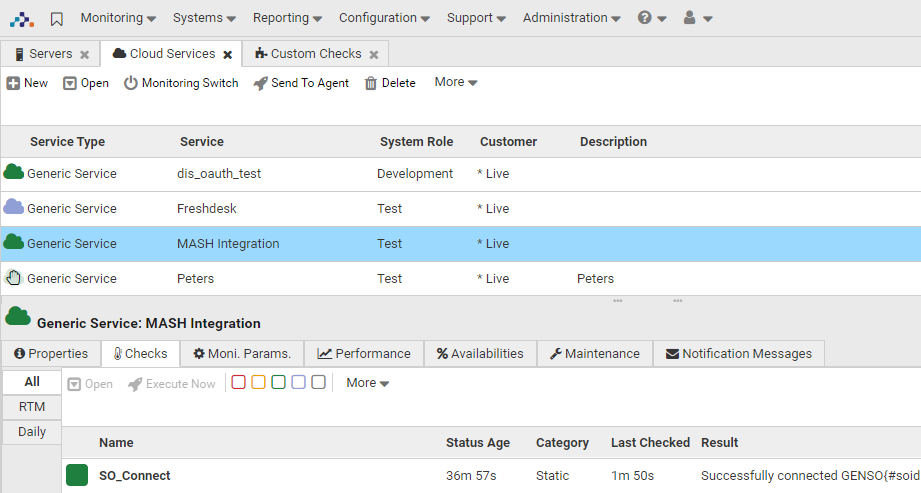
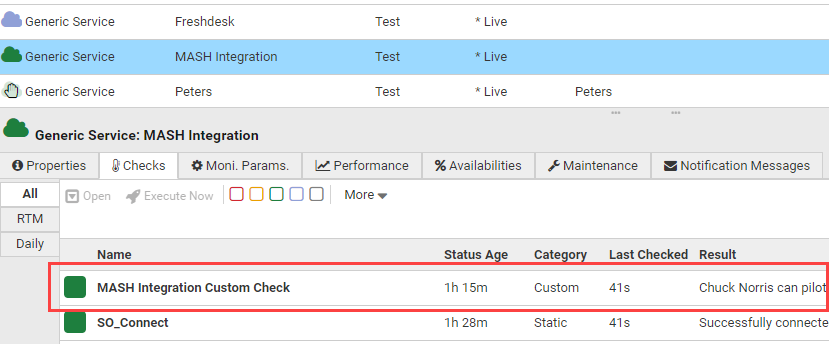
Now you can associate Custom Checks working with the service’s API to start monitoring the aspects you are interested in.
Assigning Custom Checks
To work with the SaaS solution’s API, you need to create a new Custom Check based on the RUN_JS Custom Check type. For detailed information about the RUN_JS Custom Checks, refer to {_run_js}. In this section we will cover the basic process of creating the RUN_JS Custom Check and associating it with our service.
To create a RUN_JS Custom Check:
-
Select .
-
In the toolbar, click New.
The Create Custom Check dialog opens.
-
Scroll down to the Cloud Services option and click RUN_JS in the right pane.
-
The creation options are displayed at the bottom of the dialog. Enter the Custom Check Name, select a Customer and leave the System Type at the Cloud Service option.
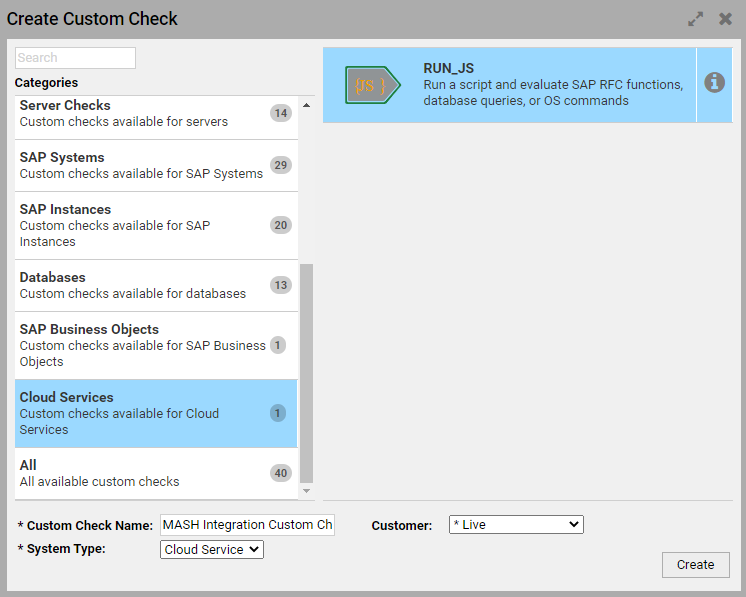
-
Click Create.
The Custom Check is successfully created and is now available in the table. Its Properties tab is displayed - this is where you associate the Check with the Service and specify what exactly the Check should monitor.
-
In the Systems section, select what system the Check is to be associated with:
-
Select a Pre-Defined System Selector - if you have already created a System Selector, you can select it from the drop-down list.
-
Define specific 'Ad-Hoc' Custom Selection - opens a System Selector creation dialog, where you can create a new selector or import an existing one.
-
-
In the Specific section, enter the Java Script to fetch the required information from the SaaS solution.
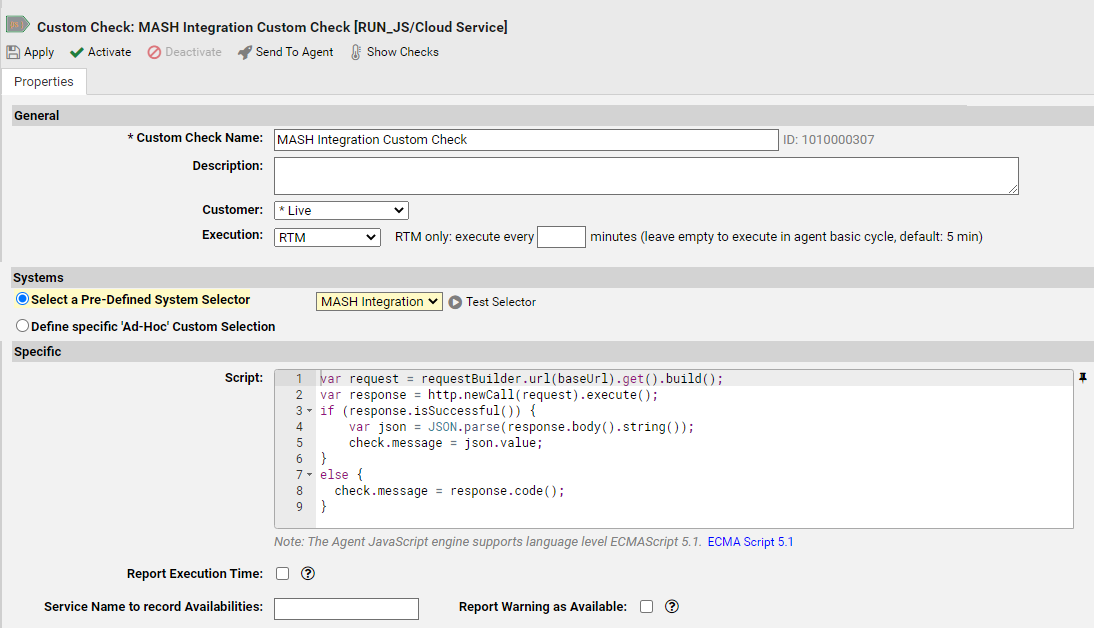
-
In the toolbar, click Apply and activate the Check.
Now your check is configured and associated with your Cloud Service. You can find it in the service’s Checks tab.