Agents
You have the option to upgrade Avantra Agents manually or automatically (recommended).
== Upgrading to Java 17
With the release of Avantra Agent version 23.3.x and above, the Java runtime support has changed as follows:
| Agent Version | JRE 8 | JRE 17 |
|---|---|---|
| 23.2.x and below | YES | NO |
| 23.3.x up to 23.9.x | YES | YES |
| 24.x and above | NO | YES |
Considerations for a JRE 17 upgrade
The table above shows that, if you are upgrading an existing landscape to use Java 17, you MUST bring all agents to a version of the Avantra agent in the 23.3.x codeline first in order to swap out the Java runtime for JRE 17. We recommend using the built-in automatic agent and JRE upgrade system as described later on this page to do both the agent upgrade and the JRE upgrade. This will also bring the JRE version under the control of Avantra (what we call an internal Java runtime). For the avoidance of doubt, the internal java runtime lives within the Agent installation folder and is only used by Avantra. An external java runtime would be controlled and provided by another source and usually is configured on the $PATH usually via a package manager.
Customers upgrading their existing installations from an earlier version are advised to follow this procedure:
The high level procedure can be seen in the following diagram:
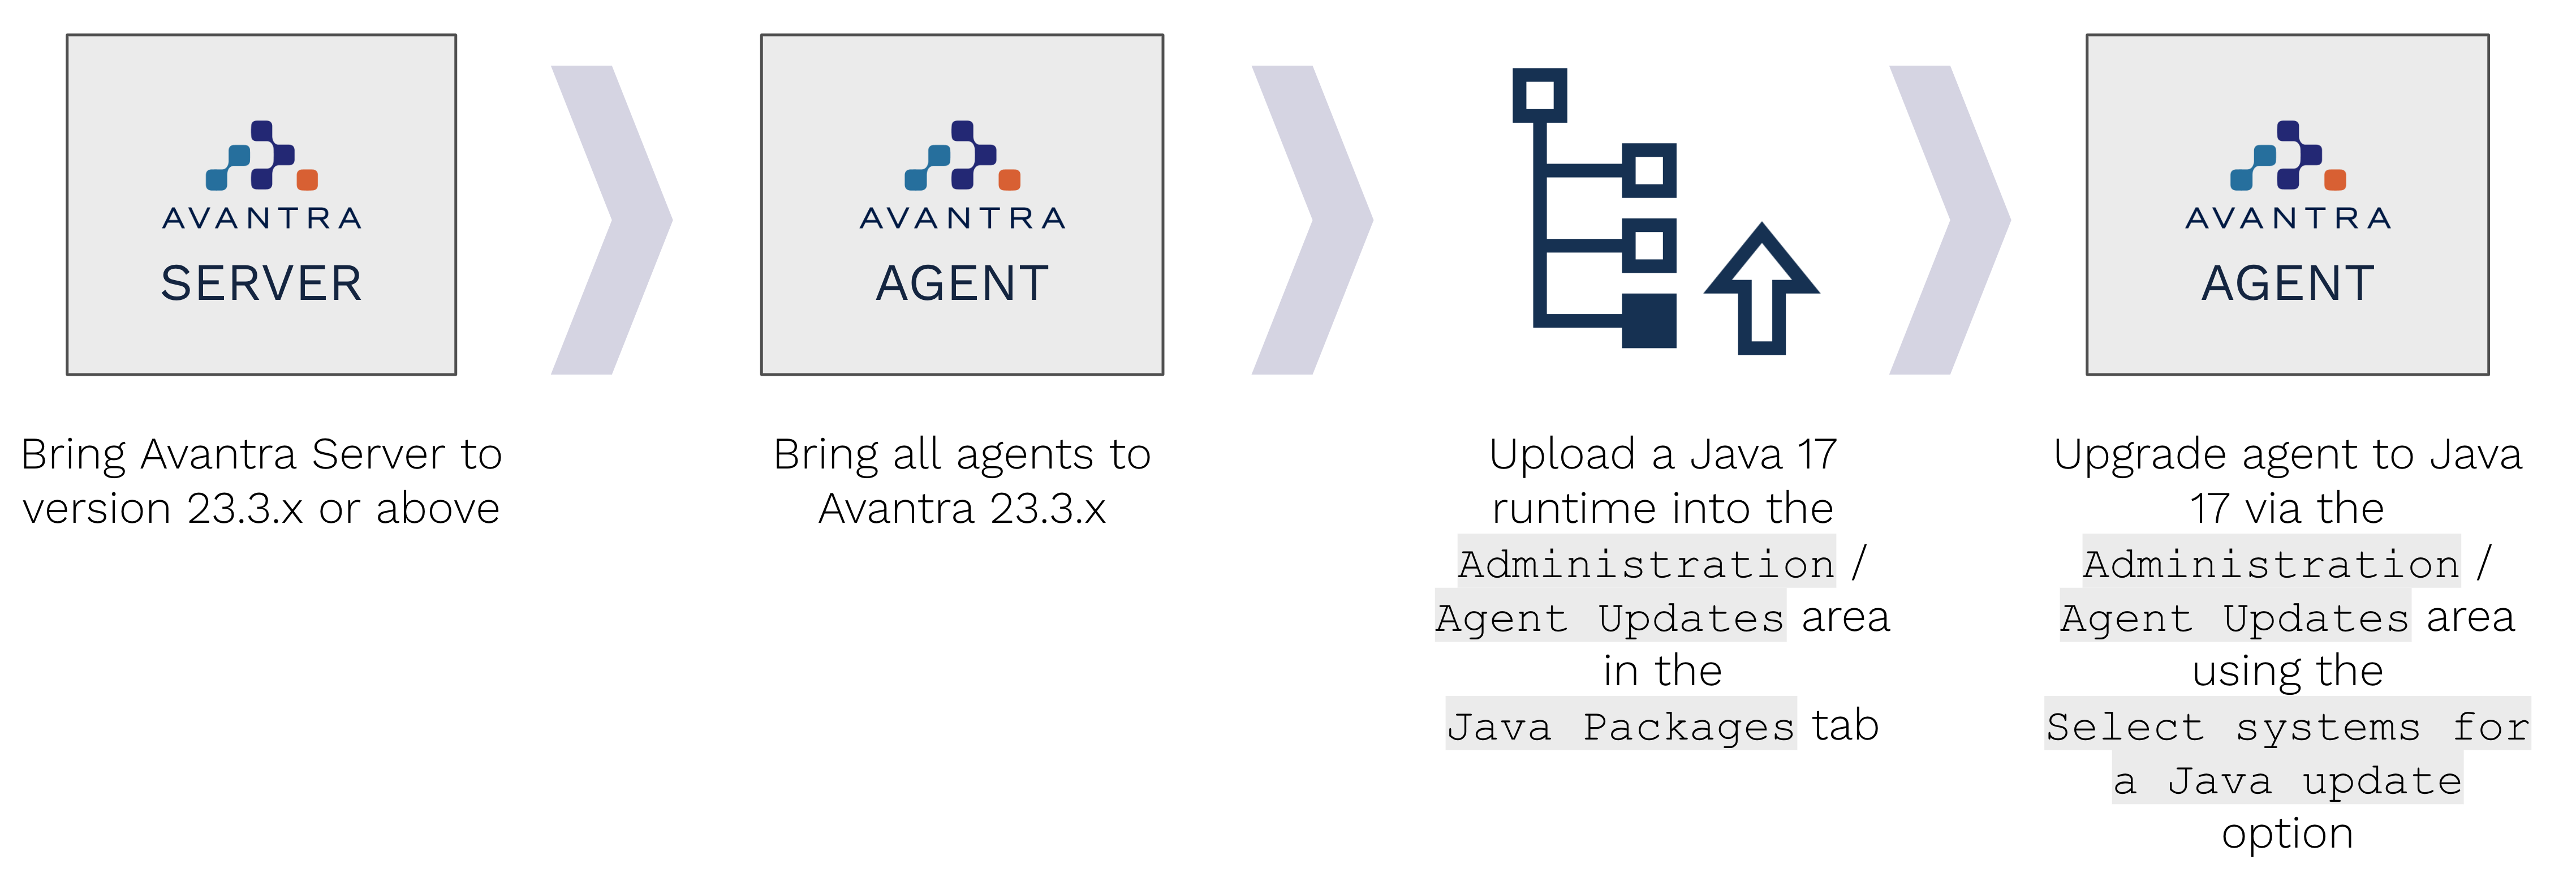
- Bring your Avantra Server up to a minimum of version 23.3.x
- Bring all agents up to a minimum version of 23.3.x using the built-in Agent Updates feature in the Administration menu. This is the only agent version that supports both Java runtime 8 as well as 17.
- Upload a Java 17 runtime into Avantra Server under Administration - Agent Updates in the new tab Java Packages. Note you will not see this tab if your Avantra Server is not at 23.3.x or above.
- Start by upgrade ONE (1) agent of a non-critical system to use the new Java 17 runtime by going to the Status tab and selecting Select systems for a Java update, select your system and select the new JRE you have just uploaded.
- Once the Java update has completed successfully and the agent is functioning correctly (wait 15 minutes for all cycles to complete or force a full check cycle). Make sure to check within Avantra that the server is showing as running under Java 17 within 15 minutes of the update.
- Once you have successfully upgraded one agent, you can proceed to upgrade more. We recommend doing these in increasing buckets of agents in case you run into issues. For example, if you have 100 agents to upgrade then follow this approach:
- 1 agent to check the process
- 4 agents to verify the process
- 15 agents
- 30 agents
- 50 agents
Upgrading agents automatically
Avantra Agents are able to perform [Avantra Self Updates]. These updates can be initiated centrally from the Avantra UI, so the installation of patches and new versions becomes easy in all Avantra environments. You need the [Trigger Agent Updates] permission in order to perform automatic updates.
You can also trigger the update of the Java runtime for agents from within the same area of Avantra.
Automated upgrade of Avantra Agents (Linux and Windows)
The [Avantra Self Updates] work as follows:
- There is just one(!) upgrade package for the Avantra Agent which is valid for all supported operating systems. This is the file called
agent-{product-release-n}.binavailable for download from the Customer Hub. Yes the.binfile works for both Linux and windows. - You can upload the packages using Avantra WebUI and the Avantra Agents retrieve the packages through the Avantra Server and Avantra Gateway infrastructure.
- Avantra WebUI provides an interface that allows you to select the Avantra Agents to be upgraded. You can either choose items from the Server list or define an ad-hoc Selectors.
Click Administration > [Agent Updates] from the top-level menu. Select the Packages tab. Choose menu:Upload from the toolbar.
Choose the packages from your computer and start the upload. - Click Administration > [Agent Updates] from the top-level menu. Select menu:Select Systems for…[Agent Update] from the toolbar.
- Fill in appropriate values for the Selectors and click OK.
- Choose the appropriate version from the drop-down list and set the flags on the Servers you want to update.
- Confirm your selection by clicking [Start Agent Update].
- The Status tab contains the latest status information about the recently scheduled agent updates. You may want to choose the value
Running and Errorsfrom the drop-down list in the toolbar to watch the update progress. - Once the download has finished successfully, the package is extracted, the Avantra Agent is stopped, old files are replaced, and the newly installed Avantra Agent is started.
While the whole process usually works very smoothly, there are a few items to observe:
Small is beautiful
If you plan to upgrade your Avantra Agents, start with one or two Physical Servers first and test the upgrade procedure as well as the new Avantra Agent. If you feel comfortable with the new version, continue with the rest of your Avantra Agents. By default, Avantra Agents running already on the target release are not upgraded, unless you enforce this.
Downgrade
If the upgrade process went well, but the new Avantra Agent does not work as expected, you can also use this feature to downgrade Avantra Agents to the last known good version. With the exception of where the agent you are downgrading to does not support the Java runtime in place for the agent.
Version Information
On Microsoft Windows systems the version information shown in the Programs and Features dialog of the control panel will not be updated. This should not cause concern.
NOTE: See the Avantra Knowledge Base Article Troubleshooting Agent Updates in case of any issues.
Manual upgrade of agents (Linux)
- Log into the server and stop Avantra agent services. You can stop your Avantra services either using
systemdor via the Avantra rc file (systemctlis recommended).
$ sudo systemctl stop avantra-agent
OR
$ /opt/avantra/agent/rc.agent stop
- Switch user to the service user running your Avantra agent and change into the avantra directory. The example below assumes the service user is called
avantraand Avantra is installed to the directory/opt/avantra.
$ sudo su avantra
avantra$ cd /opt/avantra/
- Download the installer file
agent-[version].binand make it executable
avantra$ curl -o agent-{product-release-n}.bin 'https://[CustomerHubLink]'
avantra$ chmod +x agent-{product-release-n}.bin
- Perform the upgrade of your Avantra agent.
Note that we use the--start=noflag in this case so we can manually restart our Avantra agent after the upgrade usingsystemctl. If you are using thercfiles to start and stop your services, you do not need the--start=noflag.
avantra$ ./agent-{product-release-n}.bin -- --start=no
- Restart your Avantra agent (either using
systemctlor therc.agentfile)
For the systemctl option, first we exit back to a sudo-capable user.
avantra$ exit
$ sudo systemctl start avantra-agent
OR for the rc.agent method:
avantra$ /opt/avantra/agent/rc.agent start
Manual upgrade of agents (Windows)
Simply install the new version of Avantra Agent as described in Installing the Agent on Microsoft Windows.